Last Updated on July 20, 2022 by Mathew Diekhake
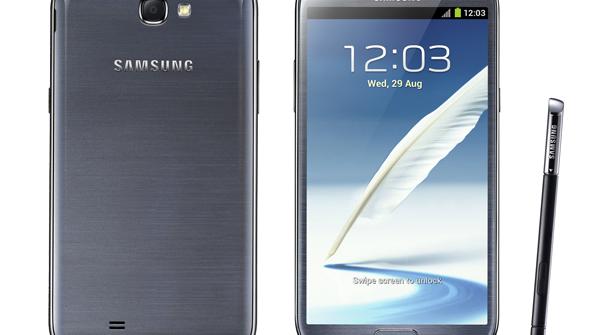
The Galaxy Note 2 LTE (N7105) is a fantastic device which main draw card is its sheer size. The screen measures a whooping 5.5 inches and it has been dubbed as the love child of the Galaxy Note and Galaxy S3 for its combination of performance, better specs and improved design. If you are the lucky owner of one of these truly impressive devices and you want to get all you possibly can from it, then you can follow the guide below to gain root access to your Galaxy Note 2 LTE (N7105) all thanks to the CF-Auto-Root tool by ChainFire.
We love using Chainfire’s work because he is arguably the best third-party developer who makes rooting methods. What’s more, he has several other tools available, each relating directly to rooting. You could say he’s a man who knows his craft. Furthermore, it gives users a One-Click method that’s easy to use. All you need to do before starting is have a Windows computer handy. We are using the Odin tool today, which is only made for Windows.

Points to remember:
- You are using the Galaxy Note 2 LTE version N7105 ONLY. This guide does not support other variants of the device.
- You are completing the root on a Windows PC which has had Samsung’s USB Drivers installed.
- Your device is unlocked and running Android Jelly Bean V 4.1.2.
- You have at least 70% battery on your device.
- USB debugging is enabled.
Files you need
Rooting the Samsung Galaxy Note 2 LTE (N7105) on Android 4.1.2 Jelly Bean
- First you will need to download the files above:
- Once downloaded, extract the files to somewhere easy to locate such as your desktop. Place your device into download mode. To achieve this simply switch your device off, then switch it back on by holding down the ‘Volume Down’ + ‘Power’ + ‘Home’buttons. Once you have done this, press the ‘Volume Up’ button to choose Download mode.
- Now you need to start Odin, you can do this by double clicking on the file. Once opened, connect your device via USB to your PC. Your device will be recognized by Odin and you will be able to see ‘Added’ appear in the Odin message box as well as a yellow box reading ‘COM port’.
- From within Odin, select the PDA option and navigate to the CF-Auto-Root file downloaded in step 1. Please note, it is important you DO NOT adjust any other setting within Odin.
- Again from Odin, select the ‘Start’ button. This will begin flashing and once complete you will see your device reboot.
- You can now enjoy all the perks of having root access on your Android device.
You are now ready to start thinking about flashing a custom recovery image such as the TWRP recovery or the ClockworkMod recovery images. You might even be lucky enough to find a Philz Touch recovery to flash these days. Once you have equipped your smartphone with the custom recovery, only then are you able to flash a custom ROM.
Should you get yourself stuck in a boot loop, or are having problems with a shaky operating system, you should boot it up into recovery mode and wipe the cache. Always take a backup as soon as you start seeing warning signs just in case you choose to take a hard reset. A hard reset or a factory reset will wipe the data.
