Last Updated on December 24, 2022 by Mathew Diekhake
Windows 7 offers different fonts, pre-bundled with the font name, font size, and other characteristics such as whether it is bold or not. You can select one of these pre-bundled fonts as the font you want to use around the Windows 7 operating system. You can also preview the font you have chosen before making it go live and making the real changes around the OS. This helps sort through and find the font you want to use the quickest.
No matter what type of font you choose to use on a Windows operating system, you will need to install them as a TrueType font or an OpenType font. TrueType fonts typically come with the .TTF extensions while the OpenType font comes with the .OTF extension. There can be some situations where an OpenType font can have the .TTF extension as well.
To install a font on Windows, you have to drag or copy the font into the fonts folder. To do that, you need first to download the font, then unzip the font file and transfer it into the fonts folder which can be found in Windows Explorer.
The following tutorial demonstrates how to preview fonts when you are using a version of the Windows 7 operating system.
How to Preview Fonts in Windows 7
You can preview fonts from the Control Panel in all versions of the Windows 7 and Windows 8 operating system. Here is how you can do that:
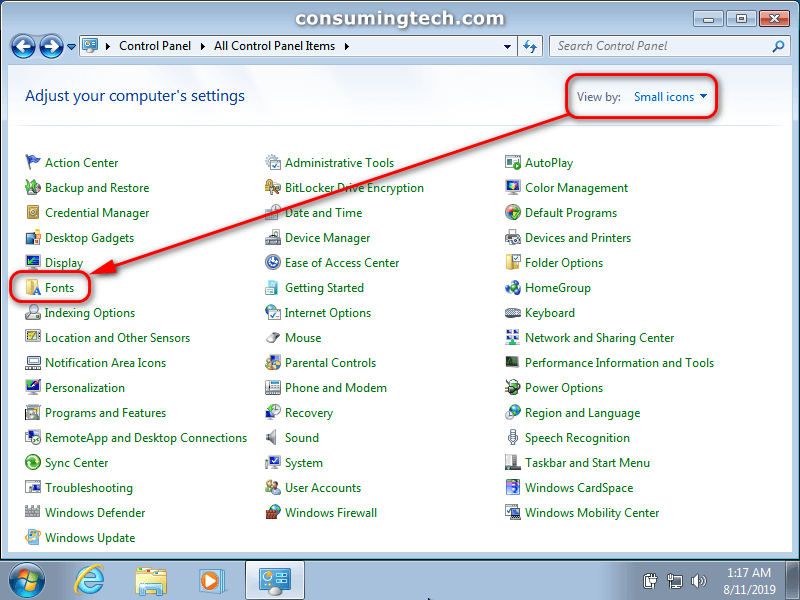
1. Open the Control Panel in its icons view.
2. From the list of All Control Panel Items, click on the Fonts icon. (click to enlarge screenshot below)
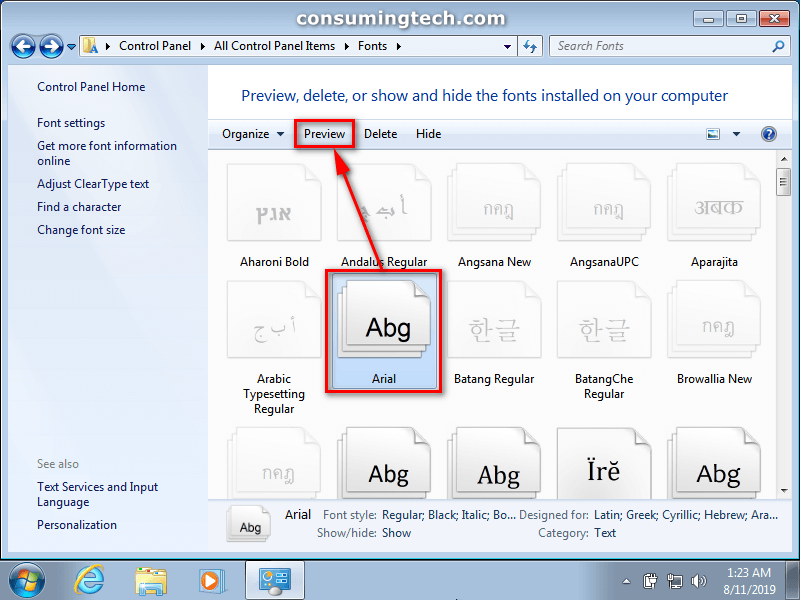
3. Scroll down the list of fonts and select the one that you think you might want to use for the Windows operating system.
4. From the Fonts toolbar menu above the fonts, click on the Preview button. (click to enlarge screenshot below)
You can also right-click the mouse on the font or font family and click on Preview to preview the font as well if you like.
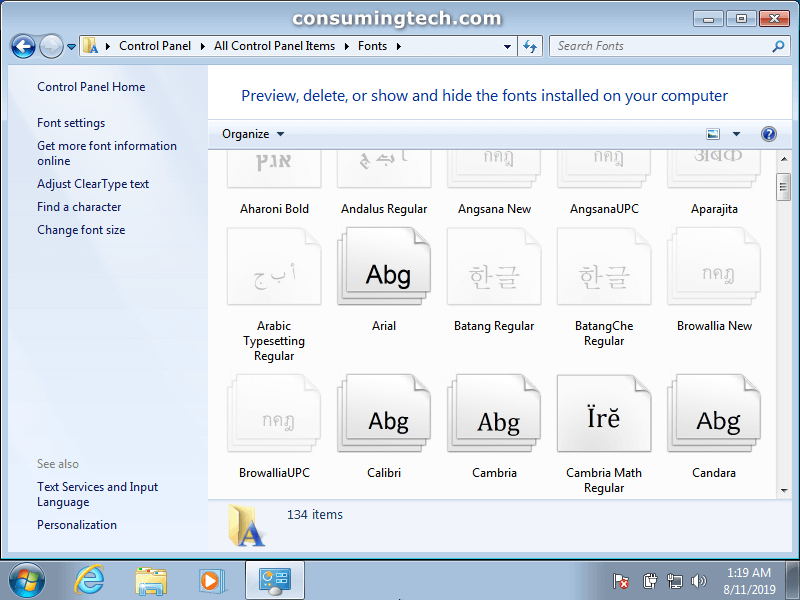
5. You can tell the difference between a single font and a font family by looking at the icons. If you see just the one page as the icon, it is a single font. If you see multiple pages (three at the time of writing this), then it is for the full font family. (click to enlarge screenshot below)
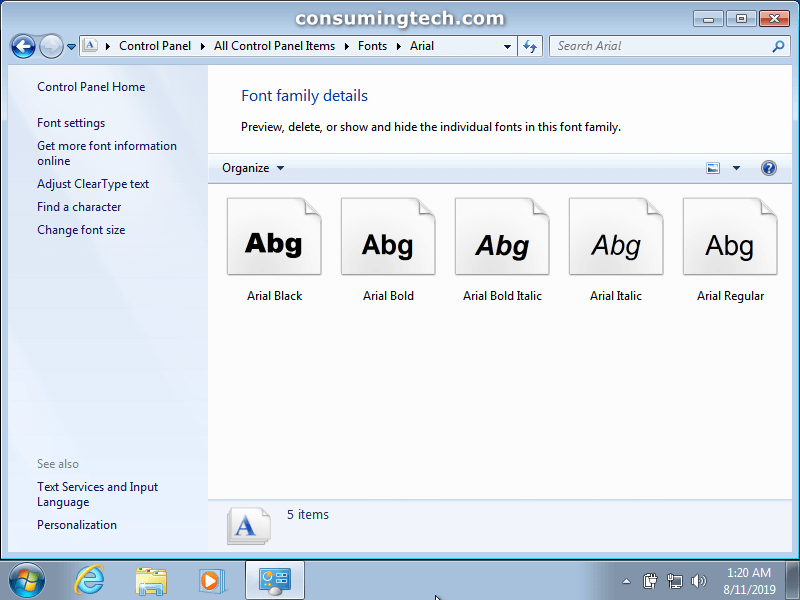
6. A font family can have more individual fonts that make up the full font family. Font families can help you further understand where your font comes from. You will need to first click on a font family before you can expand it to see single fonts. (click to enlarge screenshot below)
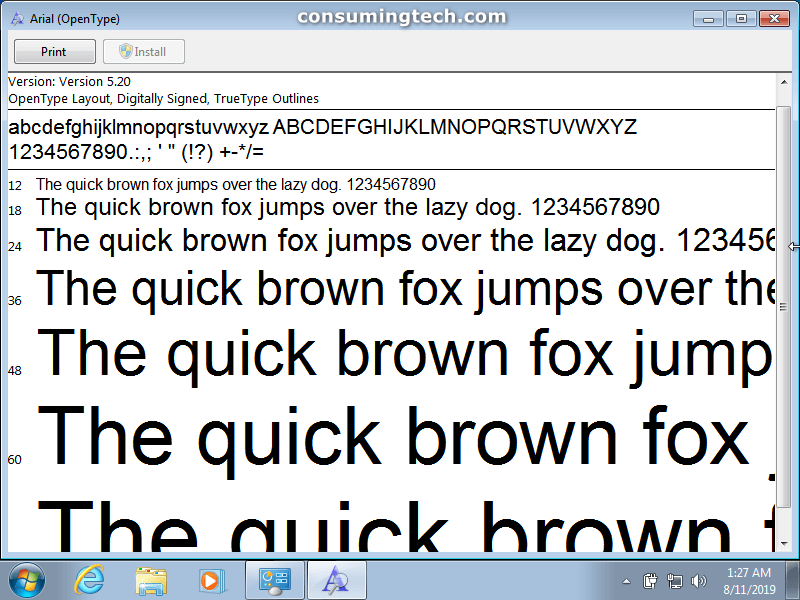
7. A notepad window ill then open and show you the previews of the fonts, which typically includes the fonts being shown at different sizes. (click to enlarge screenshot below)
You can now close Notepad and continue viewing more font previews if you like.
That’s all.
Related Tutorials
- How to View Reliability and Problems History Details in Windows 7
- How to Add/Remove an Internet Explorer Accelerator Add-on
- How to Enable/Disable Built-in Elevated Administrator Account in Windows 7
- How to Use ‘Find on this Page’ in Internet Explorer in Windows 7
- How to Change Windows Firewall Notification Settings in Windows 7
- How to Create Bootable UEFI USB Flash Drive for Installing Windows 7, Windows 8, Windows 8.1
- How to Use Personal and Public User Folders in Libraries in Windows 7
- How to Enable/Disable Toolbars and Extensions in InPrivate Browsing in Windows 7
- How to Fix Startup Repair Loop in Windows 7 without Reinstalling Operating System
- How to Install Windows 7 Using Unified Extensible Firmware Interface (UEFI)
- How to Show Services Running Under svchost.exe in Windows 7
- How to Set Default Accelerator in Internet Explorer in Windows 7

