Last Updated on August 15, 2024 by Mathew Diekhake
Windows 10 handles a lot more maintenance tasks automatically than previous versions of Windows ever did, but there still may be times when you want to venture into Disk Cleanup and manually remove any files that no longer need to be taking up your hard drive space.
You’ll even find a new feature available from Disk Cleanup called System compression which can compress the program files and binaries, so they aren’t using up as much hard drive space. It’s yet another attempt by Windows to help you run a lighter operating system which is handy for anyone using a computer that doesn’t have much hard drive space to start with, which many of today’s laptops and smaller personal computers don’t.
Note: Most of the options available to delete in Disk Cleanup are safe to remove, but there are some files you may consider sensitive and wish to keep, so make sure you read the boxes that you’re selecting before you delete them. One of the options from Disk Cleanup is for removing the previous version of Windows, and if removed, it means you will not be able to roll back to the previous version of Windows anymore. Sometimes people want to roll back to a previous version of Windows to troubleshoot problems with the operating system.
The following tutorial demonstrates how to open and use Disk Cleanup when you’re using a version of the Windows 10 operating system.
Method One: How to Open and Use Disk Cleanup
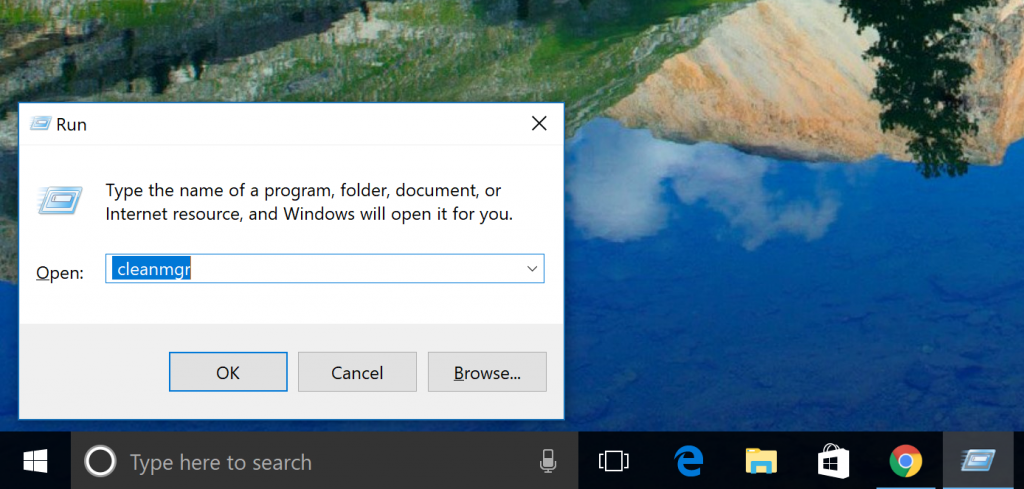
1. Open Disk Cleanup by typing Disk Cleanup into Search and clicking on the Disk Cleanup desktop app under the Best match section, or by opening Run (Win+R) and then typing cleanmgr and clicking OK.
2. Select the drive you want to open Disk Cleanup for from the drop-down menu and then click on OK. If your computer has more than one drive or partition—sometimes computer comes with an SSD drive and an HDD drive—then you can click on the drop-down menu and select the drive that you want to clean up. For most people, this is going to be the one that says C: drive.
3. To Clean Up Files for Only Your Account
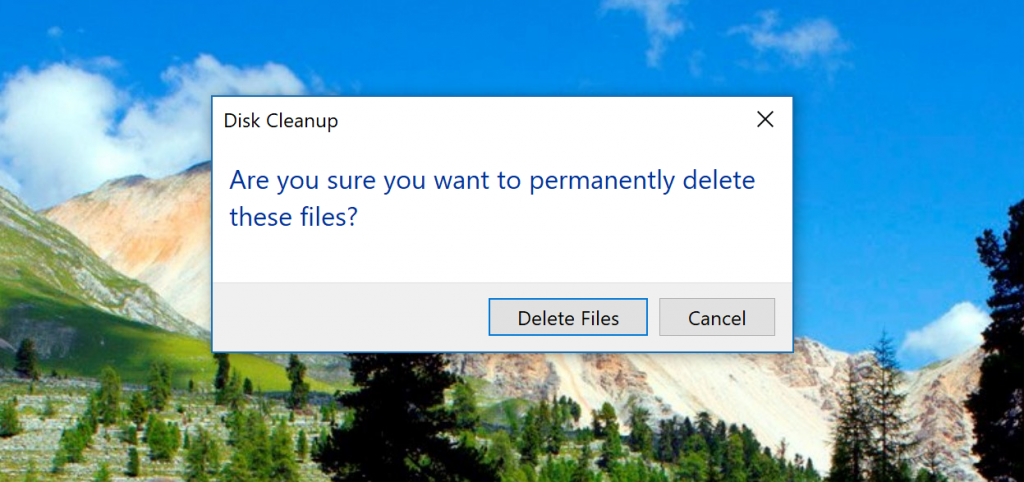
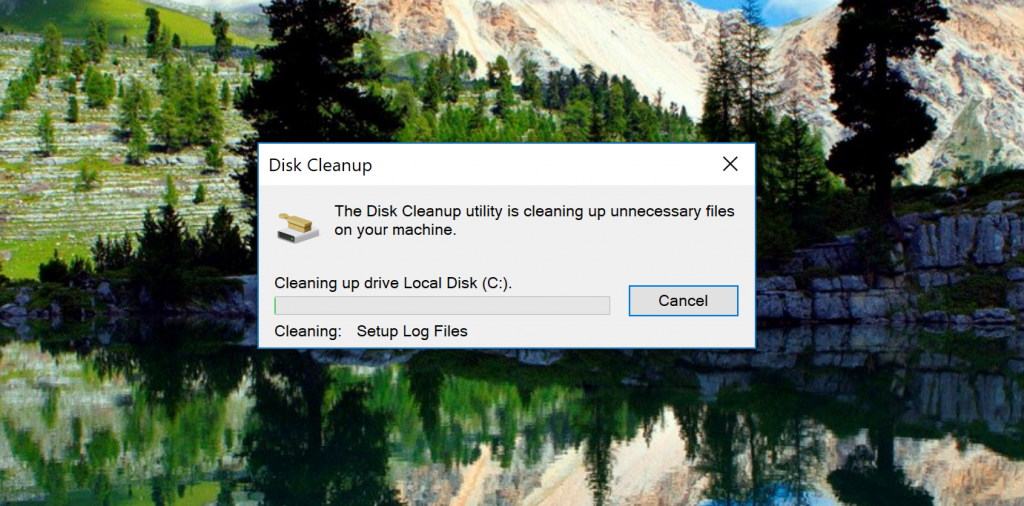
a. Check or uncheck any of the boxes that you want to include/exclude from the Disk Cleanup and then click on the OK button to start the cleaning.
Checking any options for file compression will compress the files and not delete them.
4. To Clean Up System Files
Note: You need to be logged in as an administrator to use this option. There are two ways you can log in with an administrator’s account on a Windows 10 computer: either by (a) using your Windows account that already has the administrator privileges or (b) logging in to someone else’s account that has the administrator privileges. The account that was created first is automatically assigned the administrator privileges and it can pass it on to other accounts; other administrator accounts can also remove the administrator privileges from the original account.
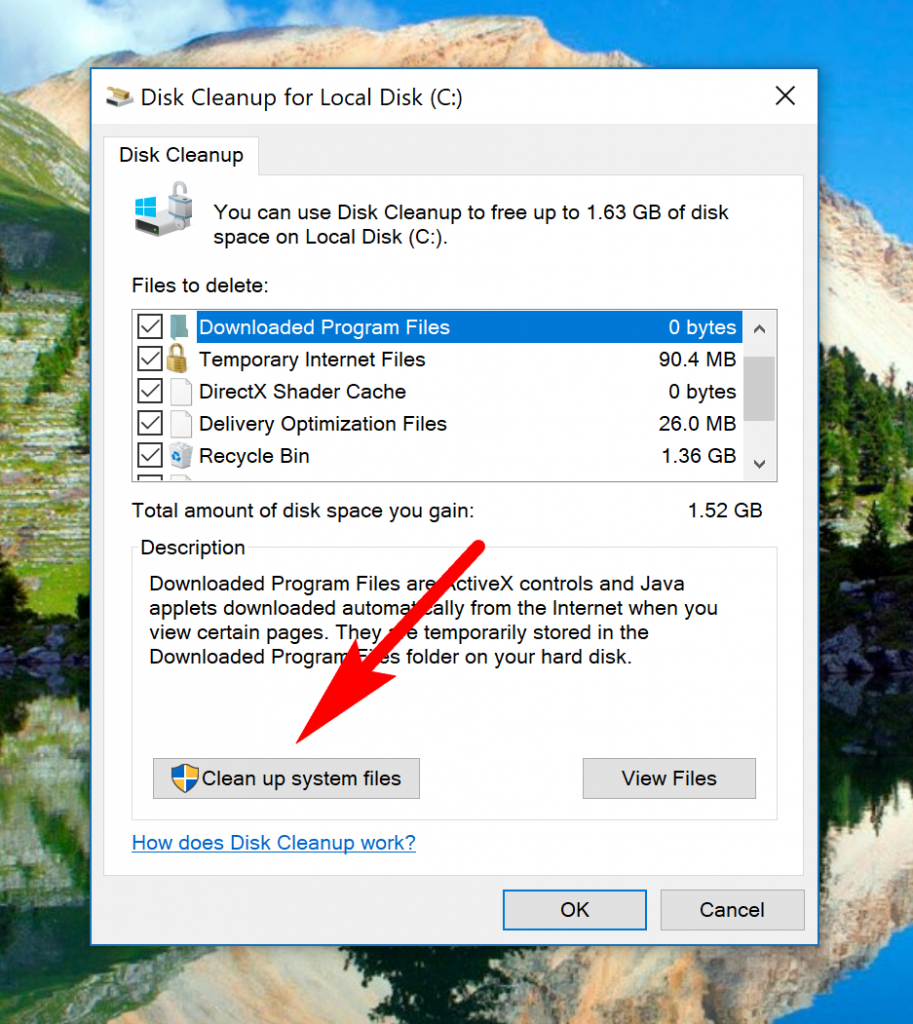
a. Click on the Clean up system files button.
b. Select the drive and then click OK.
c. Wait for Disk Cleanup to finish calculating.
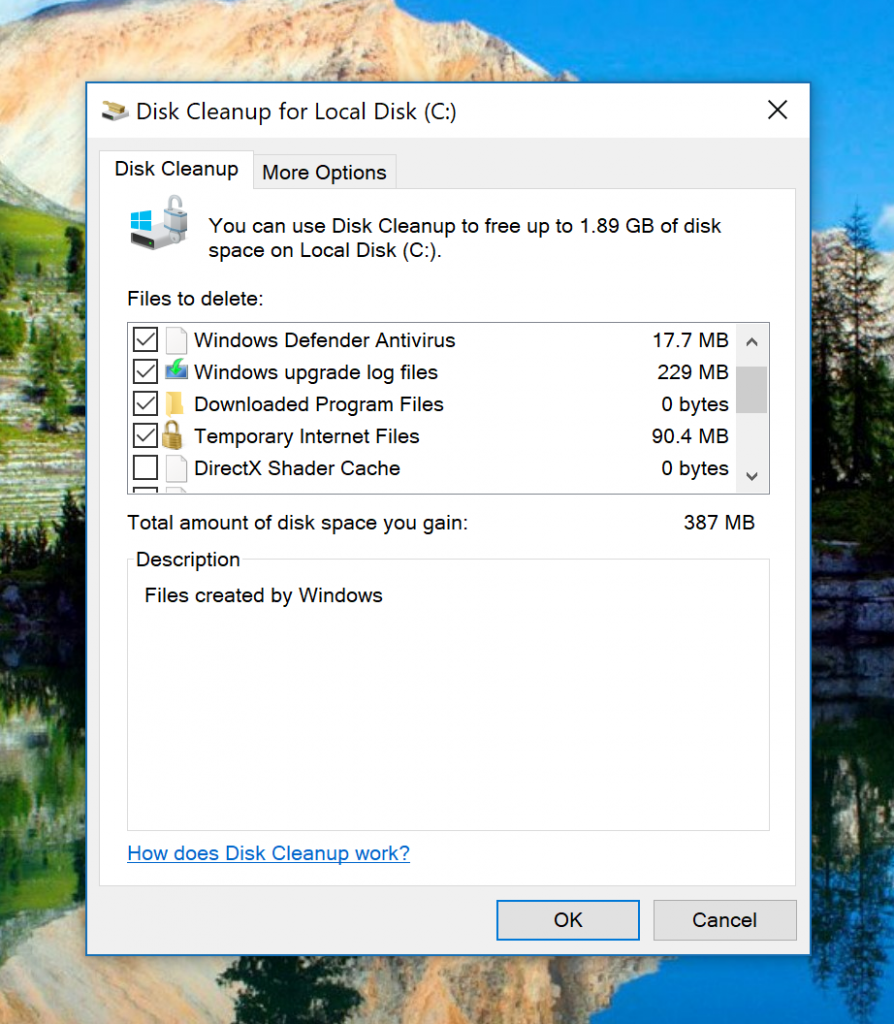
d. Check or uncheck the boxes that you want to include/exclude in the Disk Cleanup and then click on OK to begin the cleaning.
5. To Uninstall Desktop Programs
Note: You need to be logged in as an administrator to use this option. There are two ways you can log in with an administrator’s account on a Windows 10 computer: either by (a) using your Windows account that already has the administrator privileges or (b) logging in to someone else’s account that has the administrator privileges. The account that was created first is automatically assigned the administrator privileges and it can pass it on to other accounts; other administrator accounts can also remove the administrator privileges from the original account.
a. Click on the Clean up system files button.
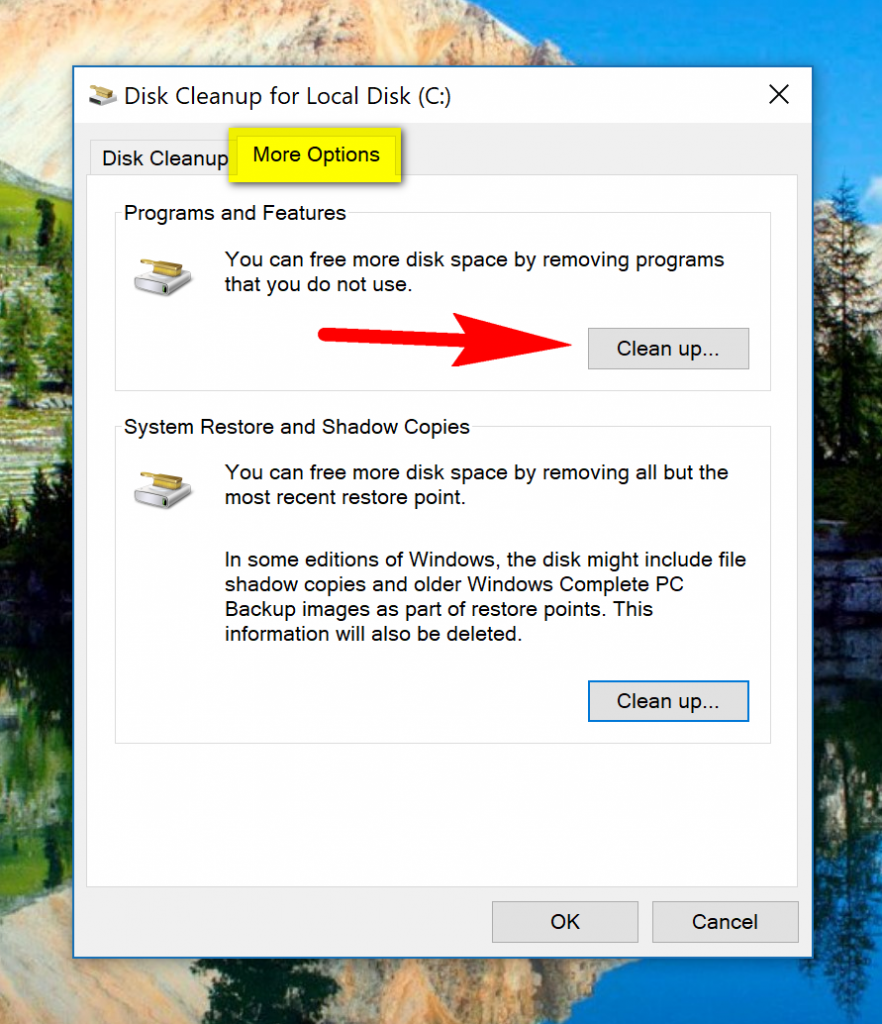
b. From the More Options tab, click on the Clean up… button under the Programs and Features heading.
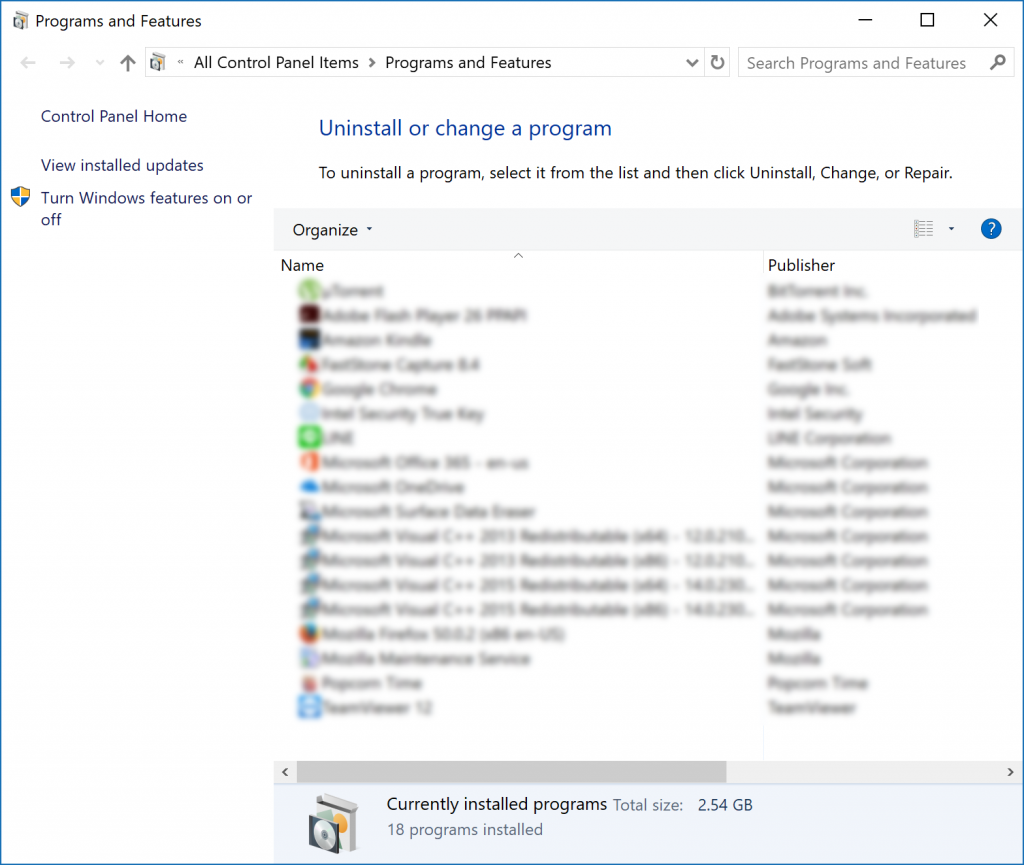
c. Select the program that you want to uninstall by clicking on it once and then click on the Uninstall button from the menu.
6. To Delete All But the Most Recent Restore Point
Note: You need to be logged in as an administrator to use this option. There are two ways you can log in with an administrator’s account on a Windows 10 computer: either by (a) using your Windows account that already has the administrator privileges or (b) logging in to someone else’s account that has the administrator privileges. The account that was created first is automatically assigned the administrator privileges and it can pass it on to other accounts; other administrator accounts can also remove the administrator privileges from the original account.
a. Click on the Clean up system files button.
b. Select the drive you want to open Disk Cleanup for from the drop-down menu and then click on OK. If your computer has more than one drive or partition—sometimes computer comes with an SSD drive and an HDD drive—then you can click on the drop-down menu and select the drive that you want to clean up. For most people, this is going to be the one that says C: drive.
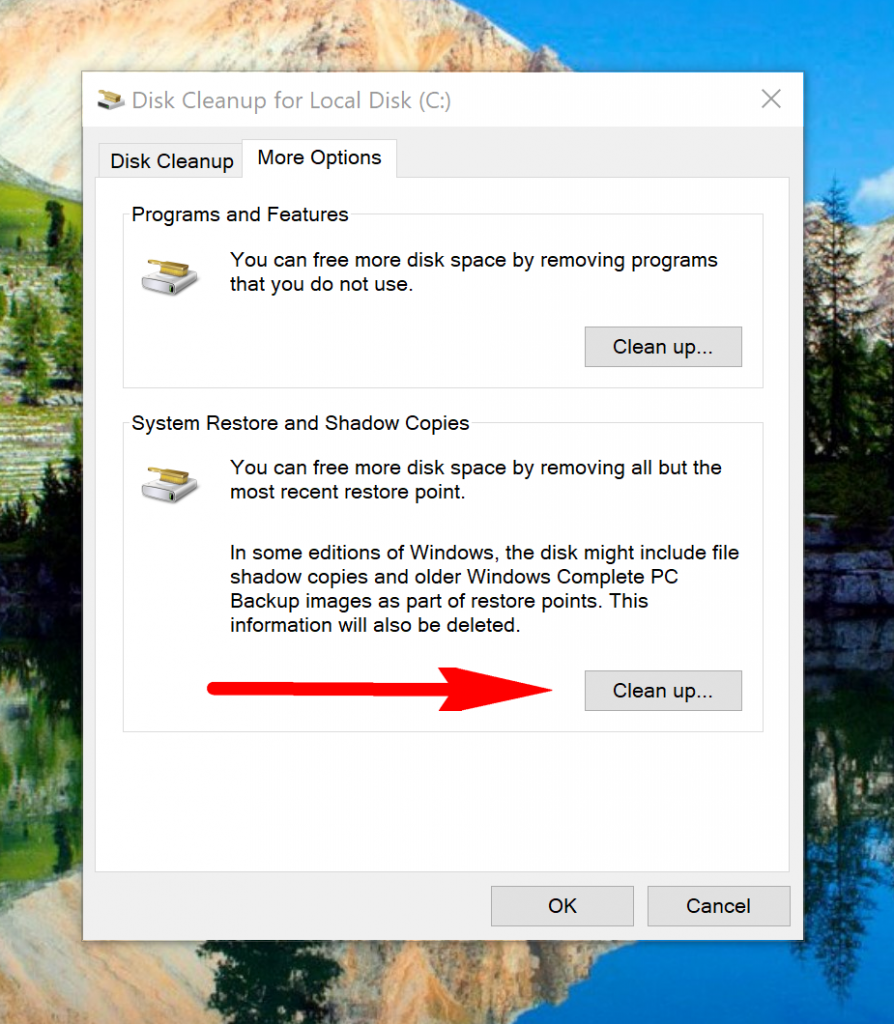
c. From the More Options tab, click on the Clean up… button under the System Restore and Shadow Copies heading.
d. When you see the message asking if you are sure you want to delete all but the most recent restore point, click on Delete.
Method Two: How to Open and Use Extended Disk Cleanup
Note: You need to be logged in to an administrator’s account to use this option. There are two ways you can log in with an administrator’s account on a Windows 10 computer: either by a) using your Windows account that already has the administrator privileges or b) logging in to someone else’s account that has the administrator privileges. The account that was created first is automatically assigned the administrator privileges and it can pass it on to other accounts; other administrator accounts can also remove the administrator privileges from the original account.
1. Open the elevated Command Prompt.
2. Type the following command into the command line and then press the Enter key on your keyboard to execute it:
cmd.exe /c Cleanmgr /sageset:65535 & Cleanmgr /sagerun:65535
Note: You need to leave the elevated Command Prompt window open while Disk Cleanup continues to clean the computer otherwise it will stop operations. Close the Command Prompt only when the cleaning is complete.
3. Check or uncheck the boxes that you want to include in the cleanup or exclude from the cleanup and then click OK.
4. Wait for Disk Cleanup to finish calculating.
That’s all.
Brett P.
April 22, 2019 @ 10:02
I recommend for Windows to add additional information on a small flyout window when you hover over each of the words available from Disk Cleanup so people can be sure about what they’re looking at. Many of the options listed I still don’t know whether I can delete it or not and what it will do to my computer if I do. Disk Cleanup said I could save as much as 40 something gigabytes of space on my hard drive if I compressed something but there’s no information about what caveats I might find if I do compress. There must be some negative things associated with the compression or else why isn’t it being automatically compressed? So I’m using this computer every day without the compression because I’m too scared to touch it. I feel this way about many things on the list. I’ve seen some websites where if you hover the mouse over a name, it gives you further information on the topic. I think that would be very useful for this also.
Jammey
April 22, 2019 @ 10:02
Disk Cleanup hasn’t gone anywhere and isn’t going anywhere. It was a big myth which began by some writer noticing a headline in the Settings app that instead of saying Disk Cleanup is said use this area to free up disk space. That has nothing to do with the name of the app.
You can go to search in the taskbar and search for Disk Cleanup and still find the Disk Cleanup desktop application that you can open up. From the top of the dialog, the name is no different. This is the actual Disk Cleanup app, not the section of the settings app that just so happens allow you to remove many of the same files from your computer such as temporary files. I have no idea why writers would jump all over this. Too often one writer creates a rubbish article and then everyone else just copies it instead of taking a look into the situation for themselves.
Orlin
April 22, 2019 @ 10:01
The type of computer you use makes a huge difference with your Windows experience.
I have only in recent years had enough money to start investing in some nice laptops which I now use pretty much as a desktop replacement. I don’t use laptops on my lap, I sit them on my desk and find them nicer to use in general unless I have the occasional job that I find is more pleasant to do from a much larger desktop display.
My second best laptop which was still very expensive is leaps and bounds ahead of anything else I’ve ever owned but it still has loud fan noise for some reason. I seem to notice it more after recent firmware updates from the manufacturer rather than from Windows. They can update their own firmware before Windows boots up and they do this to fix bugs that should never have been there. Sometimes they also create new bugs and that’s why I believe I now have excess fan noise when doing simple tasks like watching YouTube videos. And this is a laptop with 8 GB of RAM and is a high-end device. The RAM is the least impressive part about it. It’s got a very good CPU.
The best laptop I have which costs me several thousand dollars I find myself spending most of my time on. This one comes with 16 GB of RAM and the rest of the specs are extremely high end. This laptop never makes a sound. I haven’t heard the fan noise once and I’ve owned it for about half a year now so it’s just the reality that I never have to hear it. And while it does have a minor idle sound it is virtually unnoticeable these days unless I’m in a very quiet environment. The general experience of working behind this computer and using the internet and doing my work is just far superior to my other laptops. I highly recommend spending extra money on something very nice if you work behind a laptop because you will easily make the money back and much more. I’m completely stress-free behind this very expensive laptop.
Brian M.
April 22, 2019 @ 10:01
I shelled out about $3,000 on a Razer Blade Pro and have never looked back. The extra specs really do show for everyday use. No more webpages stalling and loading slowly when I have a few tabs open, no matter what I’m doing it is always powering through the job. I thought most of my computer woes were related to the internet connection to the WiFi but after owning an expensive laptop I have realized that it was the laptop.
Dustin
April 22, 2019 @ 10:01
Disk Cleanup is being deprecated but there is a replacement application with a simpler name (the free up space tool) taking its place.
Basically, it’s just a name change. It’s said to be also coming with a different app design but we get design changes all the time anyway.
A version of disk cleanup needs to stay around for the long haul because it’s not a job that a computer can handle manually anytime soon. Maybe eventually artificial intelligence will be able to predict what you want to happen after it assesses your usual habits or something like that but for now it still makes total sense for you to take control of cleaning up the disk of temporary files and other things alike.
I agree that Windows should keep its name and changing it would be a mistake. I also know people who continue to buy Windows laptops instead of Macs because they fear not knowing how to use the latter. They have no interest in learning how to use something new. They also like to use Microsoft Word and Office in general. These Office apps need continued development so they’re very light. They still feel a bit heavy. It should naturally be helped along by itself because computers keep getting more powerful to handle these applications.
Razak
April 22, 2019 @ 10:01
Apparently, the Disk Cleanup utility is being removed from Windows soon. I thought this was one of Windows’ best features. Hopefully, it is being removed because it is no longer required due to new advancements where it will be handled automatically rather than them replacing it with a new name and something else.
I was reading some fairly well known and reputable blogs talking about how Microsoft should rename Windows. That would be a terrible idea. I have no idea what these fools are thinking sometimes.
Many people come back to Windows and continue to use Windows because they already know Windows. Take that away and then you have lost all those people who were coming back to familiarity. That same familiarity takes a long time to build and is one of the main things Microsoft has managed to build up over all these years. Why on earth would you reset things back to zero and start something else? Makes zero sense.
I believe they should have kept the Internet Explorer name also. IE was just what people knew as the portal to the internet. They should have just created a better version of it. What Edge is now but with the same name.
People don’t hate Windows. Most of the hate directed at Windows is done by people who still don’t understand Windows. They don’t understand that the reason their Mac was better than their “Windows” was because the two devices were not directly competing against each other and that the WIndows device was twice as cheap as the Mac and was never made to compete with it. People still don’t understand the basics of the market where you can get low end, medium and high-end Windows computers just like you can with Android. That’s the reason for Windows suffering.
Once people understand the different qualities of computers properly, they’ll soon understand that there are many Windows computers that blow the best Macs out of the ballpark hardware-wise. There are some great “gaming” computers that no Mac could come close to competing with what they can do, and these computers aren’t just for gaming either. You can make use of the same hardware power for many other professional work.