Last Updated on December 25, 2022 by Mat Diekhake
The Windows operating system comes with essential features that it thinks most people will find useful right off the bat. But there are also some optional features that you can enable if you like. These optional features are not likely to appeal to everyone—many of them are intended for business networks and servers—but they are there for whenever you need them.
This tutorial demonstrates how to manage the optional features that are available in all version of the Windows 10 operating system.
Method One: How to Manage Optional Features in Settings App
1. Open the Settings application.
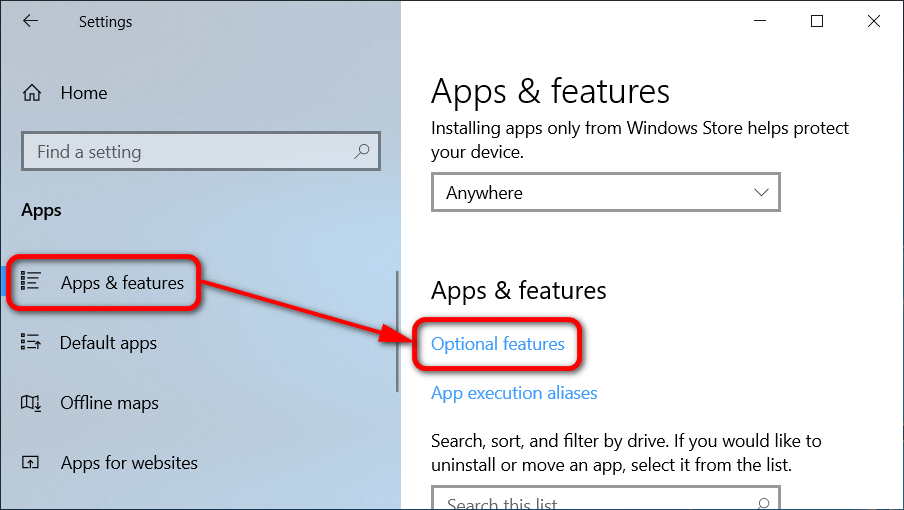
2. Click on the “Apps” icon from the main Windows Settings menu.
3. From Apps’ left side, click on the “Apps & features” link.
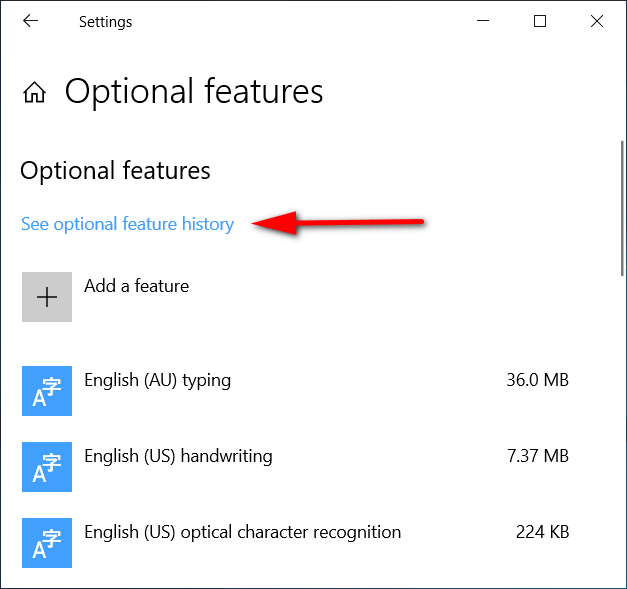
4. From the right side of the Apps & features window, click on the “Optional features” link.
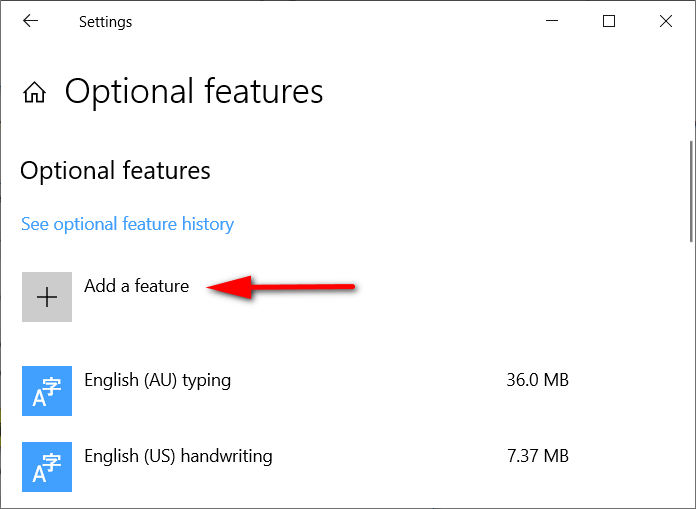
5. You can then scroll down the list of optional feature.

6. Click on the “Add a feature” button if you want to add a feature that is not on the list.
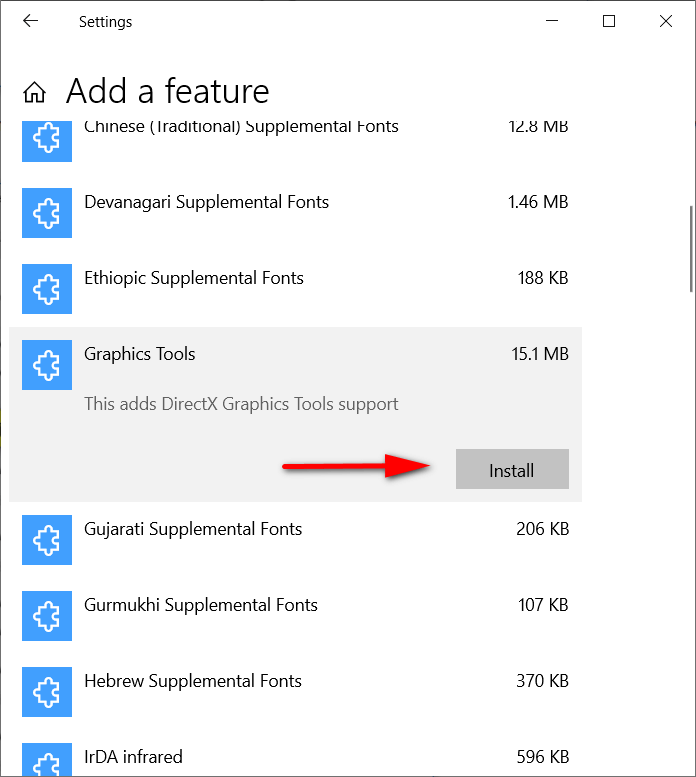
7. Click on the name of the feature that you want to add from the secondary list so it expands, and then click on the “Install” button.
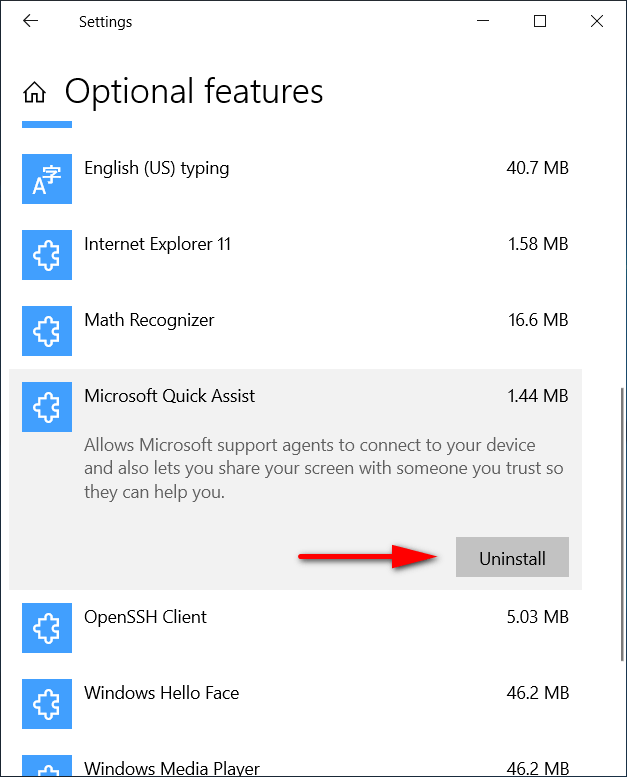
8. Click on the feature’s name from the first list of optional features and then click on the “Uninstall” button when you want to uninstall an optional feature that either you had installed or that was already installed.
9. Under the Optional features heading, click on the “See optional feature history” link to view the history of features that you’ve installed or uninstalled.
You can now close the Settings app.
Method Two: Manage Optional Features in Command Prompt
1. Open the Command Prompt (Admin).
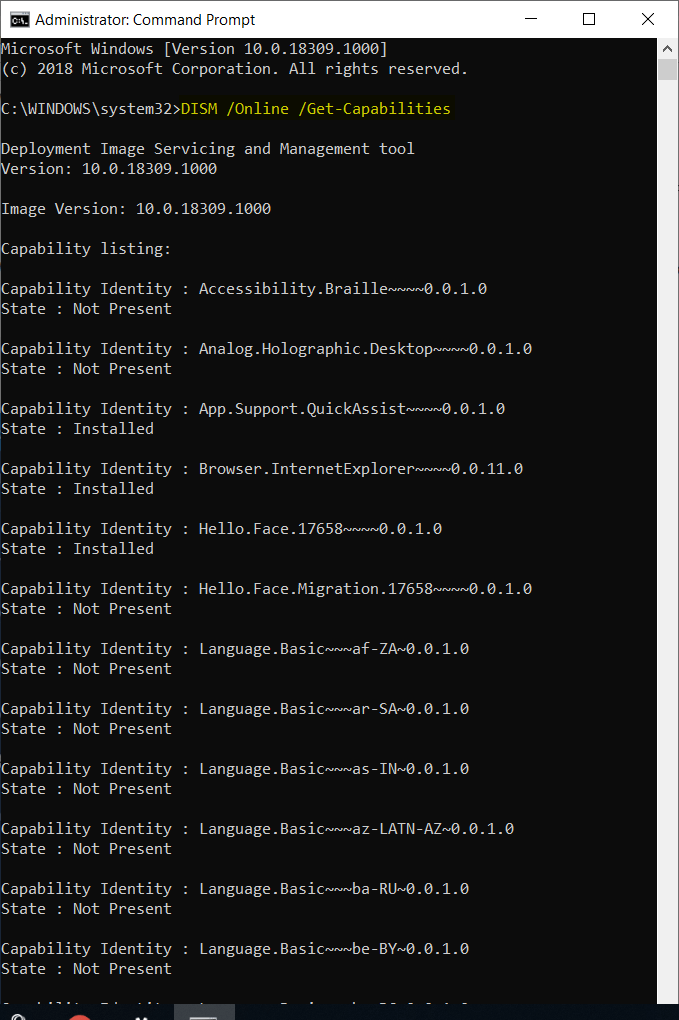
2. Type the DISM /Online /Get-Capabilities command into the command line and press the “Enter” key on your keyboards to execute it. This gives you the list of optional features, along with their “Capability identity” and the current “State” of the feature. The state will show that the feature is either “Installed” or “Not present.”

3. How to Add Optional Features
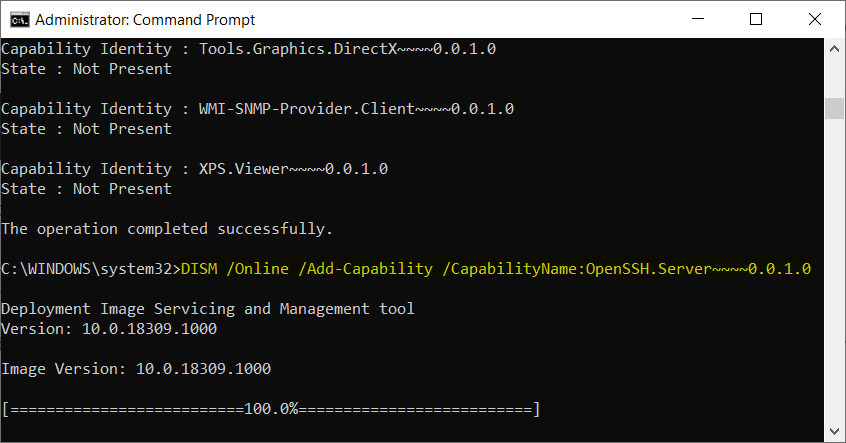
A) Type the DISM /Online /Add-Capability /CapabilityName:name command and substitute where it says “name” for the name of the optional feature as given in the command line during the step above.
For example, DISM /Online /Add-Capability /CapabilityName:OpenSSH.Server~~~~0.0.1.0 would add the OpenSSH server optional feature.
4. How to Remove Optional Features
A) Type the DISM /Online /Remove-Capability /CapabilityName:name command and substitute where it says “name” for the name of the optional feature as given in the command line during the step above.
For example, DISM /Online /Add-Capability /CapabilityName:Browser.InternetExplorer~~~~0.0.11.0 would add the OpenSSH server optional feature.

You can now close the Command Prompt window.
Method Three: How to Manage Optional Features in Windows PowerShell
1. Open the Windows PowerShell (Admin).
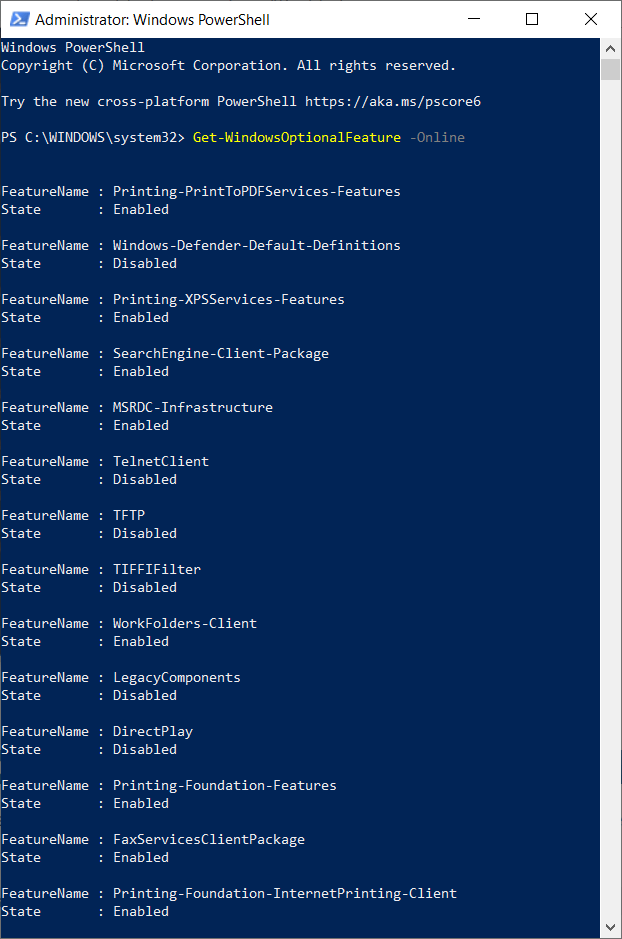
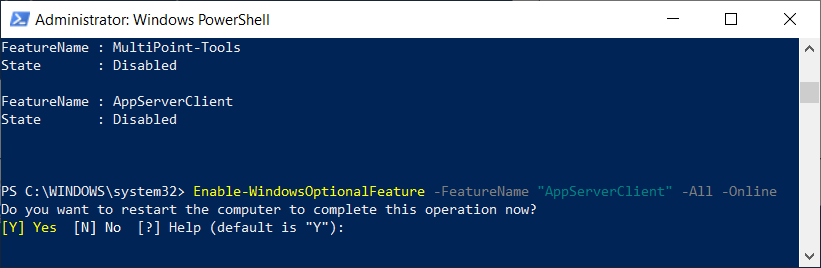
3. Type the Get-WindowsOptionalFeature -Online command into the command line and press the “Enter” key on your keyboards to execute it. This gives you the list of optional features, along with their “FeatureName” and the current “State” of the feature. The state will show that the feature is either “Enabled” or “Disabled.”

3. How to Add Optional Features
A) Type the Enable-WindowsOptionalFeature –FeatureName "name" -All -Online command and substitute where it says “name” for the name of the optional feature as given in the command line during the step above.
For example, Enable-WindowsOptionalFeature –FeatureName "AppServerClient" -All -Online would add the OpenSSH server optional feature.
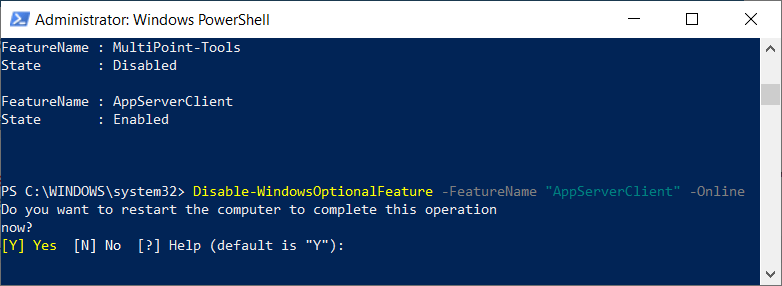
4. How to Remove Optional Features
A) Type the Remove-WindowsOptionalFeature –FeatureName "name" -Online command and substitute where it says “name” for the name of the optional feature as given in the command line during the step above.
For example, Remove-WindowsOptionalFeature –FeatureName "AppServerClient" -Online would add the OpenSSH server optional feature.
You can now close the Windows PowerShell window.
That’s all.