Last Updated on December 24, 2022 by Mat Diekhake
To install Windows 11, your computer needs to meet a series of specifications dictated by Microsoft. The idea is if you don’t have those minimum hardware requirements that your computer will not perform optimally with Windows 11 running.
Nevertheless, there are still people looking to install Windows 11 on unsupported machines. And Microsoft does allow you to do that in the Registry Editor.
This tutorial demonstrates how to install Windows 11 on unsupported hardware.
Caution:
Installing Windows 11 on computers that do not have the minimum hardware recommendations could potentially cause crashes. Installing Windows 11 on a computer with a single-core processor for instance could prevent Windows from running smoothly.
How to Install Windows 11 on Unsupported Hardware
You can install Windows 11 on unsupported hardware directly from the Registry Editor app with existing registry keys provided by Microsoft. Here is how:
Notes:
- Your computer needs a TPM 1.2 chip and UEFI firmware.
- You need to have Secure Boot enabled.
1. Open the Registry Editor app.
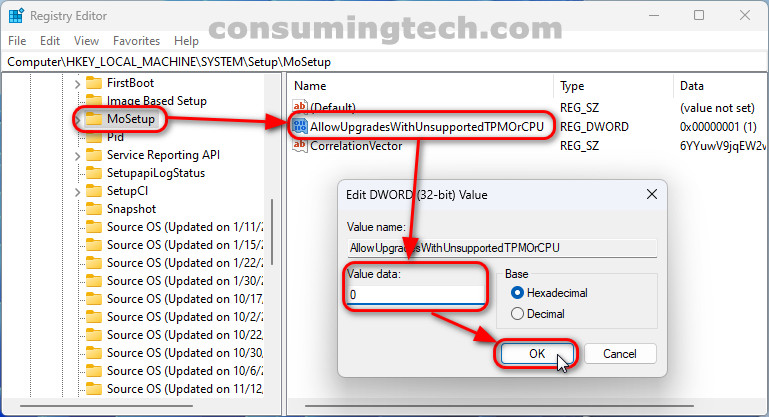
2. Navigate through to the following registry keys:
HKEY_LOCAL_MACHINE > SYSTEM > Setup > MoSetup
3. Double-click on the AllowUpgradesWithUnsupportedTPMOrCPU key and change the Value data from 1 to 0.
In conclusion, that is how to install Windows 11 on unsupported hardware.