Last Updated on April 12, 2017 by Mat Diekhake
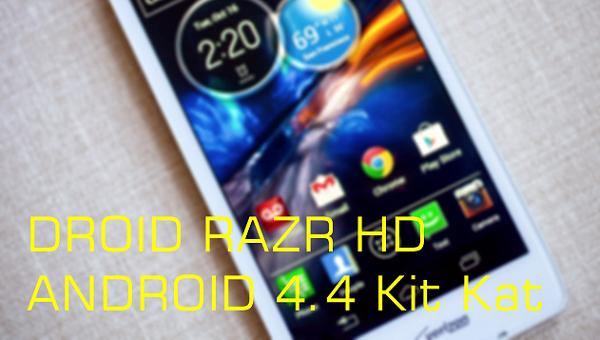
The Motorola RAZR HD XT925 variant is now getting the official Android 4.4.2 KitKat update OTA in selected European countries. That means if you only want to see it as a notification or to check from Settings > About device > System updates > Check for updates then you have to be in Europe to see them. There is another way that the rest of the world can run this 180.46.99.XT925.CEE firmware with the build number of KDA20.99 and that is by downloading and installing this file manually. We will show you how to do that here today.
The RAZR HD is a smartphone that started out on Android 4.0.4 Ice Cream Sandwich, so it has been around for a while. In fact, this handset was announced way back in September of 2012 so from that perspective it is lucky to be getting the chocolate software version that we have here. It hasn’t seen an abundance of updates that we can see so users might not be very familiar with what to do in preparation for starting the guide. If you need some directing, it’s a good idea to not skip over what I’m about to say. Motorola publicly stated that they would update this device to Jelly bean at the end of 2012, and they followed that through. However, since then it has been on a dry spell.
- This firmware is for the XT925 variant of the RAZR HD, and it cannot see installations on any other model number. Go into the settings followed by About device and check that the model number matches up with what we gave. If it doesn’t then this guide is not for you. Even though, this is official firmware, installing it on something it isn’t for can have serious consequences.
- If you have root on the smartphone before starting this guide, it will be taken away. Because the Android team officially makes the file, they revoke the root on purpose and everything custom needs to be re-installed. There’s always a way to re-root on the newer build though so don’t panic. If you want to get it back, that will not be a problem.
- Download and install the Droid RAZR HD XT925 USB drivers so we can successfully connect the handset to the computer system unit.
- Backing up is the single most important factor here. Nobody wants or expects data loss, but it could happen on occasion and when it does it is a nightmare if the person did not backup the personal data because there is no way to get it back. Furthermore if something goes wrong there is every chance that you may need to do a factory reset to fix the problem. If that is the case then the factory reset will also wipe the data. I know many people dislike the backup process because it is hard to get everything backed up properly. The hardest part is with the apps people want to store and for this I recommend Helium that is downloadable from the Google Play Store. Helium also lets you backup some data as well as the applications. The RAZR HD comes with 16 GB built-in storage space, but only 12 GB of that can be used by a person because 4 GB is being used by the Android operating system. That means many people will be using all of that space already with music, photos, video and other data. If you fall into that category, there is extra microSD, microSDHC storage expansion options that can hold up to 32 GB of space.
- You will need an SD card that fits this handset for copying a file over. If you do not have one already, these are found online from sites such as eBay or local retail outlets that sell electronic parts. Be careful when buying because they do have lots of differ4nt types for different devices. If you aren’t sure, it is always a good idea to ask the store attendant instead to point you in the right direction. Worst case scenario they should let you swap it over as long as you haven’t opened the packaging.
- For a detailed presentation on how to use the SD card use this helpful page presented by Verizon Wireless. You don’t need to be on the Verizon network to follow it because the instructions are the same for any variant.
- This guide uses Android SDK and Fastboot files. You can get ADB on Mac OS X and Linux, but this guide is for Windows PC. Hopefully most Android users are already prepared for that because most upgrades do require a PC so if you need to see a friend do that now.
- This mobile comes with a 2530 mAh battery that gives 16 hours talk time when brand new. Obviously being nearly 2 years old many people’s batteries will not be lasting that long. If the USB Mass Storage device and USB charging isn’t working do not start this guide without having enough battery power to see you through the exercise. It will vary because only the owner knows how quickly it drains. As a rough estimate keep at least 70% to avoid it shutting down. Those of you who know that the USB charging does work then there is nothing to worry about because it will charge the battery as we are working.
- This guide is not for novice users because it can be tricky switching between modes. If you are only familiar with flashing via Odin and have not used SDK or fastboot before I recommend you search for a friend to help you along the way.
- You mus have USB Debugging mode enabled before starting this procedure. To find Develop options in Android go to Settings > Develop Options and mark the USB Debugging box as “on” before navigating your way back out.
How To Install Android 4.4.2 Kitkat KDA20.99 On Motorola RAZR HD
1. Download the firmware file from here to the PC desktop or C: Drive.
2. Download the Android 4.4. Recovery file from here.
3. Download the Philz touch recovery from here.
Copy the firmware file to the tool of the SD card. Now flash fastboot and ADB. After fastboot finishes installing, copy the Philz touch recovery to the fastboot folder.
4. Open fastboot.
5. Go to Start > Run > Type CMD to open a command prompt.
6. Turn off the mobile.
7. Boot it up in Bootloader Mode by pressing Volume Up + Volume Down + the Power keys at the same time. Wait until the mobile resets and then let go of the power button.
8. Fetch the USB cable that you usually use as a connection to charge the mobile. Plug one end in the handset and the other into the computer system unit in the suitable slot.
9. From the command line type: “fastboot flash recovery philz_touch_6.43.8-moto_msm8960.img” and press enter to confirm the command.
10. Turn the mobile off and reboot into recovery mode.
11. With Android SDK installed go back to the command prompt and type “adb reboot recovery.”
12. It will now be in recovery.
13. Install the modified firmware file from the SD card.
14. Copy the 4.4 recovery to the fastboot folder.
15. Go back to bootloader mode and type “fastboot flash recovery xt926-KK-CWM 6048.img” from the command line.
16. Reboot to finish the installation and start enjoying KitKat goodness.
Don’t forget to move the mouse down to the system tray located in the taskbar on the bottom of the screen. Look for a green arrow representing the “safely remove hardware” icon and then right-click on the mouse on it. Now stop the USB Mass Storage device.