Last Updated on September 28, 2021 by Mat Diekhake
Microsoft Edge is a web browser developed by Microsoft that was a planned successor to also the Microsoft-owned Internet Explorer. You can find Edge in your taskbar by default in Windows 10, where you would have found Internet Explorer in earlier versions of the operating system.
While some Windows users were avid fans of Internet Explorer still when Microsoft decided to head in another direction, there is little doubt about Edge being the superior web browser now that IE has been discontinued. All future development by Microsoft will be done on Microsoft Edge and not IE.
Part of what makes Edge the superior browser is its support for Cortana—Microsoft’s virtual assistant—and the many other extensions available from the Microsoft Store.
Microsoft Edge was originally developed using Microsoft’s own EdgeHTML, but due to some website’s features being unable to load properly, they decided to switch from EdgeHTML to Chromium.
One feature that every good web browser must have is the ability to import and export Favorites. The Favorites feature is now a universal feature—though may be used under a different name, such as Bookmarks in Google Chrome—across the most used browsers which allows you to save webpages that you think you might revisit again later. If you use your web browser regularly, these lists can grow to hundreds of webpages long and may contain many webpages that you will struggle to find again while still being incredibly important to you. By giving you the chance to import and export this Favorites list, it will not only save you time manually entering the data again but also may help you save pages you may never have found again.
How to Import/Export Favorites (Bookmarks) in Microsoft Edge in Windows 10
You can import and export the favorites from Microsoft Edge from the web browser’s settings menu. Here is how you can do that:
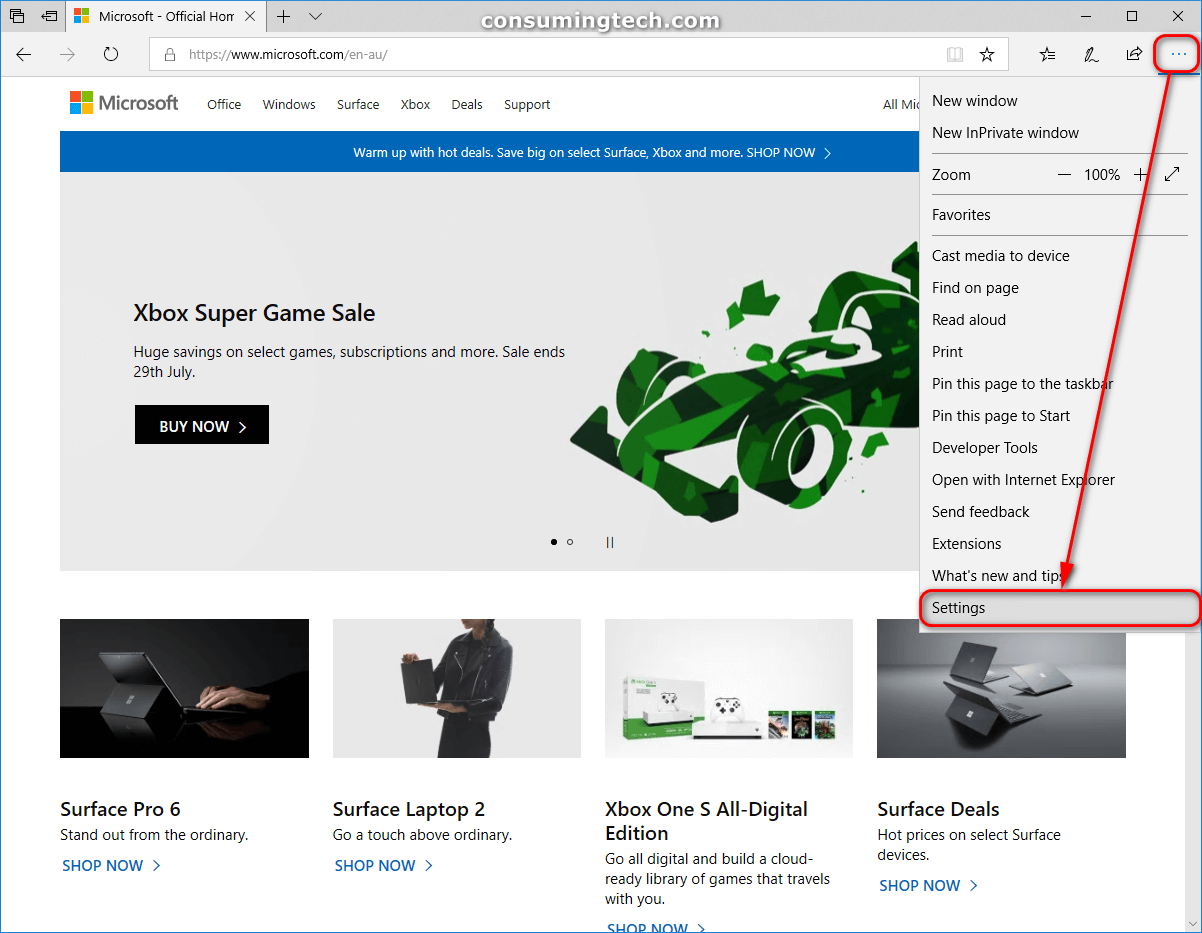
1. Open the Microsoft Edge web browser and click on the Settings and more button (with three dots) in the top right corner of the browser window, and then click on the Settings link.
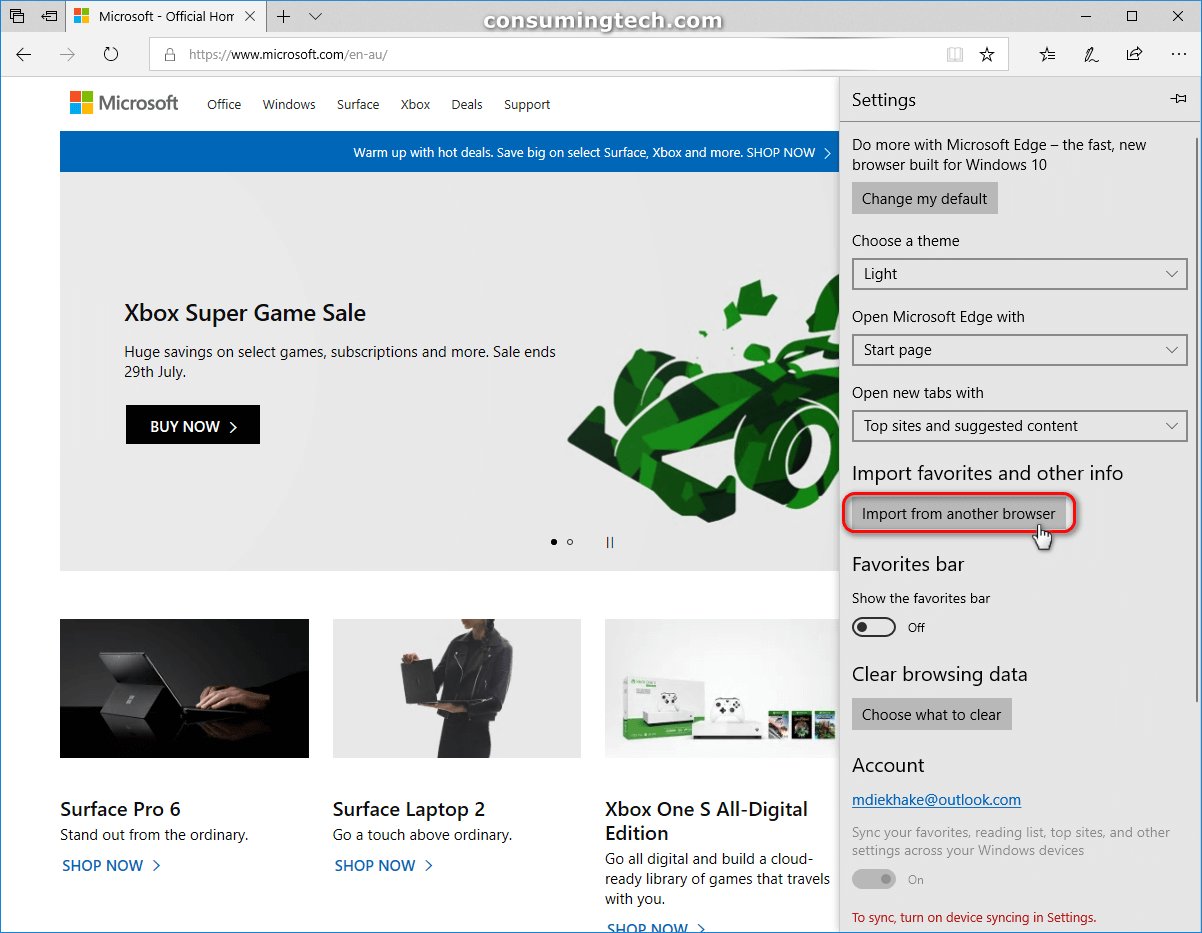
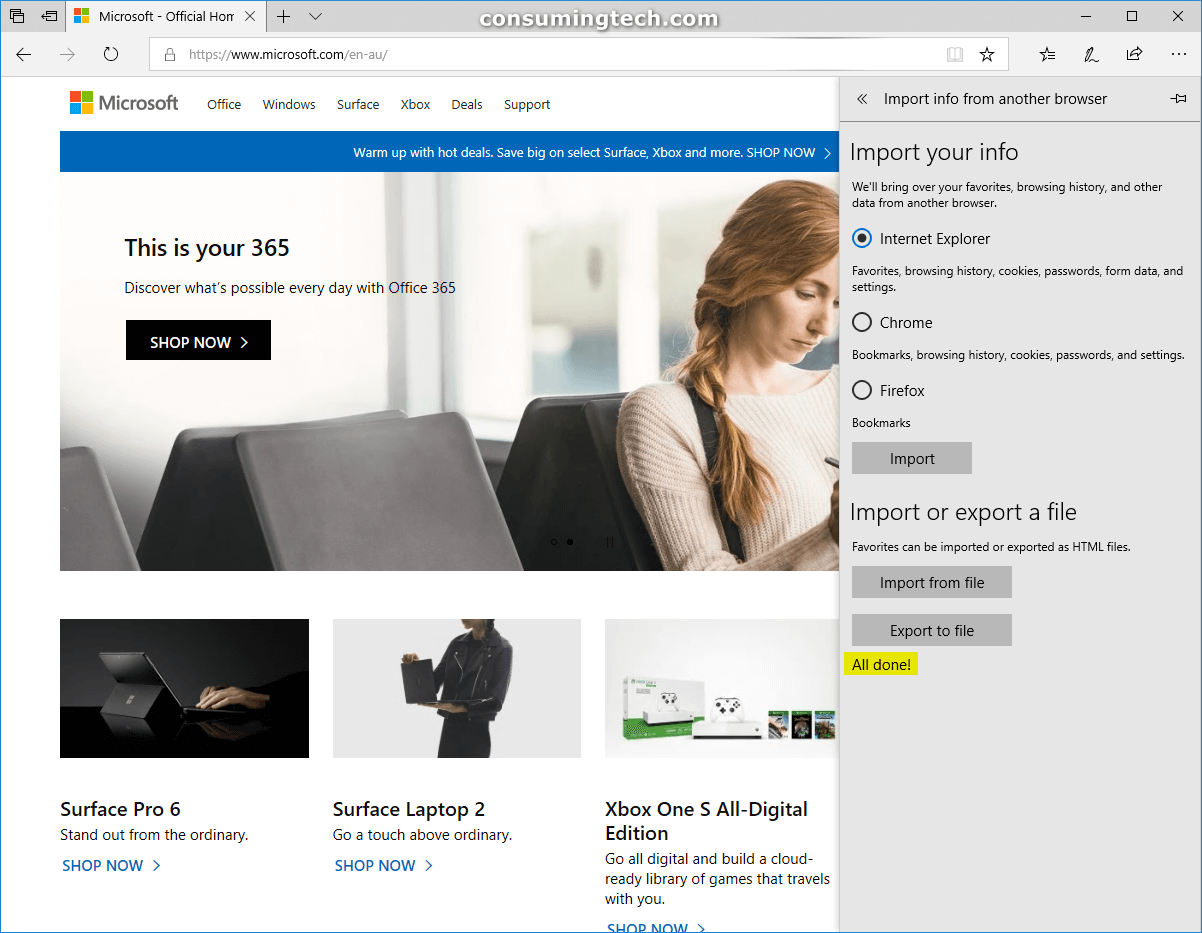
2. Scroll down and then click on the Import from another browser button that is available under the Import favorites and other info heading.
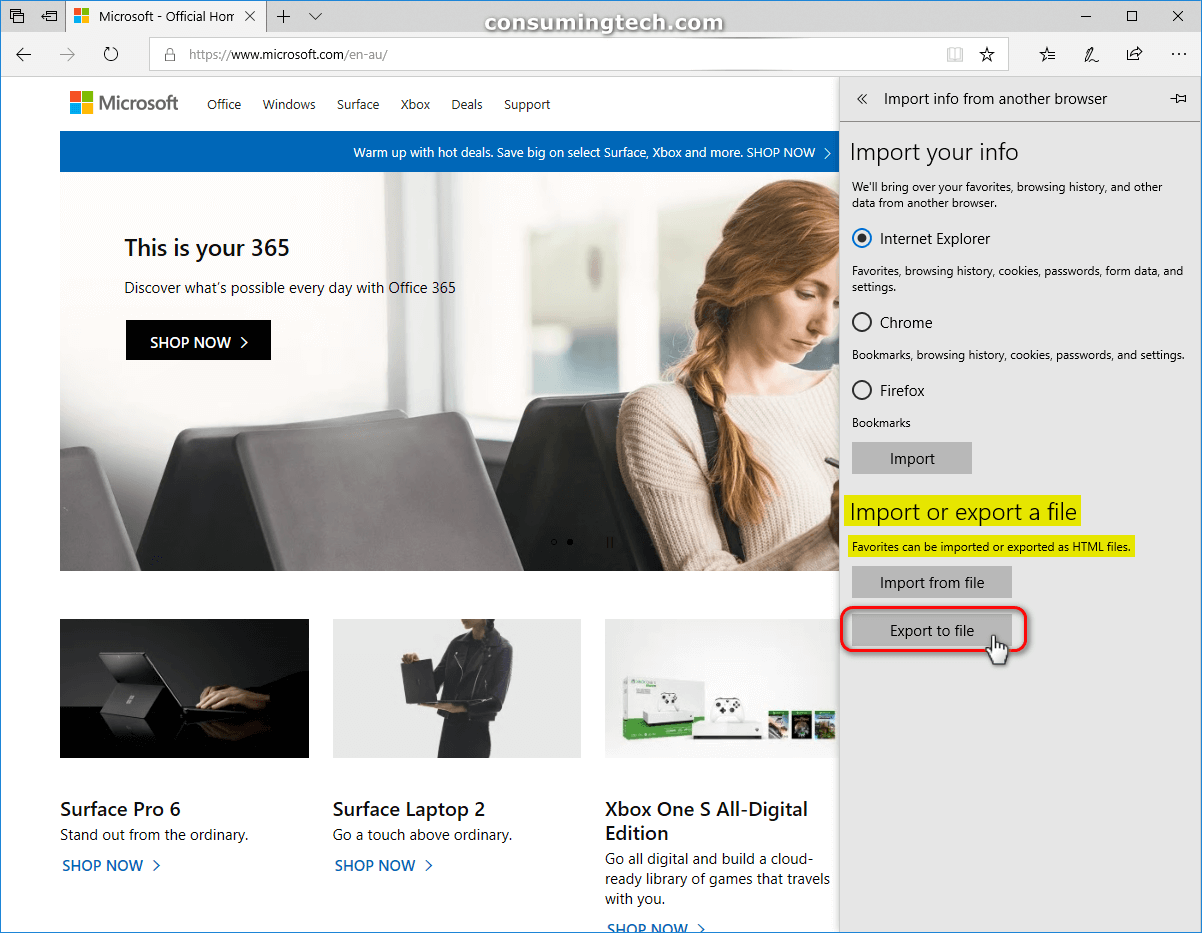
3. To Export
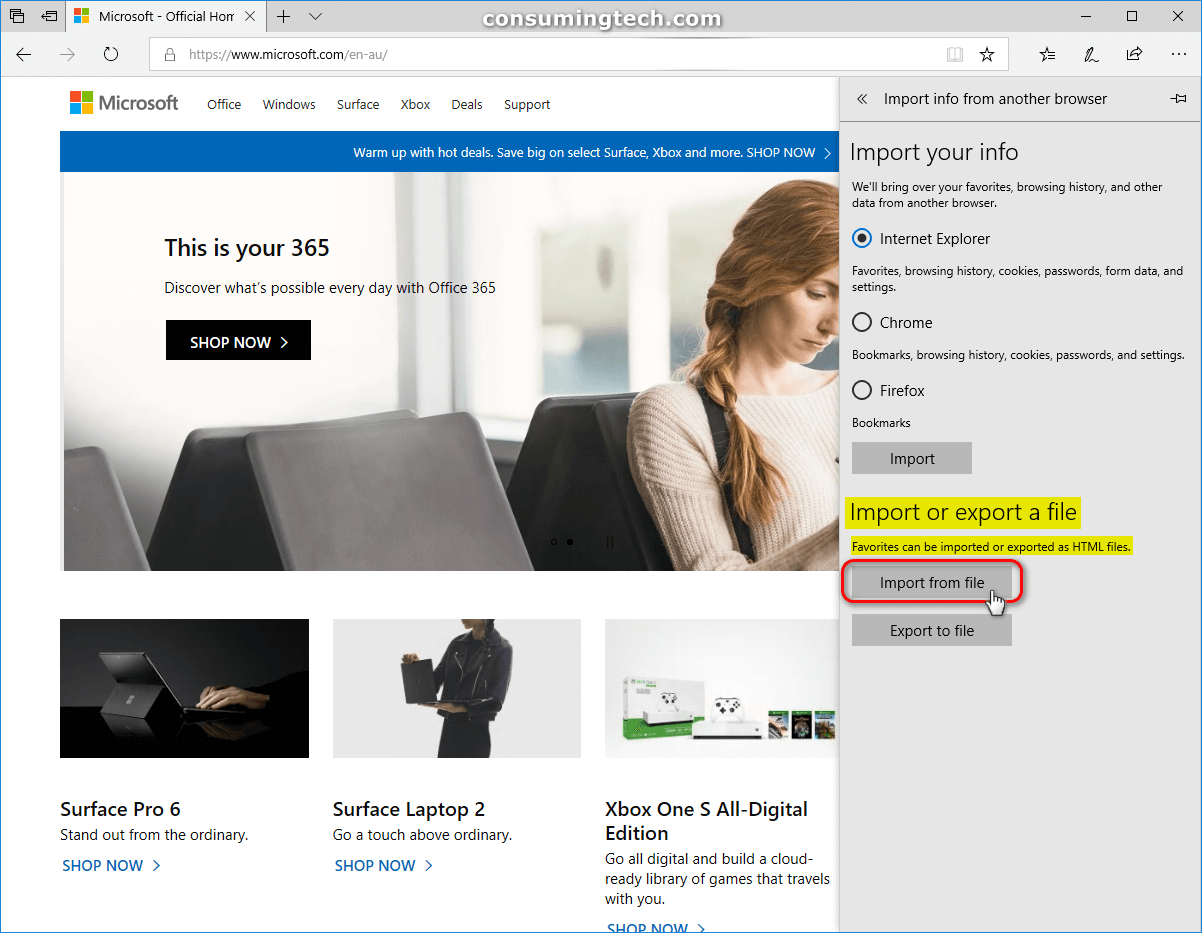
a. Scroll down and click on the Export to file button that is available under the Import or export a file heading.
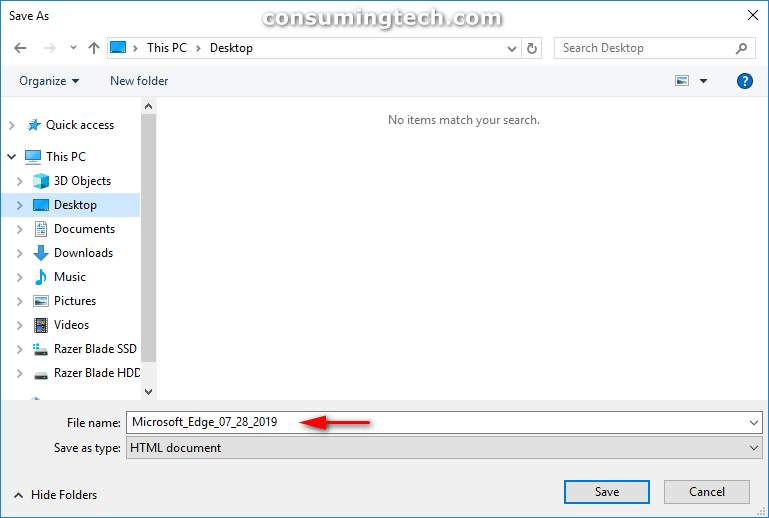
b. Type the file name you want for the file and then click on the Save button.
By default it gives you the date, which makes it easier for you to identify which backup this is.
Tip: You may want to choose the desktop as your save location if you do not know your way around File Explorer so you can easily find your file again later to import it.
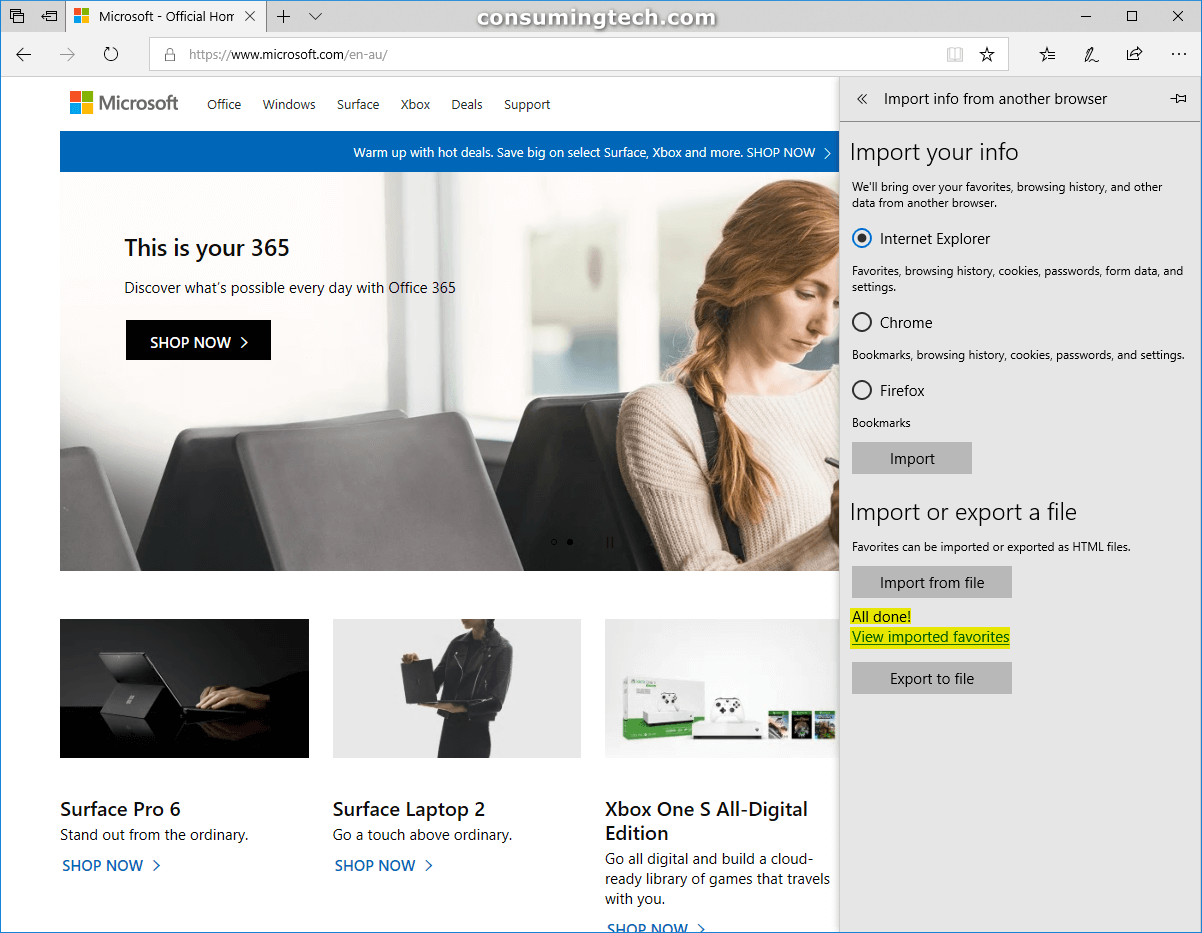
c. You know the export has been successful when you can see the All done! message from the browser.
4. To Import
a. Scroll down and click on the Import to file button that is available under the Import or export a file heading.
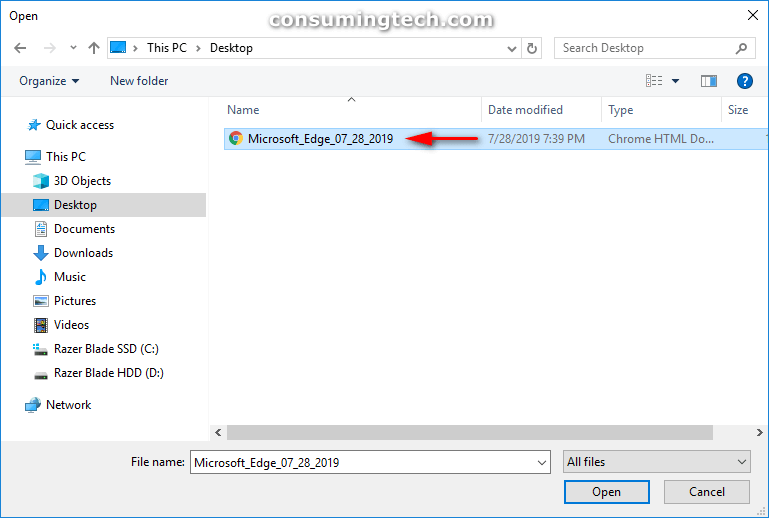
b. Select your file and then click on the Open button.
c. You know the import has been successful when you can see the All done! message from the browser.
That’s all.