Last Updated on July 23, 2022 by Mat Diekhake
If you need to look how popular rooting is becoming, look no further than Steve Bass — a retired writer from PC World — who is emailing me to find out how to unchain and unlock his Galaxy S3 to better things. The Merit is not on the same level as the flagships from Sammy, however, once unchained, it does open up the internal system to equally as great advantages that all owners can take full advantage of. Unlocking will essentially take away all factory restrictions places by the manufacturers once they get boxed and shipped off to the phone carrier where we buy them.
Only follow the steps we list below if you are an advanced user since we use a lot of the command line. If you know a computer inside out and don’t have much experience with a smartphone you will be fine.
Safeguarding root is simple and in this case the only thing required is flashing an exploit known as “ChainSSD”. Obviously, we cannot do this successfully unless we flash the custom recovery image to boot with the exploit. From there, we install the recovery system so users can take full advantage of flashing custom ROMs and otherwise inaccessible applications from aftermarkets repositories.
The bootloader is a diminutive program running on your ZTE. In reality, the phone cannot operate without the software initiating the boot process. What we perform here doesn’t stop it from working bur rather opens it up so we can have further enhanced access that is otherwise chopped off by the manufacturers. Since we do that without their permission, they will not service the parts under warranty and it becomes void. However, if we locked the bootloader back up again and take away the root access you can take it into the shops and they will fix anything that is wrong with it so long as the warranty period still remains.
Two of the most popular custom recoveries include Team Win’s TWRP and ClockworkMod better known as CWM for short. People will tell you which one is better depends on who you talk to. There’s no correct or incorrect answer. Often it is the Team Win’s version that is slightly quicker and easier for some devices.
Details of Note
-
- Assuming the bootloader is locked before starting this guide, you need to backup the settings and data by using one of the famous applications available from the Google Play Store such as the helium for Android. If you were already with access and unlocked the better option is taking a full NANDroid backup or using Titanium for Android instead. For those hard to store SMS text messages, try using the SMS backup + application available from the same Google Play Store. You must sign into your Google account on your phone before downloading and installing the Google services. Once done, make copies of the phone contacts, EFS folder, videos, music files, audio files, picture galleries and all other data you don’t wish to risk losing. Sometimes we require a factory reset and if that happens the data is gone forever.
- Verify everything worked as planned by downloading the root checker APK. Do this after you finish working on the steps. It will not work unless we have done the operation prior to checking.
- You need a computer, laptop, or notebook with a fully operational USB slot so we can plug the mobile device into the slot. We recommend running Windows XP through to Windows 8 since we provide thorough instructions for that operating system. However, any OS with a command prompt will work.
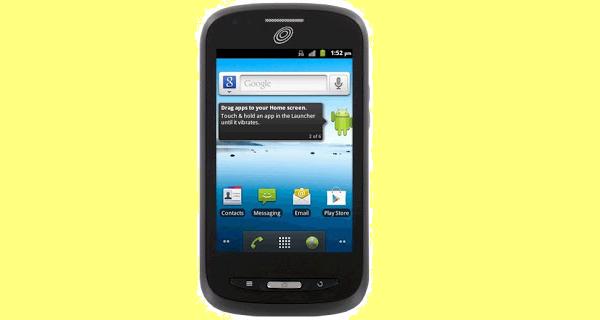
How to Root ZTE Merit 990G with Chain SSD and Flash Custom Recovery
1. Download the ChainSSD file from here to the desktop of the computer.
– extract the files from the folder.
2. Download ADB here to the desktop.
– extract the content of the file.
3. Download the custom recovery image from here.
Note: To successfully extract the files all you need to do is right-click the mouse over the file and select the extraction option.
4. Fetch the USB wire that comes in the box with your smartphone.
– Look at the cable connecting the phone charger if you cannot locate it elsewhere.
5. Go to Start > Run > Type CMD to open up the command live in a Windows PC.
6. Type adb shell followed by mkdir /data/local/logs and mkdir /data/local/logs/kernel.
7. Type one command at a time and press the Enter key to confirm the command. Now type am start -a android.intent.action.MAIN -n com.zte.emode/.logsetfollowed byls -l /data/local/logs/kernel/log_kernel.txt.
8. Next type in rm /data/local/logs/kernel/log_kernel.txt followed by ln -s /data/local.prop /data/local/logs/kernel/log_kernel.txt.
9. Type ls -l /data/local.prop and then exit followed by adb reboot.
10. Now apply the rooting commands:
adb remount
adb push su /system/xbin/su
adb shell chown 0.0 /system/xbin/su
adb shell chmod 06755 /system/xbin/su
11. And free up space by deleting all unnecessary files by confirming these final commands;
adb shell rm /data/local.prop
adb shell rm -r /data/local/logs
That’s it! You will now have root. Lastly, we want to add the custom recovery image.
1. Copy the recovery file to the SD card.
2. Go to Start > Run and type CMD to open the command prompt once more from a Windows PC. You can use the command line from a different OS such as Apple Mac OS X if you like.
3. Type these instructions:
adb shell
su
flash_image recovery/sdcard/recovery.img
reboot recovery
4. Leave the ZTE to reboot itself and the new recovery is installed.
Occasionally things can go wrong and usually the resolution to the problem is to restore factory settings. Restoring the default settings takes away the root access and everything we achieved. Additionally, you will lose the data such as phone contacts and pictures.