Last Updated on July 19, 2022 by Mat Diekhake
When you root your Sony Xperia T3 phone, you allow root-requiring apps to run on your phone that let you do tons of things that were not possible before. For instance, root-requiring apps only run on rooted phones, and if you are fascinated by these apps, you will definitely want to root your phone.
Rooting the Sony Xperia T3 is as easy as flashing a file through a custom recovery. All you need to do is download a file and flash it using the custom recovery on your phone, and you should be rooted.

Here’s how:
Files You Need
- Your bootloader must be unlocked before you can do this tutorial. Please head here to learn how you can unlock your bootloader.
- You must have a custom recovery installed on your phone before you can do this tutorial. If you have not, install one using our how to install a custom recovery on the Sony Xperia T3 tutorial.
- This tutorial flashes SuperSU to gain root access on your phone.
- Download SuperSU to your computer. Do NOT extract it. It must be in .zip format for it to be flashed using a custom recovery.
Rooting the Sony Xperia T3
- Connect your phone to your computer using a USB cable. Your phone has to be in data transfer mode so it can receive files from your computer.
- Copy SuperSU .zip from your computer over to the internal SD card storage on your phone. Place it on the top so you can easily find it in the later steps.
- When SuperSU .zip is copied, disconnect your phone from your computer.
- Turn off your phone.
- Turn your phone back on in recovery mode. To do that, hold down Volume DOWN and Power buttons together for a few seconds.
- Your phone should reboot into PhilZ Custom Recovery mode.
- Select Install Zip in the recovery menu.
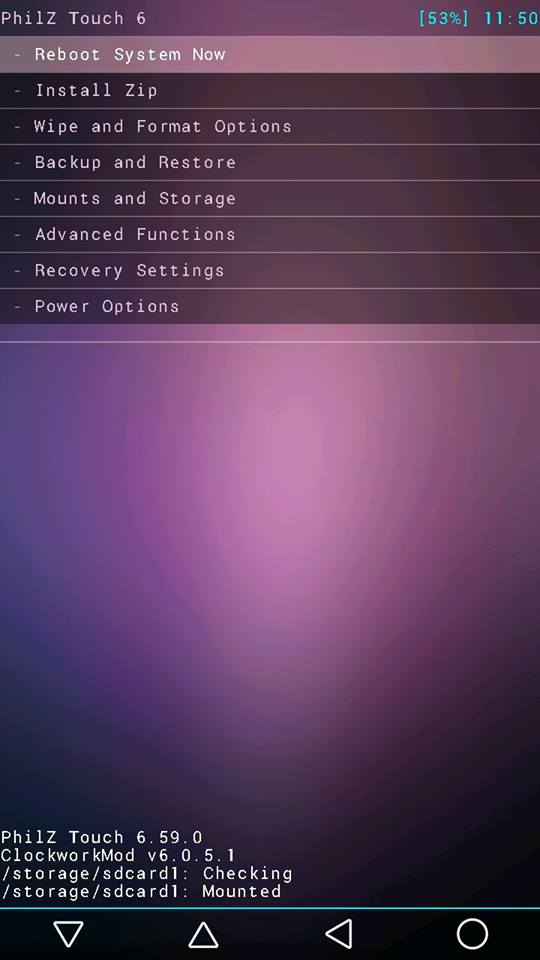
- Choose SuperSU .zip to be installed on your phone.
- Confirm the prompt and wait for PhilZ Recovery to flash SuperSU on your phone.
- It should not take too long to flash the file.
- When PhilZ Recovery’s done installing SuperSU, reboot your phone by selecting the Reboot System Now option from the menu.
- Your phone should reboot normally.
- You are now rooted!
Wonderful! Your Sony Xperia T3 is now rooted and has a custom recovery to help you with flashing custom files on your phone.
A custom recovery along with root access allows you to do tons of customizations on your phone. From flashing a custom ROM to even overclocking your CPU using a custom kernel, the combination of a custom recovery and root makes it all possible for you.
Not only is PhilZ Recovery about flashing new files, it can also be used to create entire backups of your phone. So that when things go south, you can easily revert back to the stock by restoring one of the backups you have created using the custom recovery on your phone.
One of the first few things you should do after rooting your phone is install BusyBox from Google Play, load a couple of root-requiring apps to see if they actually work, and then head on to your main customization mission for your phone. It could be anything of your choice: flashing a custom ROM, flashing a custom kernel, changing the boot animation, etc.
Let us know how this tutorial worked for you in the comments section below.
You might also be interested in:
- How To Install A Custom Recovery On The Sony Xperia T3
- How To Install A Custom Recovery On The Asus ZenWatch
- How To Root The Asus ZenWatch
- How To Root The Huawei Ascend Mate 7
- How To Install A Custom Recovery On The Huawei Ascend Mate 7
Have something to say? You can contribute to this tech article by leaving a comment below.