Last Updated on July 19, 2022 by Mathew Diekhake
Once you root the Samsung Galaxy Chat smartphone, you can install some way cool applications from Google Play like Flashify for all your flashing needs, Full!Screen so your device gets rid of the navigation bar, GMD Auto Hide soft keys to remove the soft keys and many more. You can even install apps to help your with a custom recovery like the TWRP Manager app.
Those of you looking to increase the performance a natural way, can install the Greenify app to help with battery performance and other performance enhancements. The ROM Toolbox Pro application is also useful for rooted users. You can manager your custom recoveries, install new custom ROMs, manager the apps on your device and more. Those are just a few samples to give you a taste of what rooting Android is all about. There are heaps more useful apps to install from the Google Play Store after you are done using this guide.

The Files You Need
- Download the CF-Auto-Root package from Chainfire’s page here.
- Download the Samsung USB Drivers from this page. It takes you through to the official Samsung website.
- Download the Odin flashing tool from this page.
- The following guide for the Samsung Galaxy Chat smartphone does void the warranty. You cannot unlock the bootloader, install a custom recovery or get root access without voiding the warranty. You can, however, do all of those things and revoke them later. For example, you could unroot the Samsung Galaxy Chat device, remove the custom recovery and replace it with a stock recovery and so forth. Doing these tasks will get the warranty working again.
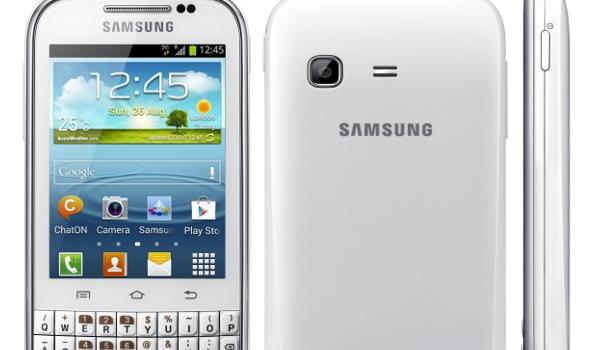
Rooting the Samsung Galaxy Chat GT-B5330B running Android 4.0.4 Ice Cream Sandwich
- Download the CF-Auto-Root package and the Odin package and have them on the desktop of the computer.
- Right-click over both files and select the option for extracting them here.
- Now you should see both executable files on your desktop — the files you can use.
- Double-click the Odin flashing tool file and the app will run on your desktop.
- Reboot the Samsung Galaxy Chat to download mode by pressing the Volume Down + Home + Power buttons at the same time. Doing that only works if you start with the device turned completely off to begin.
- Connect the Samsung Galaxy Chat smartphone to the computer with the USB cable.
- The Odin app on the computer should change the color of the ID: COM port if your USB drivers are working. You’ll need to download them again or reboot the PC if your Samsung drivers are not working. Additionally, you can try downloading a different version of Odin or installing the Samsung USB drivers from Samsung Kies.
- Click the AP or PDA button found in the Odin application on your computer and browse the desktop for the CF-Auto-Root executable package that’s on your desktop from earlier.
- Leave the default Odin settings as they are, including the re-partition box empty.
- You should have the Auto reboot button on so your device reboots automatically when it’s done.
- Click the Start button and wait for the Odin app to flash that rooting package on your device.
- After 5-15 minutes, your device will reboot and the Odin app will give you a pass message on the display of the computer to let you know your device is now rooted.
- Once your Samsung Galaxy Chat reboots, you can take control of your Google account again and open the Google Play Store application.
That’s all.
You are free to install any of the root-requiring apps from the Google Play Store that you couldn’t install before. First, you might want to try the root checker application. It’s free and will confirm your device does have root access. The root checker app is also handy to keep on your device for later so you can check it doesn’t have root access if you ever decide to unroot the device and send it away for repairs.
