Last Updated on July 19, 2022 by Mathew Diekhake
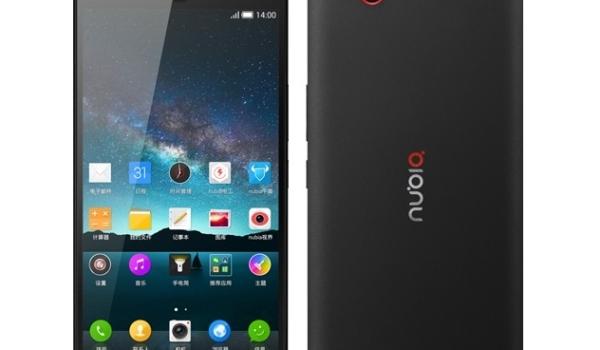
It is seldom that root and a custom recovery are covered in the same procedure, but the ZTE Nubia Z7 mini is lucky to have that. If you happen to have the aforesaid phone and wish to root and flash a custom recovery on it, the guide below should help you do that.
Rooting your ZTE Nubia Z7 mini should help you install the so-called root-requiring apps on your phone. These are not the ordinary apps that you can install on any phone, but these are special apps that only run on rooted phones. The reason these apps only run on rooted phones is because they provide you with some extra features that leverage the access to the root on your phone. And for that reason, they only run if your phone is rooted.

The real fun is when you have a custom recovery along with root access on your phone. While root lets you install the aforesaid apps on your phone, a custom recovery lets you flash custom ROMs on your phone. Well, if you do not already know, a custom ROM is the customized version of the Android OS for your phone, that brings with it some really nice features that are not usually found in stock ROMs.
If that sounds good to you, go ahead and get your phone rooted using the following procedure:
Files You Need
- You must have a computer that runs Windows to do this tutorial. The reason is: the files that you are going to use are Windows only.
- This should root as well as install a custom recovery called TWRP on your phone.
- Download ZTE Drivers to your computer. They are the drivers that your computer needs to recognize your phone.
- Download TWRP Recovery to your computer. It is the custom recovery that you are going to flash on your phone.
- Download SuperSU to your computer. It is the file that will actually root your phone.
Rooting and Installing TWRP Recovery on the ZTE Nubia Z7 Mini
- Double-click on ZTE Drivers executable file to install the required drivers on your Windows computer.
- Unlock the developer options menu on your phone by heading to Menu->Settings->About phone and tapping on Build number for 7-8 times until it says you are a developer.
- Go to Settings followed by Developer options. Turn on the option that says USB debugging. This option must be enabled in order for the following steps to work.
- Plug in your phone to your computer using a suitable USB cable.
- Copy SuperSU .zip from your computer over to the internal storage on your phone. Place it on the top so you can find it easily at a later time.
- Extract files from TWRP Recovery over to your computer by right-clicking on it and selecting Extract here.
- When TWRP Recovery is extracted, double-click on the file that says run_permanent.bat. It is for permanently installing the recovery on your phone.
- Wait for it to install the recovery on your phone.
- When the recovery has been installed and you are there in the recovery mode, tap on the option that says Install.
- Navigate to where you have copied SuperSU and select it to be installed on your phone.
- Confirm the prompt and wait for TWRP to install SuperSU on your phone.
- When TWRP’s done installing SuperSU, reboot your phone.
- Your phone should now be rooted!
Congrats! Your ZTE Nubia Z7 mini is now rooted and is equipped with the SuperSU app to help you manage root permissions.
The aforementioned phone is lucky enough to have gotten both root access and a custom recovery in a single procedure. Otherwise, you would have to first root your phone and then use another procedure to flash a custom recovery on it, but you did both of these things in a single procedure.
Now that you have root and a custom recovery on your phone, head over to the various Android forums on the Internet to find a suitable custom ROM for your phone. When you find one that you think is good for your phone, use the newly installed recovery to flash it on your phone, and you should be running a brand new custom ROM on your ZTE phone!
You might also be interested in:
- How To Root The LG Optimus L90 Running On Android 5.0.2 Lollipop
- How To Unroot The Samsung Vibrant (T-Mobile)
- How To Install A Custom Recovery On The Samsung Vibrant (T-Mobile)
- How To Root The Samsung Vibrant (T-Mobile)
- How To Install A Custom Recovery On The Sony Xperia TL Running Android 4.3
Have something to say? You can contribute to this tech article by leaving a comment below.
