Last Updated on September 7, 2024 by Mathew Diekhake
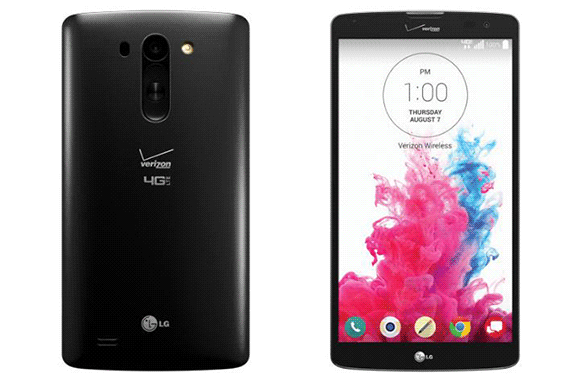
If you happen to have a rooted LG G Vista and you wish to install a custom recovery on it, the following guide should be able to help you.
PhilZ CWM Recovery – one of the finest custom recoveries for Android phones is now available for the LG G Vista and the guide below is all about getting this recovery up and running on the LG G Vista phone.

Here you go:
Files You Need
- Your phone must be rooted before you can flash a custom recovery on it. To root your phone, follow our how to root the LG G Vista tutorial and you should be rooted in a few minutes. Once that is done, return here and continue.
- This should flash a custom recovery called PhilZ CWM Recovery on your phone.
- Since this should unlock the bootloader on your phone, all the data stored on the phone will be erased. So please backup everything that you feel is important.
- This tutorial has been written keeping the Windows version of Fastboot in mind. The steps for Linux and Mac users might vary slightly.
- Ensure that the Universal ADB drivers are installed on your computer.
- Download Fastboot to your computer. It will help you flash the recovery on your phone.
- Download PhilZ CWM Recovery to your computer. It is the custom recovery that will be flashed on your phone.
Installing a Custom Recovery on the LG G Vista
- Extract files from both Fastboot and PhilZ CWM Recovery over to your computer by right-clicking on each of them and selecting Extract here.
- Launch Google Play on your phone and download and install the Terminal Emulator app.
- Launch the app after it is installed on your phone.
- Type in the following command into the app and hit Enter:
su - Now type in the following command and hit Enter:
dd if=/dev/block/platform/msm_sdcc.1/by-name/laf of=/sdcard/laf.img - Type in the following command and press Enter. It should allow you to boot your phone into the fastboot mode.
dd if=/dev/zero of=/dev/block/platform/msm_sdcc.1/by-name/laf - Once the above command has been executed, close the Terminal Emulator app.
- Turn off your phone.
- Turn your phone back on in fastboot mode. To do that, hold down Volume UP button on your phone and plug in your phone to your computer using a USB cable. That should get your phone into the fastboot mode.
- Copy PhilZ Custom Recovery .img file over to the fastboot folder.
- Open the Fastboot folder, hold down Shift on your keyboard and right-click anywhere on the screen and select Open command window here. It should launch a command prompt window in the fastboot folder.
- Type in the following command into the command prompt window and hit Enter:
fastboot oem unlock - It should unlock the bootloader on your phone.
- Wait for it to finish unlocking the bootloader.
- When the bootloader is unlocked, turn off and unplug your phone from your computer.
- Turn your phone back on in fastboot mode by holding down Volume UP and plugging it in to your computer.
- Type in the following command into the command prompt window and hit Enter:
fastboot getvar all - Make sure you get the following result when you run the above command:
Unlocked: Yes - Now, type in the following command into the command prompt window and press Enter. Make sure to replace recovery.img with the actual recovery image name.
fastboot flash recovery recovery.img - Wait for it to flash the recovery on your phone.
- When the recovery’s flashed, reboot your phone using the following command:
fastboot reboot - Your phone should reboot.
- You are done!
PhilZ CWM Recovery has been successfully installed on your LG G Vista and you can use the Quick Boot app to reboot into the same.
You might also be interested in:
- How To Install A Custom Recovery On The Sony Xperia Z5 Compact
- How To Install A Custom Recovery On The Oppo Find 5 Mini (R827)
- How To Root The Oppo Find 5 Mini (R827)
- How To Root The T-Mobile Samsung Galaxy Note 5 Running Android 6.0 Marshmallow
- How To Install A Custom Recovery On The LG G2 (AT&T)
Have something to say? You can contribute to this tech article by leaving a comment below.

March 23, 2017 @ 02:00
Will this also work on the AT&T version of the LG G vista?