Last Updated on December 26, 2022 by Mat Diekhake
There are many types of things that can be found within the Windows 10 operating system that are regarded as objects—from essential things you need when beginning such as your registry key to other things like files and folders or even a drive.
There is always an owner of every object that is created in Windows operating systems. The owner is always the account that is responsible for creating the object. Regardless what permissions are currently set up for any given object, the owner of the object can always change them. The same rule applies to the administrator or administrators of the operating system, of course, because administrators can always do whatever they like. The owner of an object can lock out any user who is not in an administrative role on the computer. If that happens, only that person who created the object or an administrator can let them back into use that object.
After mentioning all of that, it is possible to transfer ownership over to another user from an existing one. That’s done by having the current owner of an object transfer the ownership to an existing user or group. Even if an administrator is locked out of the resources by permissions, anyone who is part of the administrator’s group can take full ownership of an object or transfer the ownership to another user.
How to Change Owner of Object in Advanced Security Settings
Start by signing into the computer that is running on a version of the Windows 10 operating system by using the administrator’s account. (You do need the admin permissions to be able to follow this guide.)
Head to the Start menu and then click on the “File Explorer” icon from the left side pane.
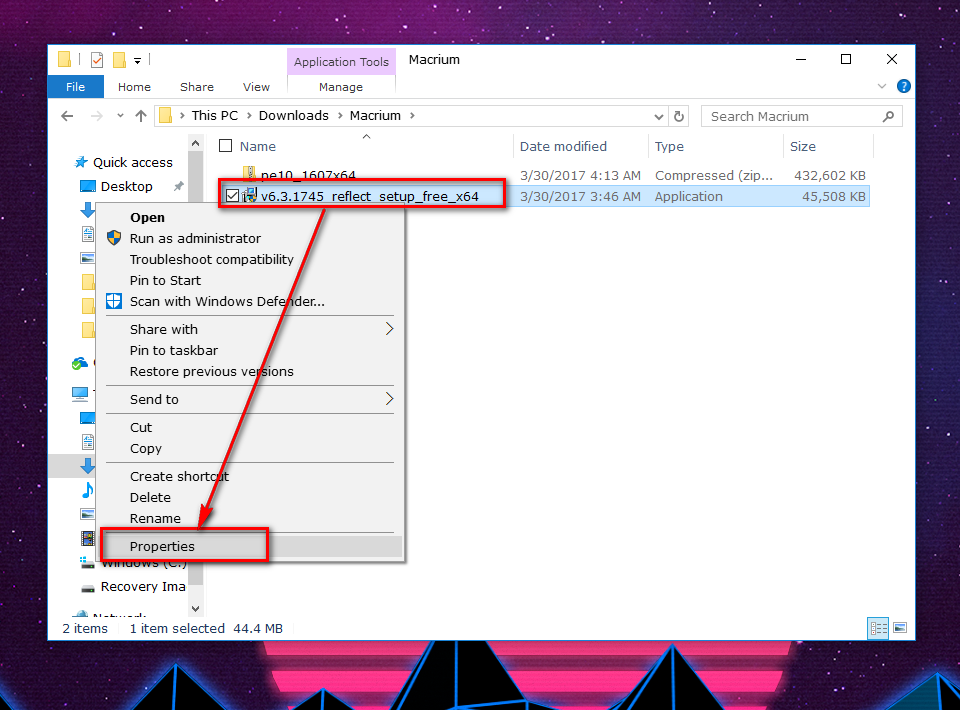
Find the file, folder or drive that you want to change the owner of and then right-click on it and then click on the “Properties” that is available at the bottom of the menu.
Make sure that the “Security” tab is selected and then click on the “Advanced” button that is available toward the bottom of the dialog box.
Look where it shows the owner of the file, and then click on the blue “Change” link that is available to the right side of the current owner.
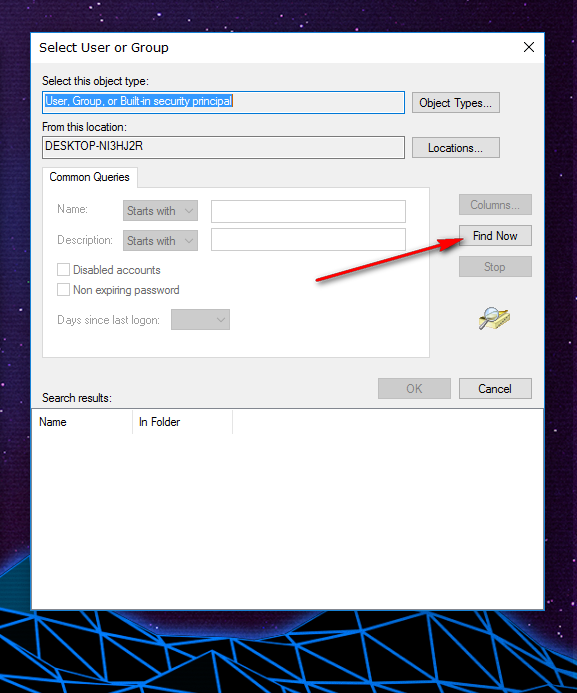
Click on the “Find Now” button available on the right side of the box.
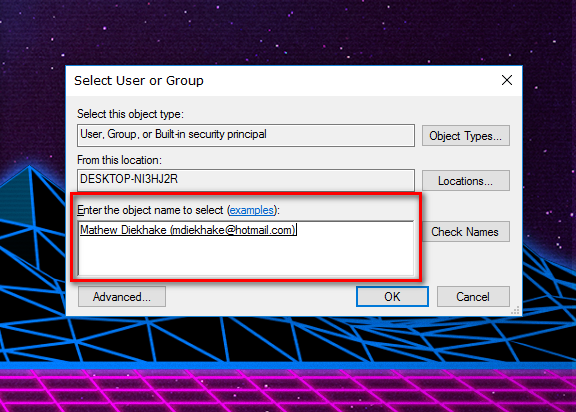
Where it shows you the “Enter the object name to select” is where you need to enter the user details. If you know that user’s details already, then you can enter it manually, but it’s tough to do it that way.
Luckily, you don’t need to know the details already. As long as they are already an account on the computer, you can find them by clicking on the “Advanced” button that is available at the bottom of the box.
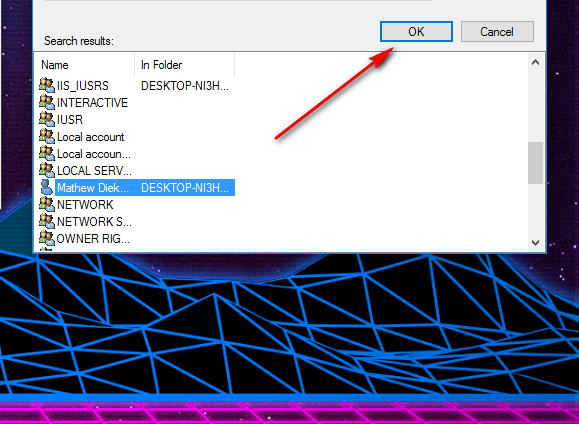
Once you have found the users name on the list, highlight it by clicking on it and then click on the “OK” button just above the search results.
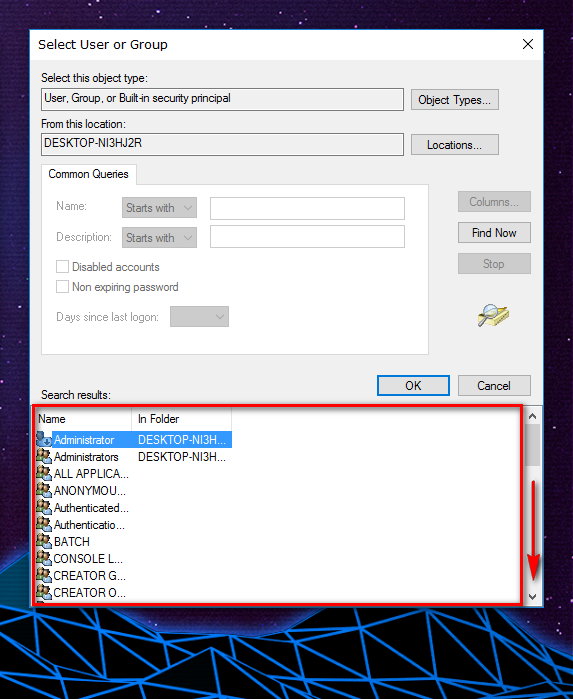
Side note: you can scroll down the list here. You might need to do that if you can’t see the user you wanted from the list above the fold.
It then takes you back to the “Select User or Group” dialog box, and you should now see the name that you chose inside the box where it lets you enter names.
Click on the “OK” button to continue.
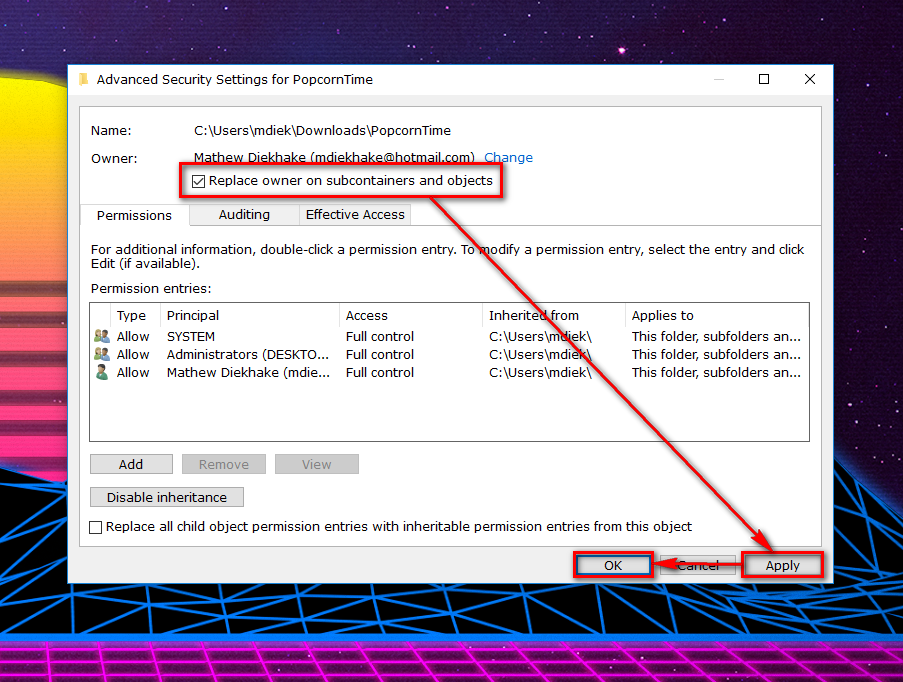
You should now see a new checkbox available underneath the owner at the top of the “Advanced Security Settings for” screen that reads “Replace owner on subcontainers and objects.” If you aren’t changing a drive, folder or registry key, then you won’t see this message.
Click on the “Apply” and “OK” buttons at the bottom of the screen after you have chosen what you want to do with the subcontainers and objects.
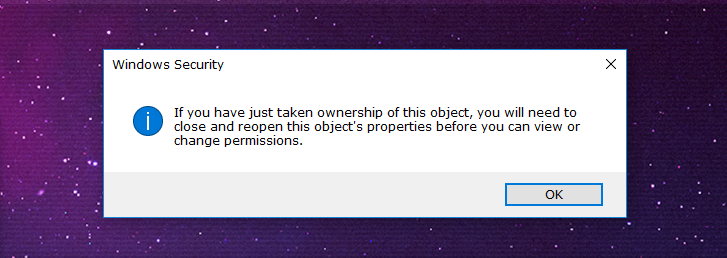
Lastly, you will probably get a Windows Security dialog box opening up that lets you know that you need to close and reopen the object for the changes that you just made to the object to take effect. Click on the “OK” button to close it.
Windows operating systems can still be fun if you have your own user account as long as you haven’t had all permissions taken away from it. It makes sense that the creator of an object is given ownership of that object. Just don’t take away your own ownership and give it to someone else without realizing that is what you are doing because unless you are the administrator, there is no way you can get it back once it is lost.
You might also be interested in:
- How to Unblock a File in Windows 10
- How to Reset the Windows Update feature in Windows 10
- How to See if Your Computer is Running 32-Bit (x86) or 64-Bit (x64) Architecture of Windows 10
- How to Add or Remove Folders from “This PC” in Windows 10
You can subscribe to our RSS, follow us on Twitter or like our Facebook page to keep on consuming more tech.


