Last Updated on January 9, 2019 by Mathew Diekhake
iPhoto and Photos are two of the greatest apps to manage your photo libraries on your Mac. These apps provide you a number of features that help you organize your photos in various libraries and they even let you create smart albums for arranging photos smartly. One of the less known features that these apps provide its users is the ability to hide photos in the photo libraries.
There may be some photos on your Mac that you would not like to show anyone who gets access to your Mac. Maybe those are your personal photos or they are your work blueprints and you would not like for just anyone to come and see them. When that’s the case, you can use the hide feature in the iPhoto and Photos apps for Mac that helps you hide your photos from prying eyes.
Here’s how you can go about doing that on your Mac:
How to Hide and Unhide Photos in the iPhoto App for Mac
In this section, you’ll learn how you can hide your photos in the iPhoto app for Mac.
1. Launch the iPhoto app on your Mac by clicking on Launchpad in the Dock and searching for and clicking on iPhoto. The app will launch.
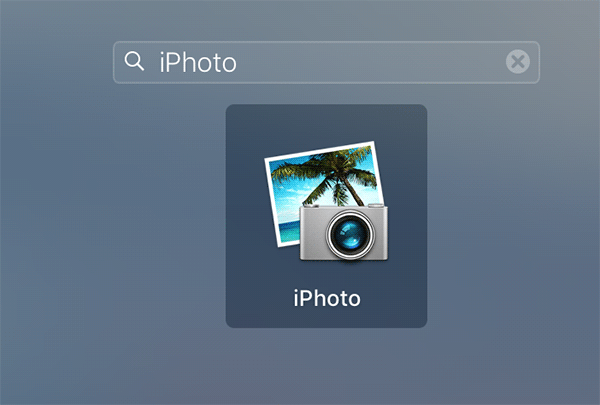
2. When iPhoto launches, select a photo or photos that you want to hide. That can be any photos that are available in the iPhoto app. If you don’t have the photos you want to hide in iPhoto, you can use the import feature in the app to import your photos to the app.
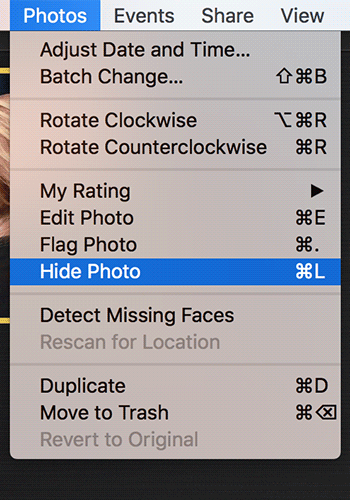
Once you have selected a photo to be hidden, click on the Photos option in the menu bar on the top and select the option that says Hide Photo. Alternatively, you can press the Command + L key combination on your Mac’s keyboard to hide the photo.
3. When you have hidden a photo, a cross will appear at the top-right corner of the photo indicating the photo has been successfully hidden from viewing.
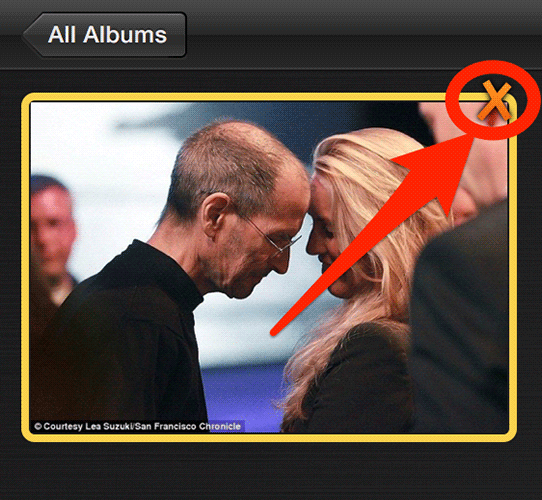
4. The hidden photo will no longer appear in your regular albums so anybody would be able to access it.
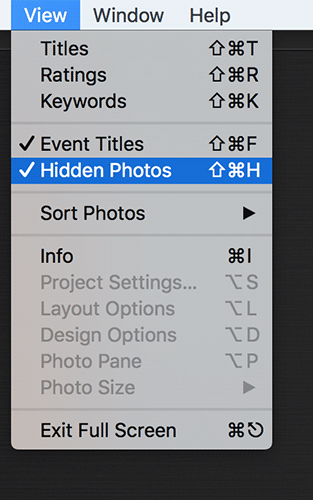
5. If you require access to your hidden photos, then you can click on the View menu in the iPhoto’s menu bar and then click on Hidden Photos, and you should be able to see all of your hidden photos.
6. Should you ever wish to unhide a photo, click on the hidden photo and then click on the Photos menu on the top and select Unhide Photo to unhide the selected photo.
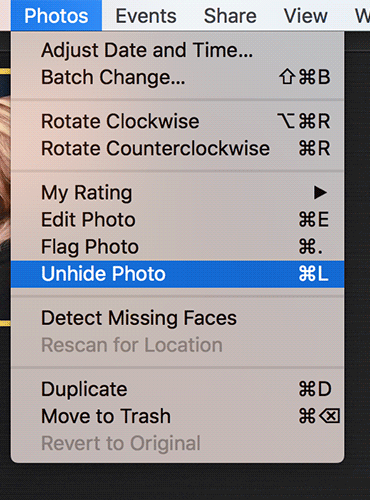
7. The photo should now be unhidden, and you should be able to access it.
So, that was how you could hide and unhide photos in the iPhoto app for Mac.
If you’ve started to use the latest Photos app for Mac and you would like to learn how you can hide and unhide photos in this app on your Mac, then the following is what you need:
Hiding and Unhiding Photos in the Photos App for Mac
1. Launch the Photos app on your Mac by clicking on the Launchpad in the Dock and searching for and clicking on Photos. The app will open.

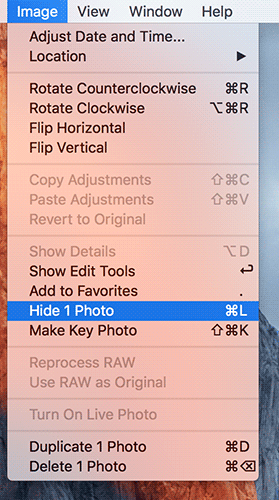
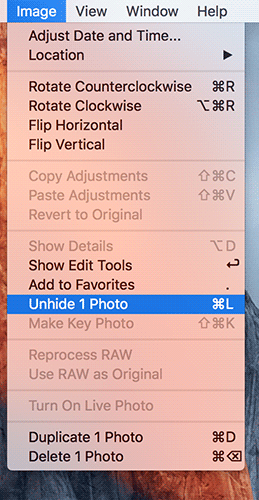
2. When the app launches, select a photo or photos that you wish to hide. Once you’ve selected the photo, click on the Image menu on the top and select the option that says Hide X Photo where X is the number of photos you have selected.
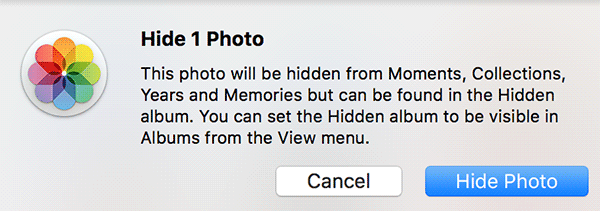
3. You’ll see a warning on your screen that says your photo will be hidden from another kind of albums, but it will still be visible in the hidden album. Click on Hide Photo to hide the photo.
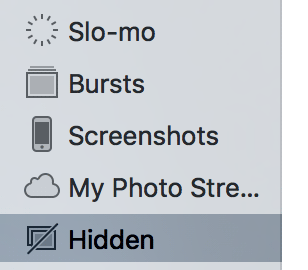
4. The app will create a new album called Hidden where all of your hidden photos will be available at. To see this album in the left-hand side albums list, click on the View menu at the top and select Show Hidden Photo Album.
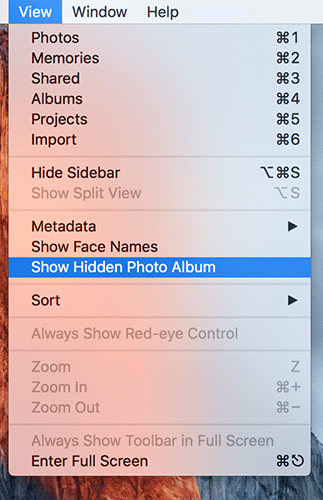
5. You can now see the Hidden album appearing in the albums list. Click on it to see all the photos that you have hidden in the app.
6. To unhide a photo, click on the Hidden album in the left-hand side menu and select the photo that you want to unhide. Then, click on the Image option in the menu bar on the top and select Unhide X Photo option where X is the number of photos you have selected and the photos will be unhidden.
So, that was how you could hide and unhide photos in the Photos app for Mac.
Let us know if this helped you hide your personal photos from the prying eyes!

January 9, 2019 @ 15:21
When I click “hide,” the photo does not disappear. Any reason why? They still all appear in my photo albums, but when I right click they come up as hidden and say “display photo” instead of “hide photo” because technically I’ve already hidden it. Any answers?