Last Updated on August 15, 2024 by Mathew Diekhake
The Windows operating system can run on a deluge of different computers and hardware configurations. This is necessary since Windows isn’t just software for Microsoft but rather oodles of different manufacturers that each want Windows running on a whole range of various devices.
Naturally, that’s going to mean that Windows being perfect for every device will be difficult compared to if it were just running on Microsoft hardware and with only a few devices to choose from. It also means that users like yourself might one day need to collect some system information to troubleshoot some problems to do with a version of Windows that is running on your particular hardware.
Various tools around the Windows OS allow you to collect different sets of information regarding the software. You may one day want to take the initiative and post this information yourself in comment sections of tutorials websites or be asked to provide it when seeking online assistance.
The following tutorial demonstrates how to collect system specifications by using some default apps and third-party apps when you’re using the Windows operating system.
How to Use System Information (msinfo32) within Windows
The Windows operating system comes with a standalone application called System Information that you can bring up at any time to check many of the details available on your computer. Here is how to open it:
1. Press the Windows logo + R keys and then type msinfo32 into the Run dialog box and click on the OK button.
You’ll then have the System Information screen open. This is the most useful page of all for you to check out and displays a vast array of information about your computer.
In addition to the abundance of information on your screen as is, you also have various categories in the left pane that can be expanded as well.
2. To expand a category double-click on it and then click once on a subcategory that you wish to view.
You may also wish to save the information that you see from this page so you can upload a screenshot. You can do that by clicking on File and then Save as you would any typical document.
You can view more on the msinfo32 command from the Microsoft TechNet Msinfo32 webpage.
How to Use DirectX Diagnostic Tool
Windows comes with another standalone application called DirextX that also offers some additional details about your system that you may find useful if System information didn’t have what you were looking for. Here is how to open it:
1. Press the Windows logo key + R and then type dxdiag into the Run dialog and click on the OK button.
Note: if you get a message from Windows asking if you want to check whether or not your drivers are digitally signed, click on the Yes button. It should then open up with the DirectX Diagnostic tool as intended.
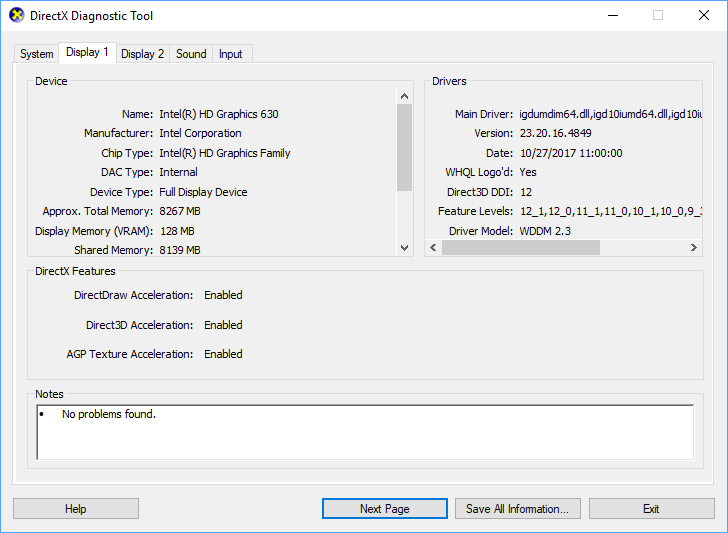
Windows will now begin to show the first page of the DirectX Diagnostic tool, which is set to the System tab.
2. Click on the Next page button to scroll through to the Display 1 tab.
3. Click on the Next page button to scroll through to the Display 2 tab.
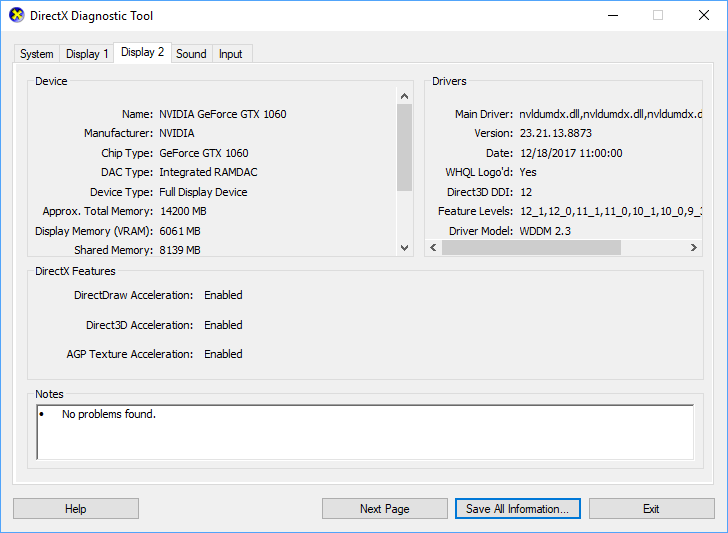
4. Click on the Next page button to scroll through to the Sound tab.
5. Click on the Next page button to scroll through to the Input tab.
How to Generate a Speccy Report
The same people who created Avast develops Speccy. That should help, at least a little bit, in not only trusting the tool but knowing that’s it’s worthwhile. Speccy can share just about anything you could ever want to know about your computer’s hardware and software. With it you can browse through information regarding the operating system, CPU, RAM, motherboard, storage, optical drives, and anything else you might need to know about your computer.
1. Download Speccy from its official download page.
Note: Speccy comes as a free or paid tool. The free version works well but can be bundled with what some people consider to be potentially unwanted programs (or what are known in the industry as PUPs). Be sure to uncheck any installations during the setup phase that you may not want installed on your computer. It’s common for free programs to do this and isn’t a reason for you to not trust the Speccy tool—it’s just how the free software makes money. Each time you install one of the extra programs Speccy makes money from that installation. If you accidentally install programs that you don’t want, you should find it possible to remove them by heading to the Start menu > Settings > Apps > Apps and features, then click on the app you no longer want and then click on the Uninstall option.
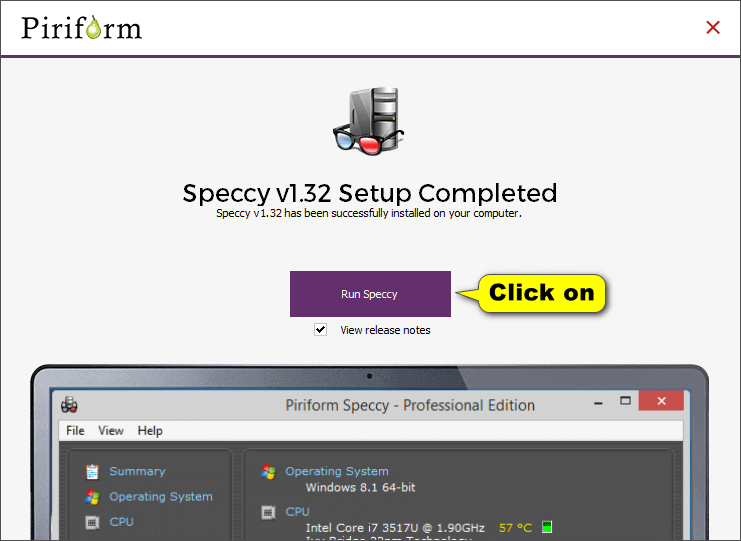
2. Run the file once the download completes and then click on the Install button.
Directly beneath the button to install is where you may want to opt out of installing CCleaner.
3. Click on the button to Run Speccy.
You may wish to opt out of viewing the release notes.
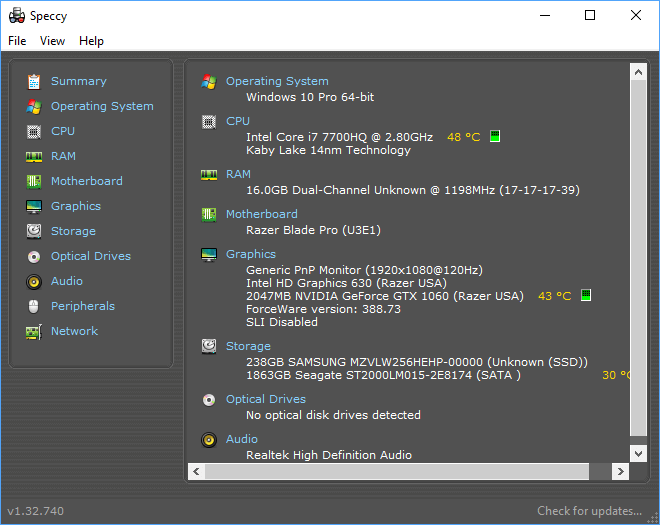
4. The Speccy tool then opens up, and you can use its left pane to select what exactly it is about the computer that you want to check out.
How to Use Device Management Tool
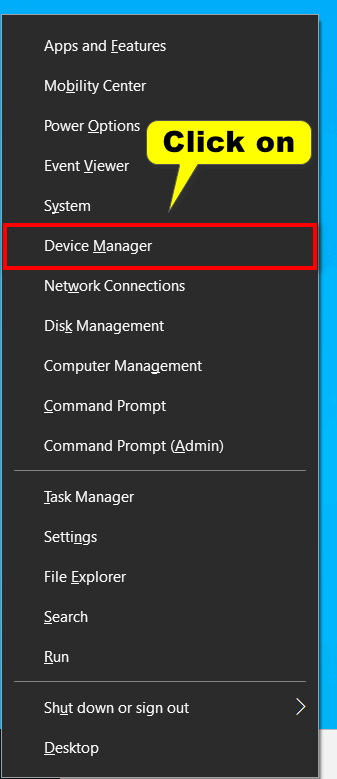
1. Press the Windows logo + X keys and then click on Device Manager from the Win+X Quick Links menu.
Note: If you need to, you can also bring up the Win+X menu by right-clicking on the Start button in the taskbar.
2. From the Device Manager window, you’ll see a list of devices that are connected to the computer, many of which can be expanded again with a single click to reveal subdevices.
For instance, if you were to click on the Bluetooth entry, you’d then see a list of all the different Bluetooth devices that are connected to your computer—any of which you may be having a problem with.
3. You can also right-click on the devices and then select Properties from the context menu.
4. From the device properties dialog box, select the Details tab to bring up more details about the device.
That’s it.
Related Tutorials
- How to Add Remote Desktop Connection in Remote Desktop app on Windows 10 PC
- How to Erase Disk using Diskpart Clean Command in Windows 10
- How to Turn On/Off Allow Pen to Act as a Mouse in Windows 10
- How to Turn On/Off Mouse ClickLock in Windows
- How to Open Elevated Command Prompt in Windows 10
- How to Enable/Disable Automount of New Disks and Drives in Windows
- How to Install Windows 10 Virtual Machine in VirtualBox
- How to Choose Default Operating System to Run at Startup in Windows 10
- How to Change Windows To Go Startup Options in Windows 10
- How to Upgrade Windows 10 Pro to Windows 10 Enterprise


