Last Updated on December 26, 2022 by Mat Diekhake
Windows 10 has a troubleshooter available from the Settings application and the Control Panel. With it, you can let Windows do the hard work by letting it figure out what is wrong with your operating system without you needing to do anything else other than wait for the results.
The troubleshooter not only helps you identify what is wrong but it will also take the matter into its own hands and offer to try to fix the problems for you.
The troubleshooter can help find and fix any of the common issues people have with Windows 10. It won’t necessarily solve them all, but it allows for you to run the troubleshooter for most of the programs that are installed and that make up the important stuff that people need to deal with when using the operating system. For example, you can run the troubleshooter to find and fix problems for blue screens, hardware and devices, internet connections, program compatibility, system maintenance, the Windows Media Player and loads more.
There are a variety of troubleshooters located all around the Windows operating system for different things, but Windows also packages them in one little area for you to check out as well—you’ll see that spot in the Control Panel where you can either view the history of the troubleshooting or view all the different troubleshooters that you can run, right from the same left side pane in the “Troubleshooting” section. The troubleshooting section of the Settings application in Windows 10 is also exceptional for finding and fixing problems, and offers an easy-to-use interface, clearly labeled buttons, as well as the added bonus of multiple headings, making categories easier to find.
It’s also possible to clear the troubleshooting history if you prefer the history section not to show anything relating to the troubleshooting if you prefer not giving that away.
How to Clear Troubleshooting History in Windows 10
You can clear the troubleshooting history from the Control Panel in Windows 10. To do that, first open the Control Panel by typing “Control Panel” into the search field in the taskbar and then clicking on the “Control Panel” desktop application that comes up under the Best match section.
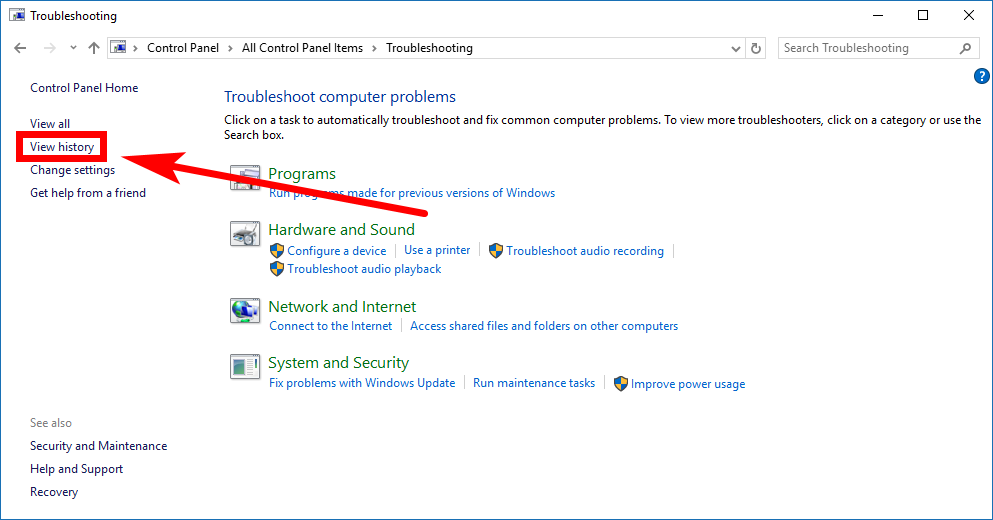
Make sure you are viewing the Control Panel window using the classic view so you can see all of the items and then click on the “Troubleshooting” link. It directs you through to the same window as in the picture below where you’ll then need to click on the “View history” link from its left side pane.
Click on the links at the bottom of the window that says “Include troubleshooters that were run as administrators” so you get the full list of troubleshooters that might have been run showing up in the window.

The quickest and most obvious method for getting rid of all troubleshooter entries is by clicking on the “Clear history” link from the menu in the window.
![]()
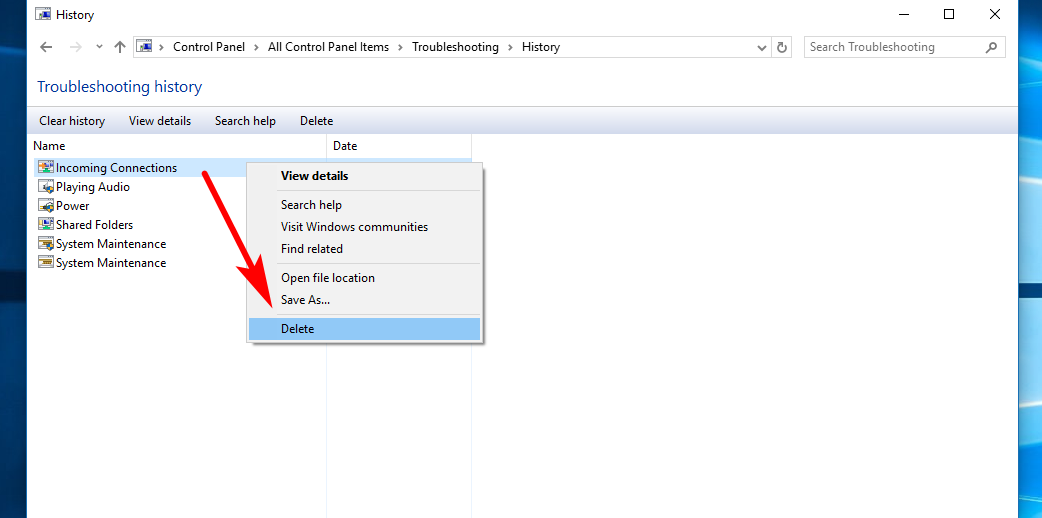
However, if you want only to delete some of them and not all, you can do that by right-clicking on the entries that you want to delete and then clicking on the “Delete” option from the menu.
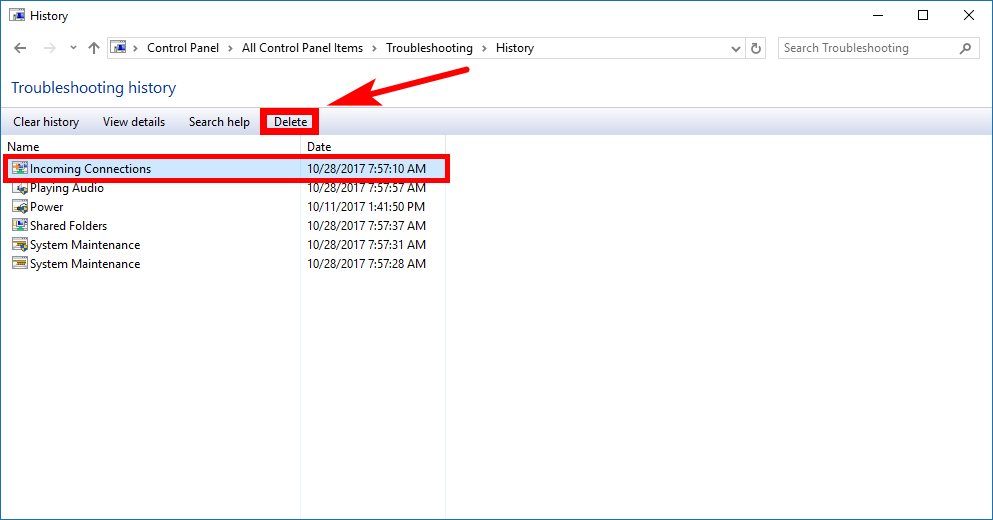
Deleting single troubleshooter entries can also be done by highlighting the entry by clicking on it once and then clicking on the “Delete” link from the menu in the window.
The troubleshooter history is there so you can take a look at what troubleshooting techniques have been applied before and thus it allows you to continue where you left off troubleshooting or can help you with any other issues that might arise. However, sometimes people prefer privacy over anything else. Windows offers the chance to clear the troubleshooting history for those times if you would prefer.
You might also be interested in:
- How to Remove Windows Defender Icon in Windows 10
- How to Run Troubleshooters in Windows 10
- How to View Troubleshooting History and Details in Windows 10
- How to Rename URL for Favorites in Microsoft Edge in Windows 10
You can subscribe to our RSS, follow us on Twitter or like our Facebook page to keep on consuming more tech.