Last Updated on December 26, 2022 by Mat Diekhake
So your Mom’s on the computer upstairs and she is doing something for your Dad’s job because your Dad can’t type and for some reason, she can’t get the printer working. So the next thing she does is press the print button five, six, seven times and counting but nothing is happening.
She then calls you upstairs to try to identify the problem. You click on the print button once, twice, three times, and then you realize what the problem is: she doesn’t have the cable connected. You shake your head at her before realizing you have a pretty big problem on your hands.
Now you’ve got a really long print queue happening and if you don’t cancel you are in lots of trouble and about to waste a lot of ink and paper—plus the time it’s going to take to print.
Don’t worry; there is a way out of this problem. All you need to do is know how to clear the print queue in Windows 10 and then it won’t print the things you asked for it to print by accident.
How to Clear Print Queue in Windows 10
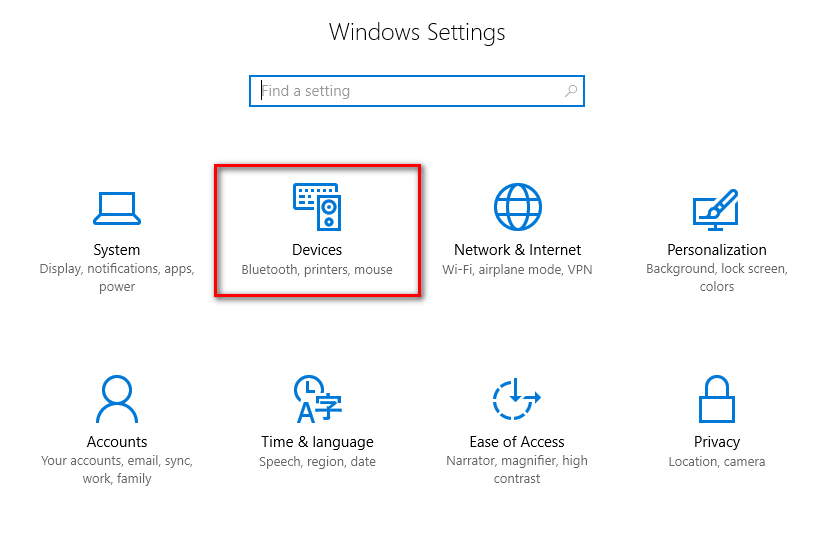
1. Click on the Start menu > Settings icon from the left side pane that Windows 10 offers.
2. Click on the “Devices” button from the Windows settings screen.
 3. Click on the “Printers and Scanners” option from the left side pane.
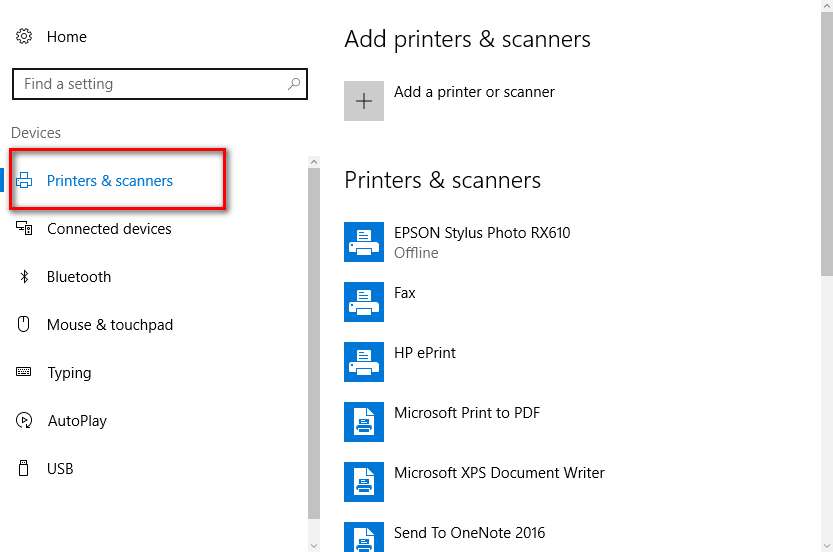
4. You can then see the printer that you have connected to the computer appearing in the right side pane under where it says “Printers and Scanners.”
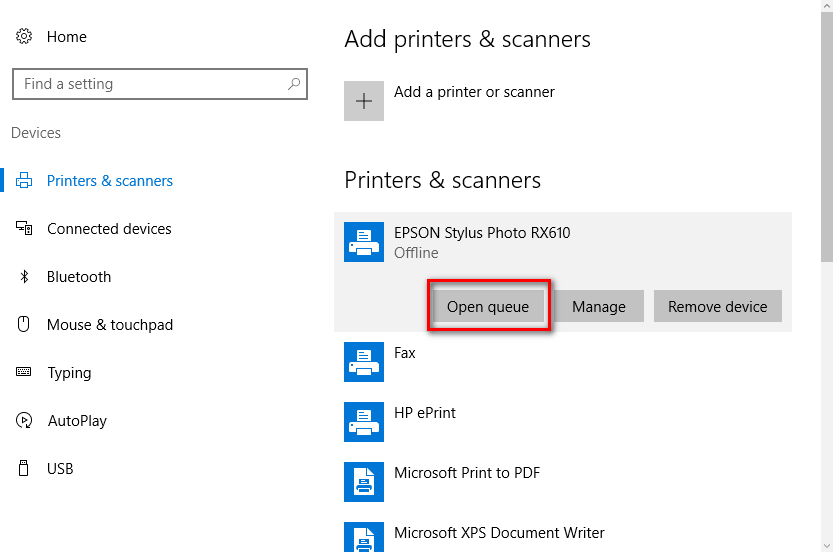
5. Click on the “Open queue” button directly beneath the printer name.
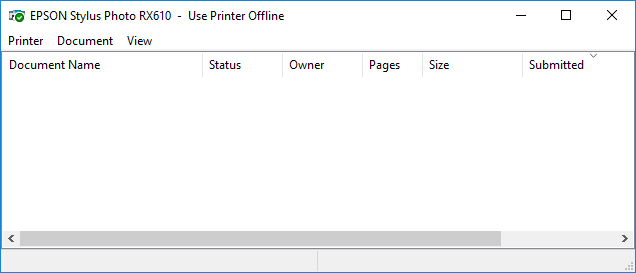
 6. Here is where you will see the printing that is queued. Ours is currently empty because we don’t have anything in the queue.
7. All you need to do when you do see something there is right-click on the name of the file that is in the print queue and then click on the option to cancel it.
Whatever was in the print queue in your Windows 10 operating system will now be canceled, and the printing will not continue from the point of the cancellation. There is no way to start it up again unless you go back to what you wanted to print and select the option to print it again.
It’s worth noting that there are several ways you can stop a document from printing in Windows 10 and the guide above is just one of the ways by using the built-in Windows 10 settings. It’s the way that we think is the easiest but there is nothing wrong with doing one of the other ways either. The second best alternative is probably opening up the “Devices and Printers” app directly from the Search Windows box attached to the taskbar next to the Start menu. Once you open up the Device and Printers, you will see a picture of the printer that you have connected to the computer. You can right-click on the printer icon and then select the “See What’s Printing” option from the menu. Inside you can right-click again to stop the computer from printing anything that is in the queue.

That is everything you need to know about clearing the print queues when running on a version of the Windows 10 operating systems. There have been a couple of Windows 10 updates, including the Windows 10 Anniversary Update, that should all still have the same method as the guide above demonstrates without there being any changes that you need to know about for it to work.
You might also be interested in:
- Download Google Photos App for Windows 10
- How to Play 360-degree VR Video for Free in Windows 10 with GOM Player
- How to Easily Connect to Another PC and Use It in Windows 10 without Needing IP Address
Have something to say? You can contribute to this tech article by leaving a comment below.
February 2, 2020 @ 14:24
OK, this is like BASIC print cancel instruction from the ice ages… but what about when you KEEP TRYING to cancel the print job and it just keep re-appearing and blocking other print jobs from processing? I need like a CACHE CLEANER for the printer function!
I am at work and tried to cancel a print job in the middle of the job (right after printing anyway) and it SAYS “deleting” but it’s not actually clearing. I go over to the printer (largish work printer, and looks at the error log, and it says that the job was canceled… but it’s stuck inside my computer.
THIS TOTALLY SUCKS and microsoft needs an additional tool to clear out “STICKY” print jobs that won’t go away!
December 25, 2019 @ 04:54
This did not work at all. Still get get rid of print jobs, even shutting down and restarting spooler