Last Updated on November 15, 2019 by Mathew Diekhake
Mac is known for its impressive productivity and hassle-cutting tools that help you get more done on your machine in less time. The stock apps built into the Mac are some of the greatest tools I have ever come across. From the Finder app for viewing and managing files to the Photos app for organizing photo libraries, everything has been designed thoughtfully and is really amazing.
Many times what happens is that we want to change the extensions of numerous files on our Macs. Maybe there’s a bunch of image files with the JPEG extension, and you want them to use the JPG extension, and so on. Usually, what a user does is right-click on each of the files he wishes to change the extension of and select Rename and enter the new extension at the end of the file name. It works amazingly, but it is only good when you have a small number of files whose extensions you want to change.
If you happen to have, say a hundred files, it will take a lot of your time to change the extensions of those files, and it really is a painful task. Fortunately, though, as I said earlier, Macs are really time-saving machines, and they do have a method that lets you quickly change the extensions of multiple files at once.
Your Mac allows you to change the extensions of some files at once using the built-in tools and doing that is as easy as renaming a file. If you know how to rename a file, you already know how to bulk change extensions on your machine.
Here’s our guide that shows how to bulk change file extensions on a Mac:
Changing the File Extensions in Bulk on Your Mac
To do the task, you don’t need to download and install a third-party application on your Mac as the app that you need to do the task already exists there – the Finder app.
Here’s how to use the Finder app to get the task done:
Go to the desktop of your Mac so that you are inside a Finder window. You are going to change a Finder setting so you must be in a Finder window to be able to do that.
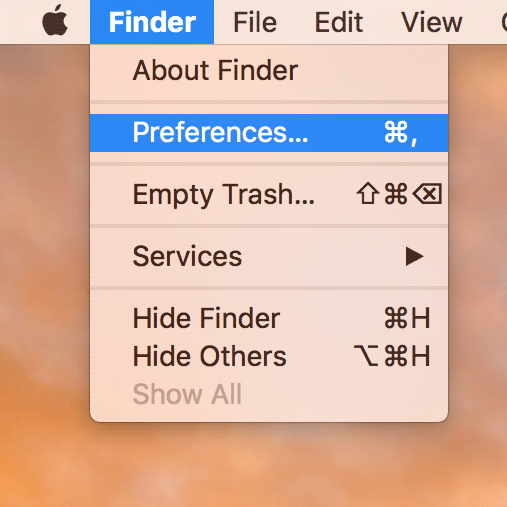
While you are inside a Finder window, click on the “Finder” menu at the top and select the option that says “Preferences.” You get the settings panel for the Finder app from where the settings related to this app can be adjusted.
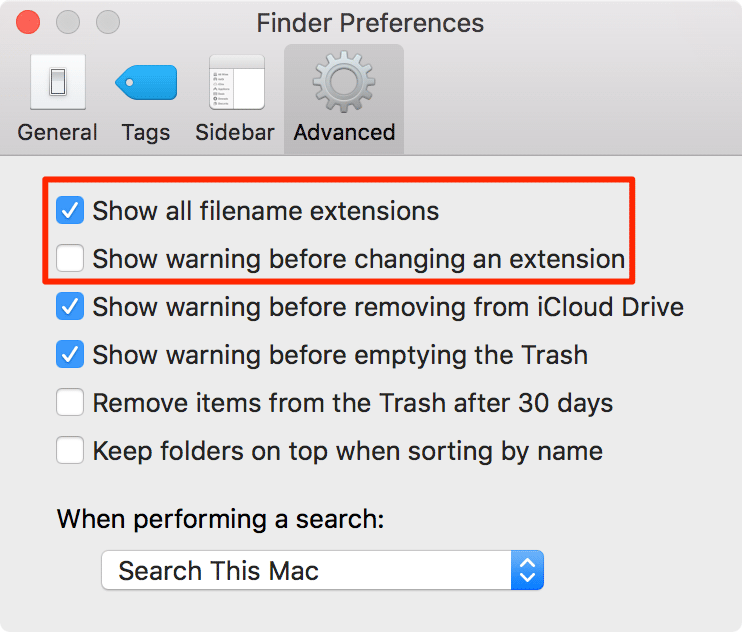
You should land in the General tab when the preferences panel opens. Click on the “Advanced” tab on the top to go to the advanced settings panel as that is where the option we want to change is located.
4. When the Advanced tab launches, you should be able to see a couple of options that you can adjust. What you need to do here is checkmark the box that says “Show all filename extensions” and uncheck the box that says “Show warning before changing an extension.”
The reason you enabled the Show all filename extensions option is that is how you can see the extensions of the files in the Finder app. If the option is disabled, you are not able to see the extensions and the extension changing process becomes complicated for you.
The reason you turned off the Show warning before changing an extension option is that you don’t want to get a prompt asking you if you would really like to modify the extension of a file each time a file’s extension is changed. That way you can save yourself from a hundred prompts that appear when you change the extension of a hundred files on your Mac.
You may now close the preferences panel as your job’s done there.
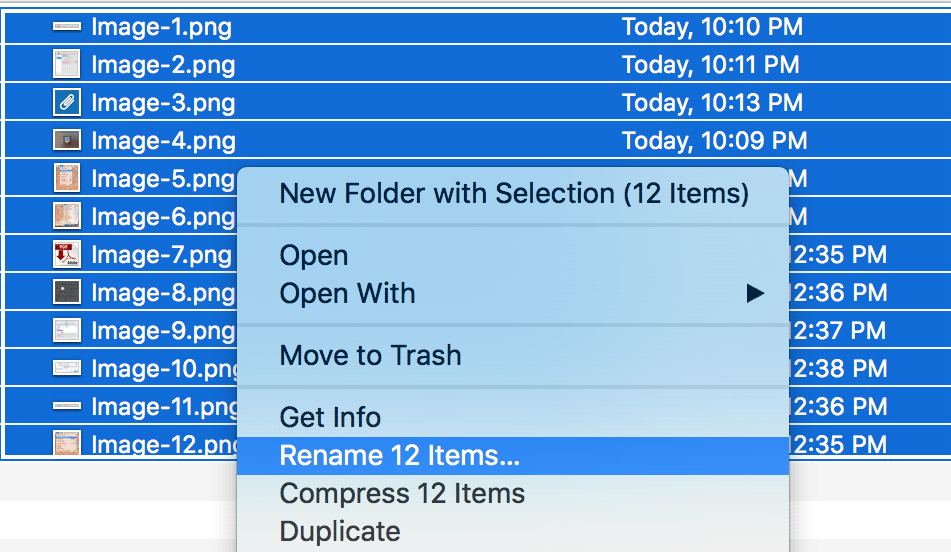
Open the folder that has the files you wish to change the extensions of. Select all of the files in there and right-click on any of them and select “Rename X Items” where X is the number of files you have selected.
When the Rename files box opens, you see a few options that you can change. What you need to do here is select Replace Text from the drop-down menu that appears on the top of the box.
Then, enter the current extension of the selected files in the input box that says “Find.” The Finder app only renames the files that have this extension.
In the “Replace with” input box, enter the new extension you want for these files. Make sure it is a compatible one, or you cannot open these files after the process has finished.
When you are done configuring the options, click on “Rename” to begin the file extension changing process. It should not take too long.
You should now be able to see all the selected files with your new extension.
The selected files should now have your chosen extension as their file format, and you should be able to view them in an appropriate app on your Mac.
When you do this procedure, make sure you only use a compatible extension, or it messes up everything. For instance, never change the DOCX extension to PNG or something like that as the original file is a Microsoft Word file and you are converting it to a PNG image format which is not possible. I hope you get the idea.
You might also be interested in:
- How To Add Subtitles To A Video On Your Mac
- How To Fix The Attachments Not Showing In Mail For Mac
- How To Quickly Export Documents As PDF On Your Mac
- How To Get Rid Of Annoying Push Notifications Popups From Safari And Chrome On A Mac
Have something to say? You can contribute to this tech article by leaving a comment below.


