Last Updated on November 16, 2019 by Mat Diekhake
Domain Name Servers—often abbreviated as DNS—help you resolve web addresses on your computer. When you type in a web address such as Google.com, the domain name servers look for the domain and the IP address associated with it and load it on your computer for you to view the web pages hosted there.
By default, your Mac uses the DNS servers provided by your ISP and loads domains and web pages accordingly. These servers, however, are editable and you can adjust them to however you want. There are also some third-party domain name servers that you can use to load websites on your Mac and how to add those to your Mac is exactly what you are going to learn in the rest of this guide.

There are many benefits of using a third-party DNS server. You might want to use them when you are experiencing issues with your current servers or you can just use them if you feel like your current servers are too slow. The two popular third-party DNS servers are Google DNS and OpenDNS. If you have ever Googled the term third-party DNS servers, you might have seen these appearing in the search results.
Adding one of these two DNS or any other DNS to your Mac is as easy as going into the network preferences panel and adding a new entry. It might sound like an advanced task if you are new to a Mac but believe me, it’s even easier than doing the same on a Windows PC. Here’s how you can go about doing that on your Mac:
Changing the DNS Servers on Your Mac
You are not going to need a third-party app to do the job as you can just get the job done right off the system settings panel.
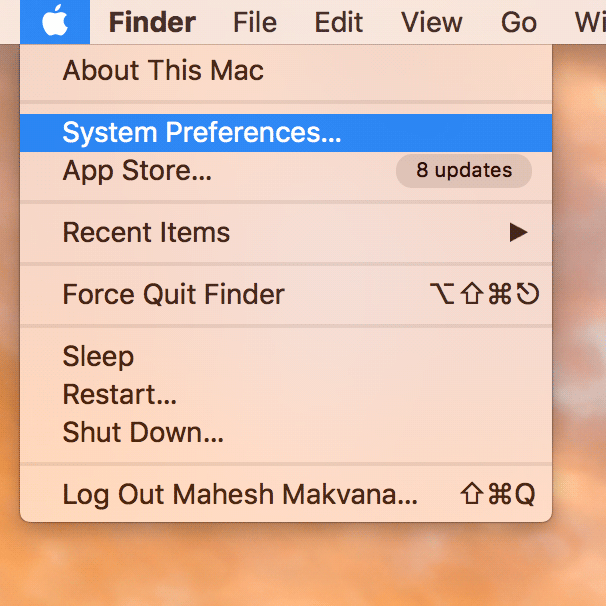
Click on the Apple logo in the top-left corner of your screen and select “System Preferences” to be taken to the panel from where you can manage settings for your Mac. All the settings options are located on that panel.
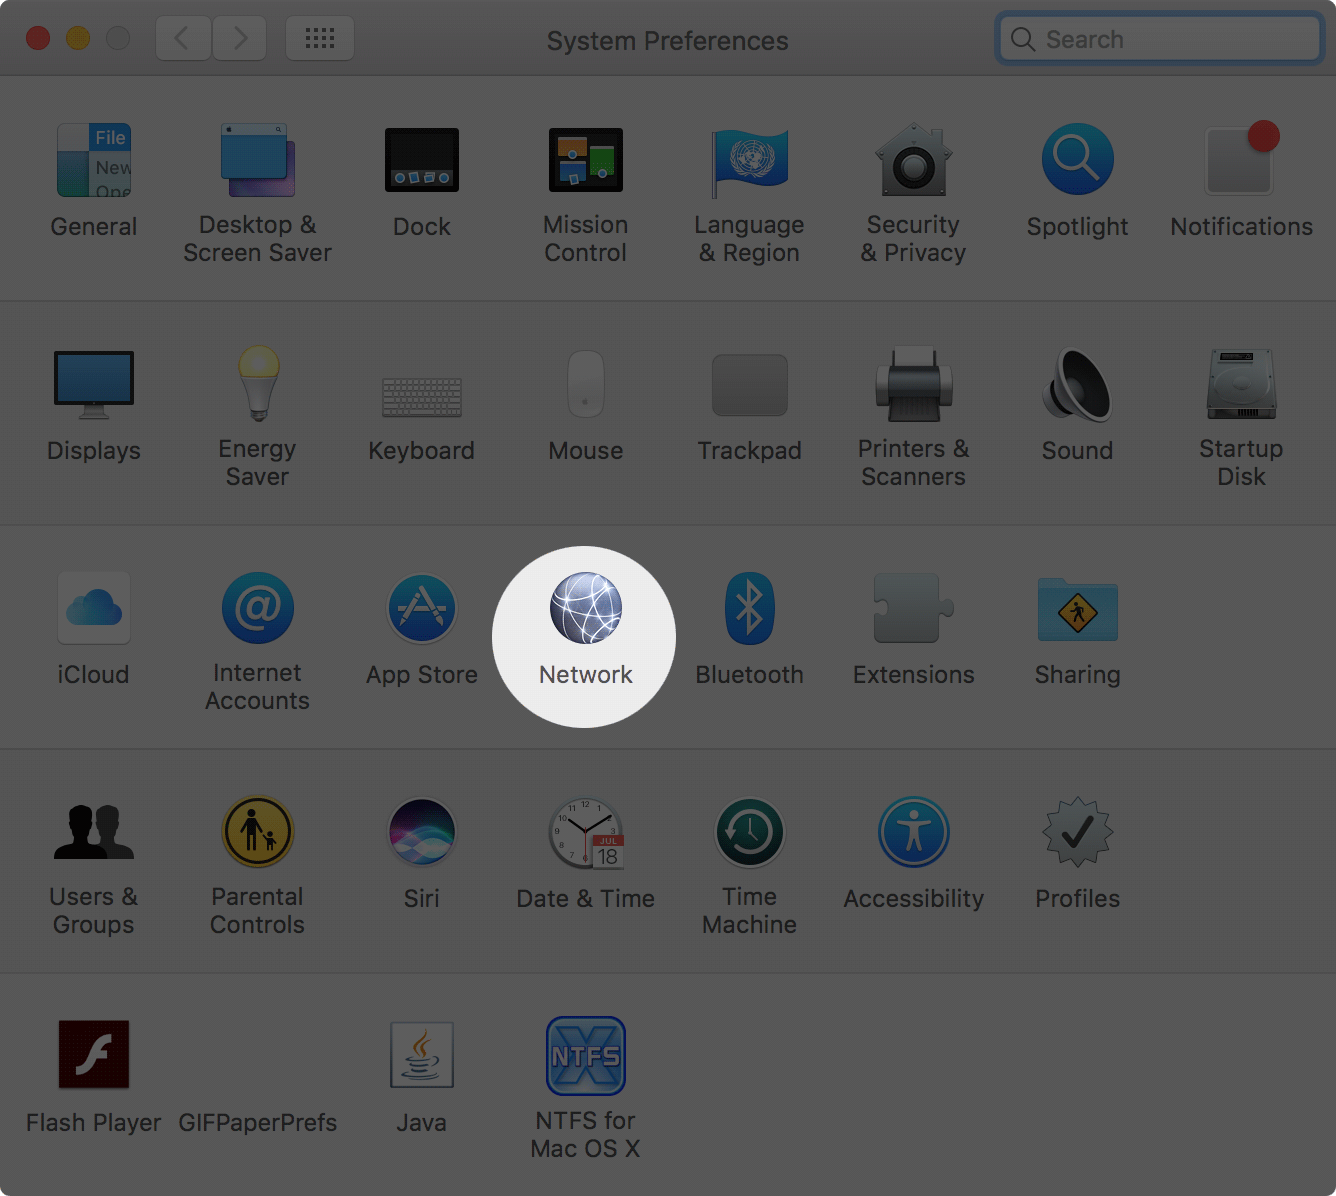
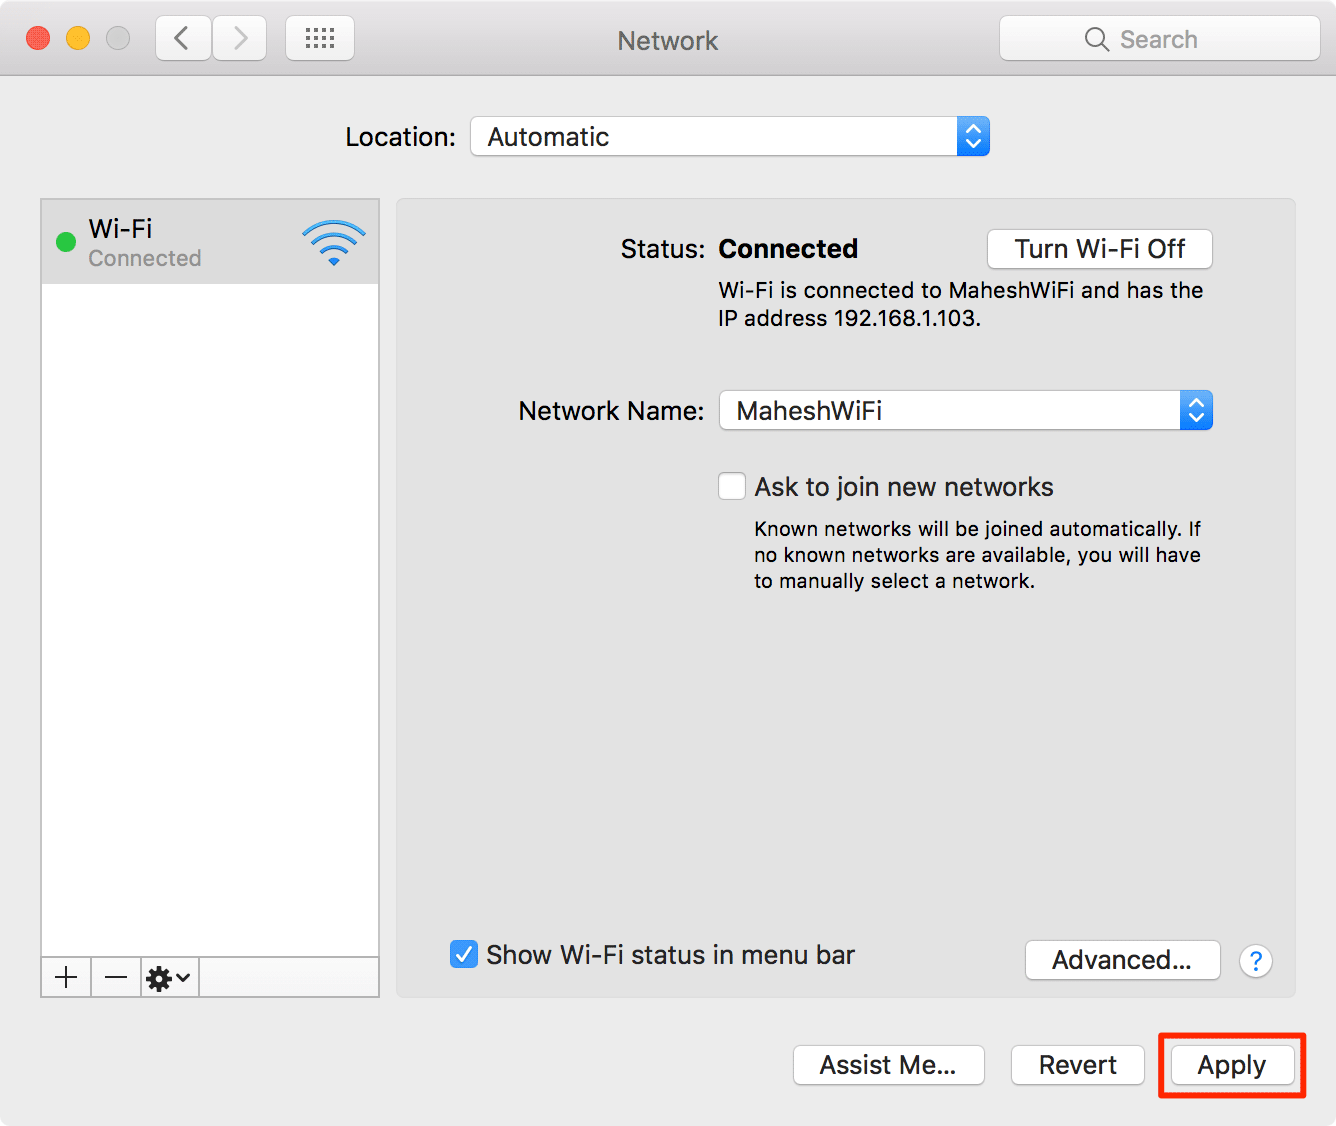
When the system preferences panel opens, you need to find the option named “Network.” That is where the Internet and your local network settings are located. Click on it to reveal the network settings panel.
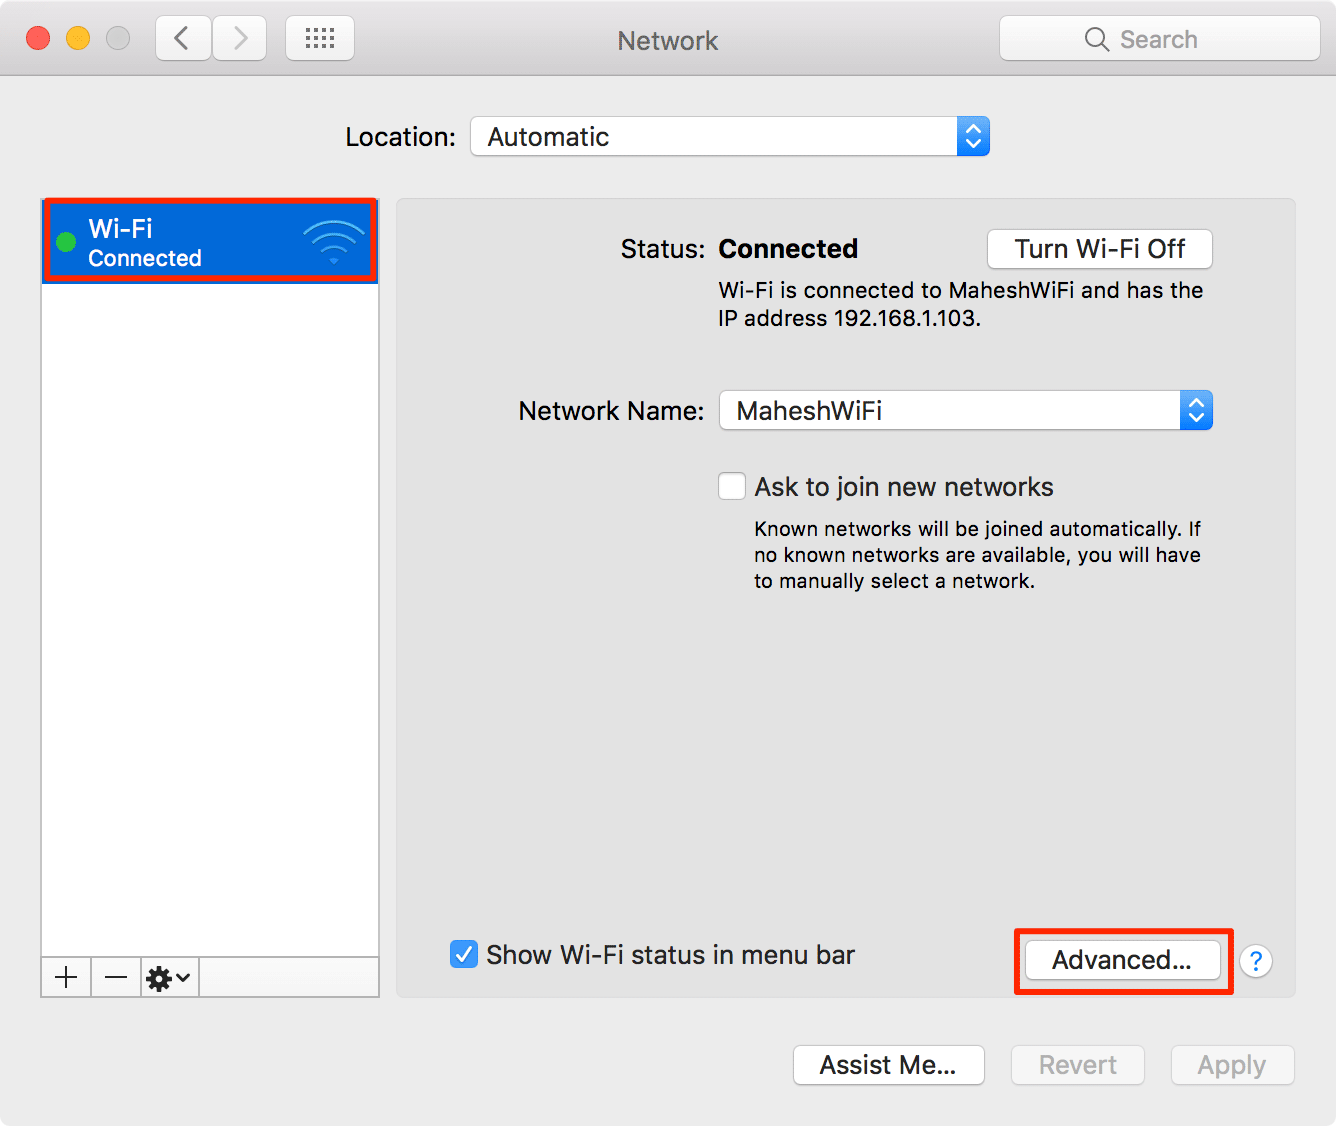
When the network settings panel opens, click on the “Wi-Fi” option in the left panel to select it. Then, click on the button that says “Advanced” in the right panel to open the menu that has advanced network settings. That is the place where the DNS and IP related settings can be adjusted.
When the advanced menu opens, you land in the first tab labeled as Wi-Fi where you can see all of the WiFi networks around you. What you need to do here is click on the tab that says “DNS.” It is located in the top tab bar and clicking on it should open it.

When the DNS panel opens, you should be able to see all of the DNS servers that exist on your Mac. The left panel is where you can see them (ignore the right panel as it is not for our use).
If you have never added any DNS servers to your Mac, the list should be empty. To add a new one, click on the “plus icon” in the bottom of the DNS list and it lets you add a new DNS server for your network.
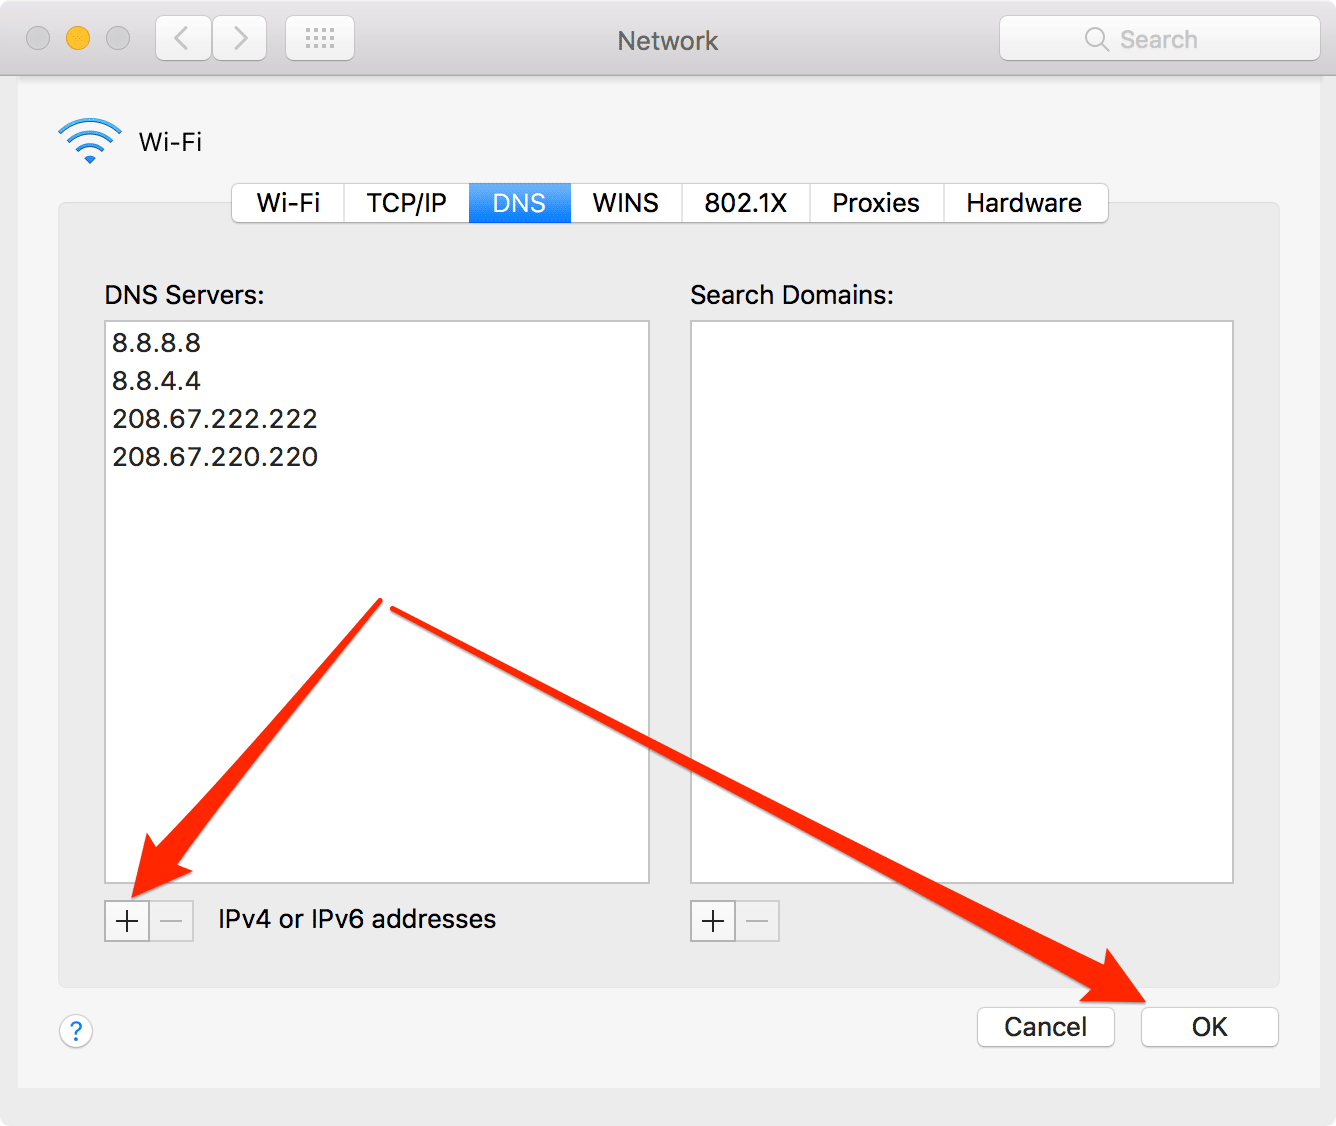
When you hit the plus sign, you can type in the IP address of the DNS server you want to add. Well, here is where you can choose what servers you would like to add. You can just Google for Google DNS or OpenDNS, and you should be able to see their IP addresses that you can then input here on this panel.
Usually, you have two servers, and you need to click on the plus sign again when you have added one DNS server to the list. That way, you will have two servers in the list at the end.
When you are done adding the servers, click on the button that says “OK” in the bottom-right screen to save the settings.
The DNS screen goes away, and you are back to the network settings panel. Click on “Apply” on this screen to apply the settings you just adjusted.
Once the settings have been applied, you can close the network settings panel.
The new DNS servers should now be up and running on your Mac, and you can open a browser such as Chrome and load up a website to see if it solved any issue you had been facing before or if there have been any improvements in the speed of resolving a domain name.
Should you ever wish to get back to your ISP’s DNS servers, just select the servers you added to the list and click on the minus sign in option that is available at the bottom, and they are removed from your Mac.
You might also be interested in:
- How To Get Rid Of Annoying Push Notifications Popups From Safari And Chrome On A Mac
- How To Quickly Export Documents As PDF On Your Mac
- How To Change File Extensions In Bulk On Your Mac
- How To Fix The Attachments Not Showing In Mail For Mac
Have something to say? You can contribute to this tech article by leaving a comment below.