Last Updated on December 26, 2022 by Mathew Diekhake
Up until recently, if you wanted to free up more disk space on Windows 10, you needed to do it the old fashioned way by right-clicking on the Drive and then going into the Properties dialogue box. It’s sweet of Windows developers to have kept that feature relatively close to what it has always been like for as long as I can remember Windows—but it’s still lots of manual work that we could all do without.
Windows agrees because there is now another way you can do it and the new way doesn’t require you having to do anything at all.
Starting from the Windows 10 Creators Update with build number 15014, there is now a new way to clean up disk space in Windows 10. All you have to do is make sure that the toggle switch is turned on from the Windows Settings and it does it all for you automatically now.
Automatically free up disk space in Windows 10
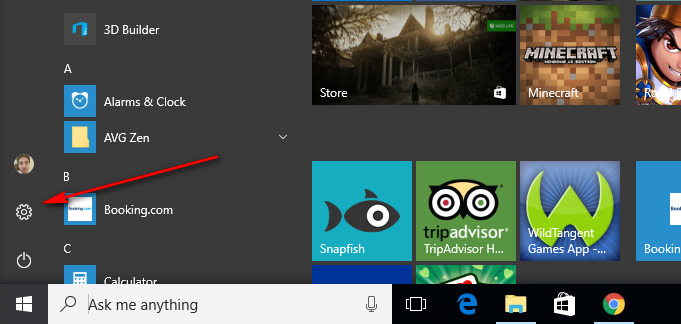
Click on the “Start menu” from the taskbar (Windows icon.)
Click on the “Settings” gear icon from the left side pane.
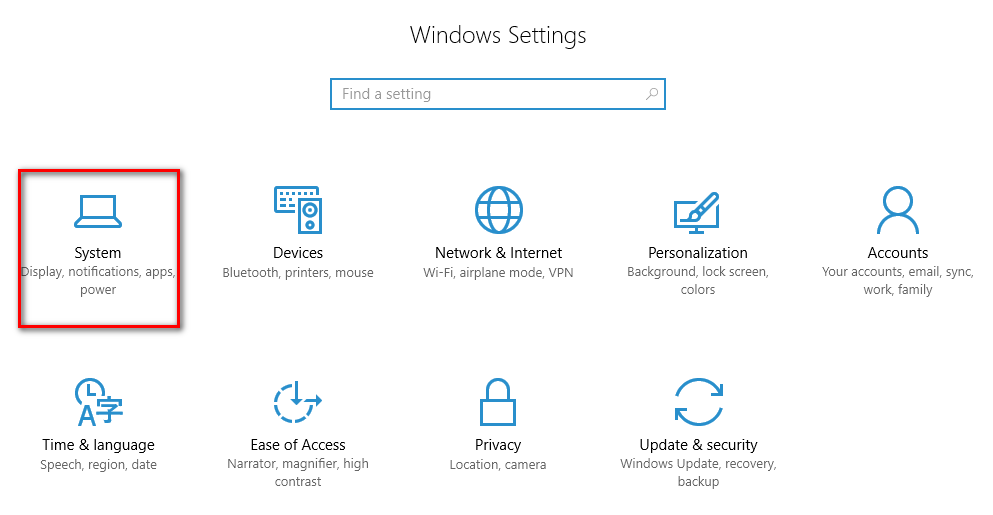
Click on the “System” button from the “Windows Settings” hub.
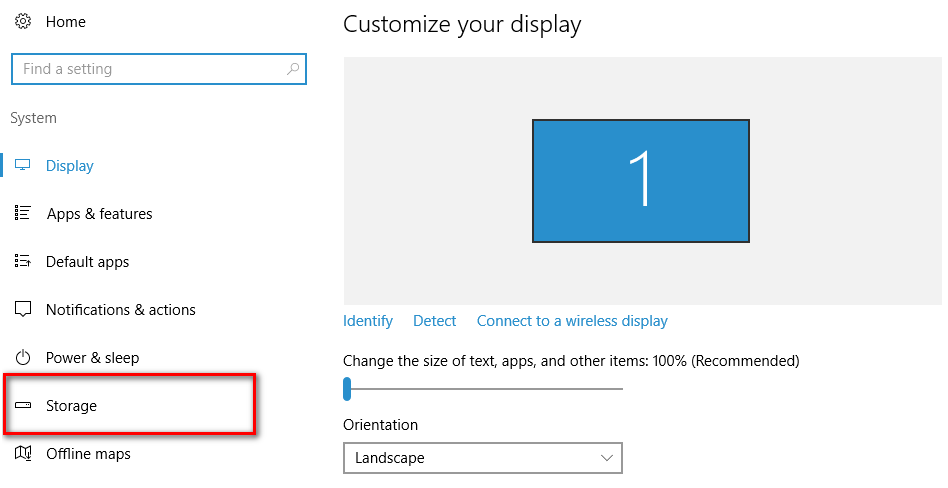
Click on the “Storage” option from the menu.
You then get to see how much storage space you have left on the computer. That information is relevant to you in this exercise because cleaning up the disk space, of course, is going to give you more storage space. You can keep on eye on how much you have left at the moment if you are interested in seeing the difference after Windows 10 cleans up the disk.
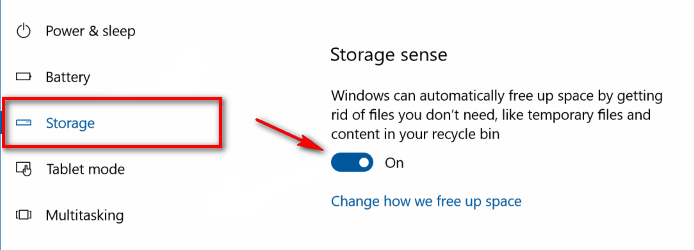
Directly beneath the storage statistics is a new feature called “Storage sense” and it is what you need to turn on by toggling the switch over, so it says “On” and is now blue in color.
By default, this new feature called “Storage sense” is turned off (just in case people do not want to be deleting the data that is involved in cleaning up the disk space.) Just because it is turned off by default does not mean you should be alarmed. None of your valuable data that you want to keep is getting deleted with you free up disk space.
Once the switch is turned on, click on the link below it called “Change how we free up space.”
Now look where it shows you the “Change how we free up space” heading further down the page and make your selections out of the two options that are available. If you want as much disk pace cleared as possible, you should toggle both switches to the on position for “Delete temporary files that my apps are not using” and “Delete files that have been in the recycling bin for over 30 days.”
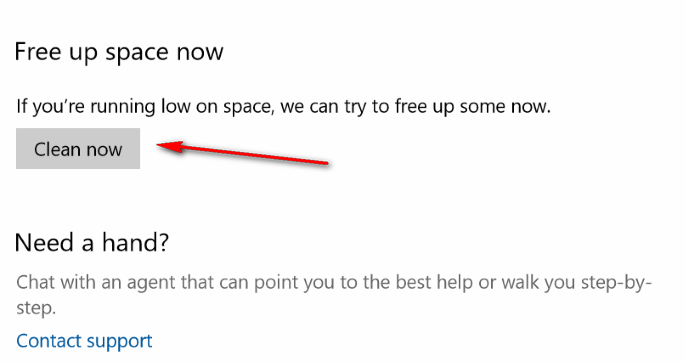
By having the options given above turned on, it will now automatically do everything that Windows 10 can do to try to free up as much disk space in Windows 10 as possible. However, if you are running low on space right now and don’t want to wait for the automatic freeing up of space to happen, you can click on the “Clean now” button available under the “Free up space now” heading to clean the space today.
Here’s how:
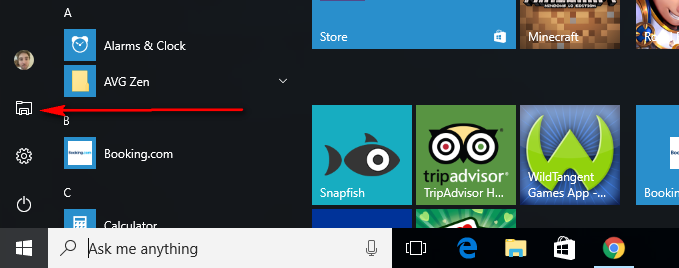
Click on the “Start” menu from the bottom left-hand side of the taskbar again.
Click on the “File Explorer” icon from the Start menu.
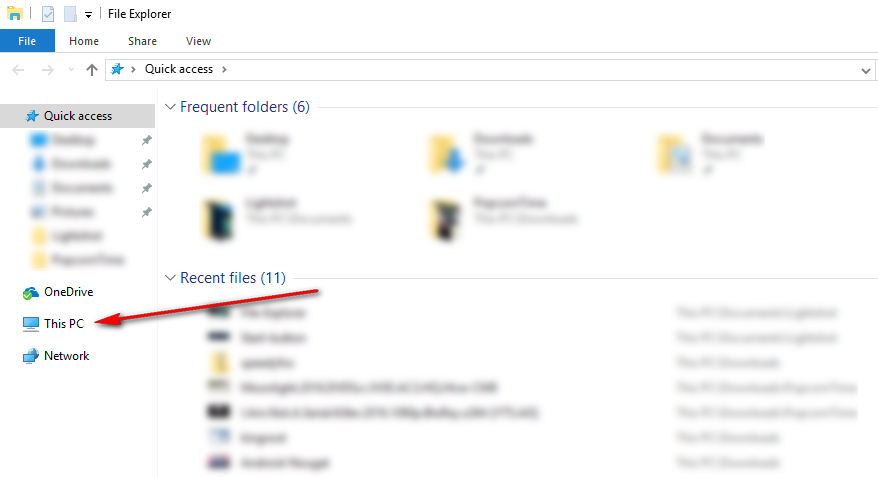
Click on the “This PC” link given in the left side pane.
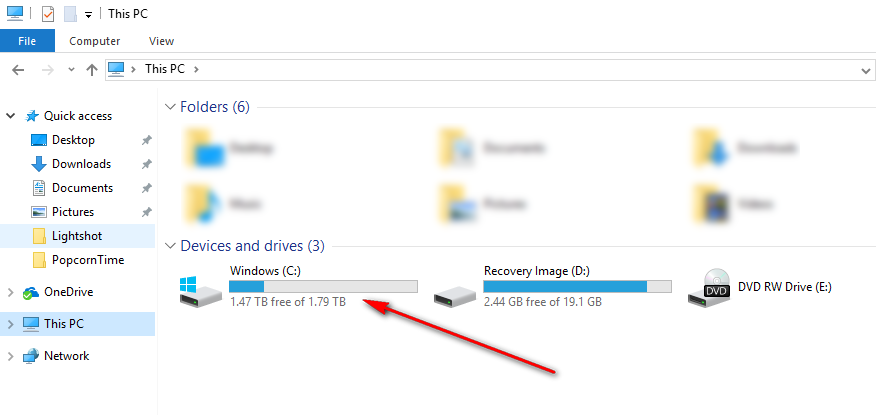
Right-click the mouse or touchpad on the “Windows (C:)” drive to bring up another menu.
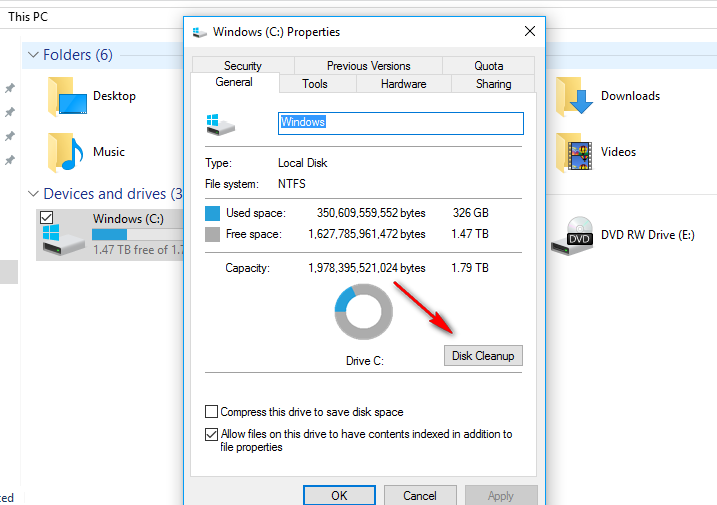
Click on the “Properties” option from the menu to open the properties that are related to that drive that you clicked on.
Keep it on the “General” tab and click on the “Disk Cleanup” button to clean up the disk space in Windows 10 that way.
You now should have no problem automatically cleaning up disk space in Windows 10 and using the Disk Cleanup feature that Windows is so famous for having to help you free up disk space that way instead. By freeing up more storage space, you are allowing your hardware to run better, and thus the computer should last longer. Additionally, you should find the performance is better, especially if you were running low on space when you started.
You might also be interested in:
- How to Clear the Thumbnail Cache in Windows 10
- How to Create a Desktop Shortcut to a Website in Windows 10
- How to Create Desktop Shortcuts to Programs in Windows 10
- How to Get a Full Battery Notification in Windows 10
- How to Use the On-Screen Keyboard in Windows 10
Have something to say? You can contribute to this tech article by leaving a comment below.


