Last Updated on January 12, 2019 by Mathew Diekhake
Trash is to Mac what Recycle Bin is to Windows. Trash on a Mac is a place where the files you have deleted from your Mac are kept. These files have been removed from your Mac, but they continue to exist in the Trash to give you the last chance to put them back on your Mac in case you accidentally deleted them off your Mac.
Eventually, the Trash gets filled with a number of files that you delete from your Mac. And if you do not pay attention to it, it will just grow and become larger. So, you need to manually empty it every once in a while to ensure it’s clean and you get the memory space back.
If you forget to empty the Trash regularly, then you can use the auto empty trash feature on your Mac that automatically empties the Trash for you after a certain number of days have passed.
Here’s how to do that:
Automatically Emptying the Trash on a Mac
First of all, make sure you are inside a Finder window on your Mac. If you are on your desktop or you are inside a folder using the Finder app, then you are already inside a Finder window, and you should see the Finder options on the top of your screen.
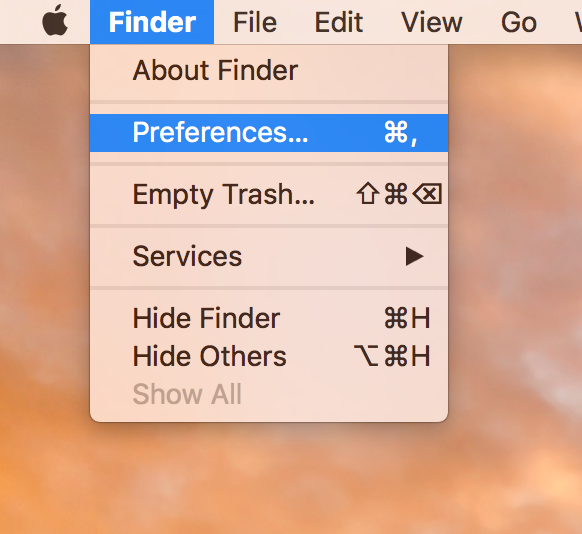
Once you have gotten yourself inside a Finder window if you were not already, click on the “Finder” menu given at the top menu bar and then find and select the option that says “Preferences.” What it will do is it will take you to the preferences panel from where you can manage Finder as well as Trash settings on your Mac.
Trash is a part of Finder, and thus you will see its options in the Finder preferences panel on your Mac.
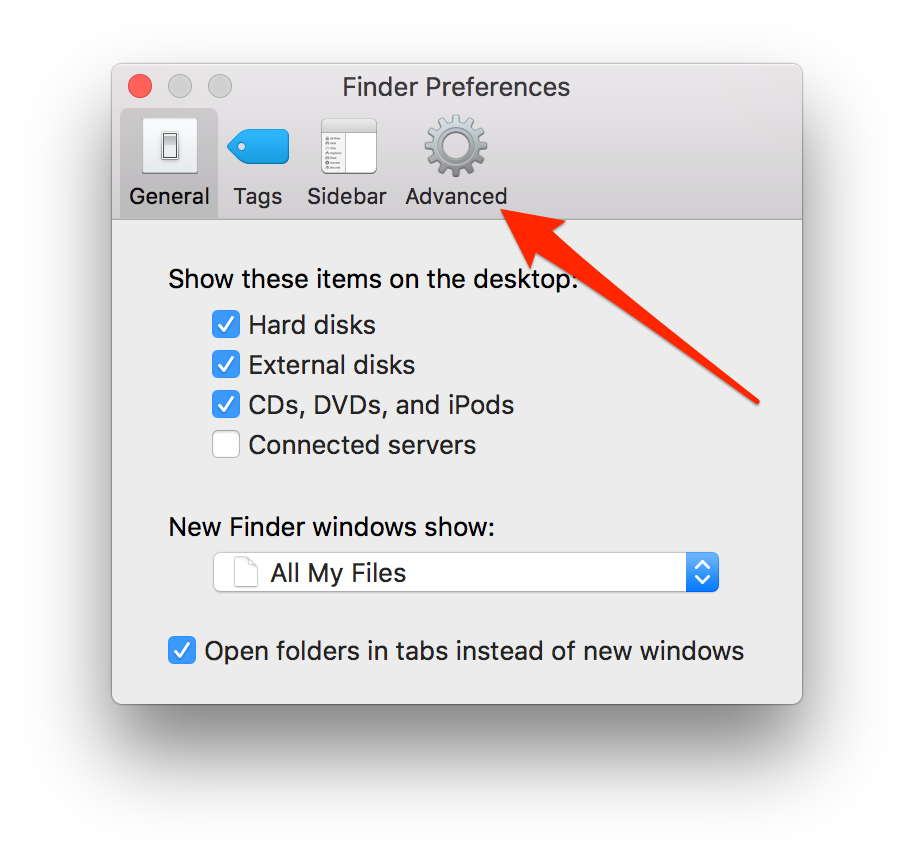
When the Finder preferences panel opens, you will land in the first tab that says General. That is where the general setting options for the Finder are located, but that is not where you should be. You are supposed to be inside the tab that says “Advanced” so click on it on the top bar, and you will be taken to that tab. Trash options exist there.
When the Advanced tab opens in the Finder preferences panel, you will see about five options on your screen. From the given options, the one that you are supposed to enable is called “Remove items from the Trash after 30 days”. Checkmark the box for this option and the option will be enabled on your Mac.
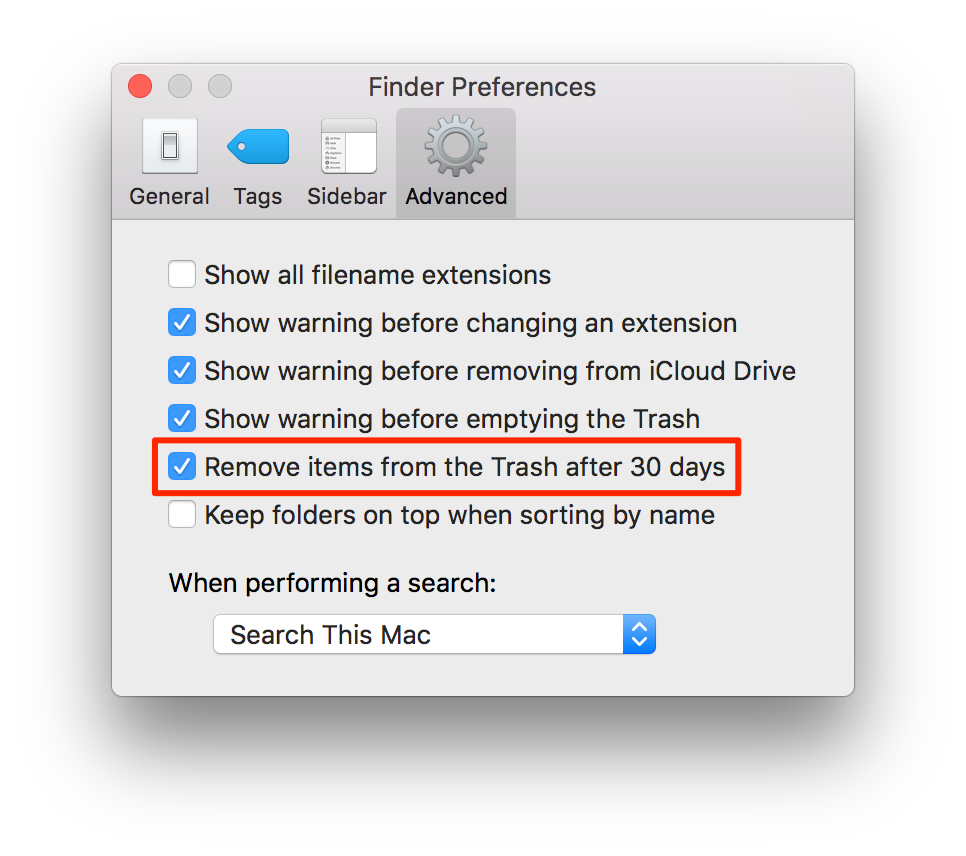
Once you have checkmarked the box and the feature has been enabled, exit out of the preferences panel as you no longer need it.
From now on, the files that you delete from your Mac will remain in Trash only for a period of 30 days. After 30 days have passed, the files will be permanently deleted from the Trash, and you will never ever be able to recover them.
In a case when you wish to permanently delete the files without keeping them in Trash for the duration of 30 days, then you can do that as well. Manually emptying the trash can be done regardless of anything. You can do that by simply opening the Trash and clicking on the “Empty” button to empty it.
If you have enabled the auto empty trash feature and it made you lose some files, and you simply wish to disable it, then doing so is as easy as it was enabling it. Here’s how:
Disabling Auto Empty Trash on a Mac
Get insider a Finder window on your Mac, preferably go to your desktop so that you are inside a Finder window.
Click on the “Finder” menu at the top and then select “Preferences.” Then, select the “Advanced” tab and deselect the box that says “Remove items from the Trash after 30 days”.
That’s all. Files from Trash will not be automatically deleted after 30 days have passed.
So, that was how you could make Trash empty itself after 30 days of file deletion in case you forget to empty it at regular intervals.
Related Tutorials
- How To Find All The Commands You Can Run From Terminal On Your Mac
- How To Set A Default Browser And A Default Email Client On Your Mac
- How To Update Apps From The Command Line On Your Mac
- How To Remove Settings Icons From The Preferences Panel On A Mac
- How To Run A Terminal Command Using A Keyboard Shortcut On Your Mac