Last Updated on December 26, 2022 by Mat Diekhake
Windows 10 has a troubleshooter available from the Settings application and the Control Panel. With it, you can let Windows do the hard work by letting it figure out what is wrong with your operating system without you needing to do anything else other than wait for the results.
The troubleshooter not only helps you identify what is wrong but it will also take the matter into its own hands and offer to try to fix the problems for you.
When you run the troubleshooter it can can help find and fix any of the common issues people have with Windows 10. It won’t necessarily solve them all, but it allows for you to run the troubleshooter for most of the programs that are installed and that make up the important stuff that people need to deal with when using the operating system. For example, you can run the troubleshooter to find and fix problems for blue screens, hardware and devices, internet connections, program compatibility, system maintenance, the Windows Media Player and loads more.
There are a variety of troubleshooters located all around the Windows operating system for different things, but Windows also packages them in one little area for you to check out as well—you’ll see that spot in the Control Panel where you can either view the history of the troubleshooting or view all the different troubleshooters that you can run, right from the same left side pane in the “Troubleshooting” section. The troubleshooting section of the Settings application in Windows 10 is also exceptional for finding and fixing problems, and offers an easy-to-use interface, clearly labeled buttons, as well as the added bonus of multiple headings, making categories easier to find.
It’s also possible to view the troubleshooting history so you can come back at a later time and take a look and what issues were resolve or what problems still need fixing.
How to Find Troubleshooting History and Details in Windows 10
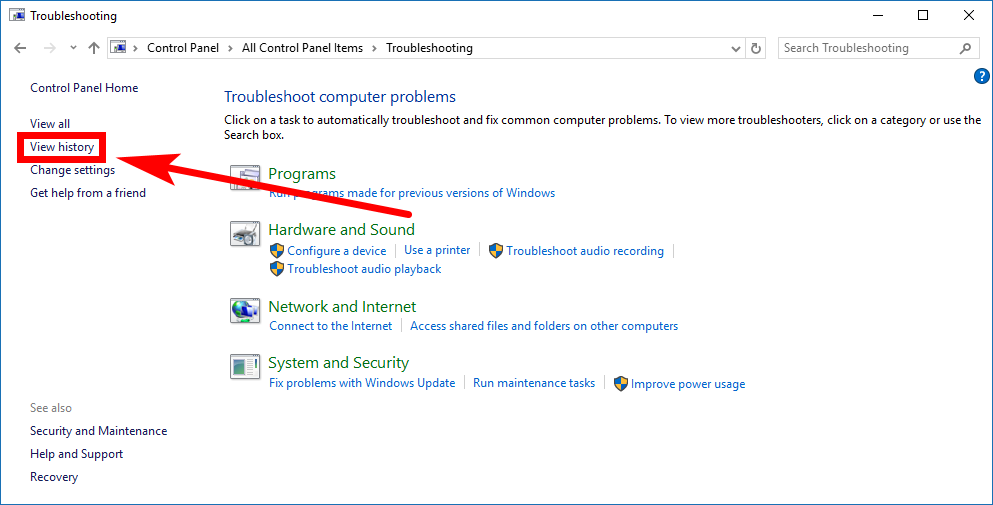
You can view the troubleshooting history and details in Windows 10 by using the Control Panel. Open the Control Panel so that it id showing its classic view with the smaller icons and then click on the “Troubleshooting” link from the list of all Control Panel items.
You’ll then see a link in the left pane that says “View history” that you need to click on next.
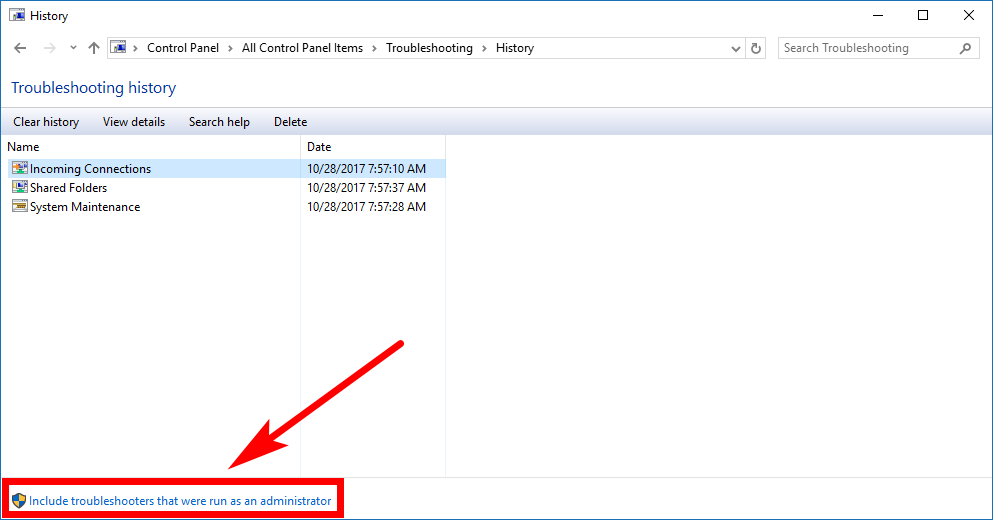
All the troubleshooting history is now listed in the “Name” column. The only exception is if you were not logged in as an administrator when you did the troubleshooting, to begin with, in which case you then would need to click on the “Include troubleshooters that were run as an administrator” also.
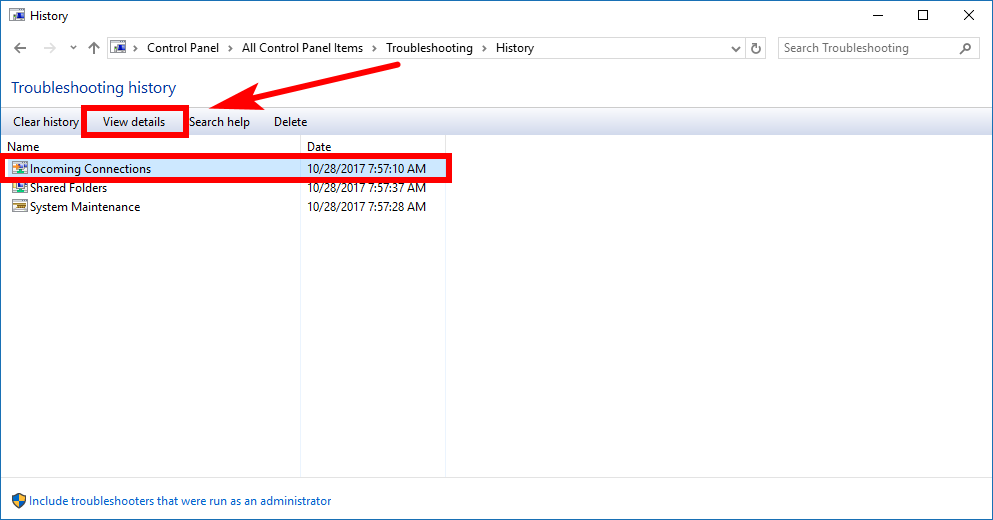
There are three ways you can view the history for each of the items in the troubleshooting history. You can either double-click on the item, right-click on the item and then click “View details” or just highlight the item by clicking on it once and then click on the “View details” link like shown in the picture below.
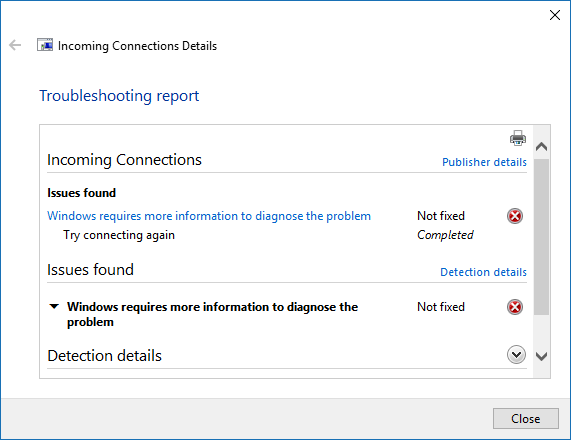
Whatever way you choose to view the details, you’ll get the same troubleshooting report popping up on your computer’s display. It’ll let you know about the issues found, and you might even find additional links if Windows feels the issue still requires more attention. As the link shows in the picture below, you might also need to give Windows more information about the issue so it can help resolve it as well.
You can use the Settings application and the Control Panel to find and fix problems with the troubleshooter, but it’s only the Control Panel in Windows 10 that offers a place to view the history and check out what users have been doing with previous problems. Anyone who has experience using Windows 7 and Windows 8 editions will be pretty familiar with viewing the troubleshooting details from the Control Panel if they have done it before because not much has changed. The only slight change is the way in which you need to get there in Windows 7 and 8—by navigating to Control Panel > System and Security > Troubleshoot Common Computer Problems—has now been simplified to just heading to the list of Control Panel items and then clicking on “Troubleshoot.”
You might also be interested in:
- How to Run Troubleshooters in Windows 10
- How to Rename URL for Favorites in Microsoft Edge in Windows 10
- How to Check if Someone is Using My Wireless Network (WiFi)?
- How to Boot to Advanced Startup Options in Windows 10
You can subscribe to our RSS, follow us on Twitter or like our Facebook page to keep on consuming more tech.


