Last Updated on April 12, 2017 by Mat Diekhake
The Samsung Galaxy S3 handsets are getting old, but the phone carriers around the United States are still doing a decent job of keeping them up to date. Today it’s the Big Red’s turn to dish out a new firmware build namely I535VRUDNE to devices.
Verizon released this software update OTA starting as of yesterday and owners can continually check for a system notification alerting them it is ready or check manually the usual way by navigating to Settings > About Device.
Inside the new build you will find improvements with the Samsung keyboard, new Emoji menu, the camera app available from the lock screen; access it by swiping up and don’t try to tap the key. There’s new Media Player cover art for artists when listening to music, wireless printing, Backup Assistant+ Media gets cloud support. Furthermore, there’s new widgets for Google+ User Locations, S Bookmark 1×1, S Suggest and Samsung Music 4×1. Moreover, we see removals of the Music Hub and the Samsung Hub.
Users of this smartphone were previously stuck on jelly Bean. Everyone will notice huge performance improvements, the OS is much faster, browsing happens with more fluency and the overall feel for the OS is extra smooth. In addition to this, the battery performance is top-notch compared to the old Jelly Bean version, so the operating system can help with this and we don’t always need to rely on changing the battery pack for extra battery life.
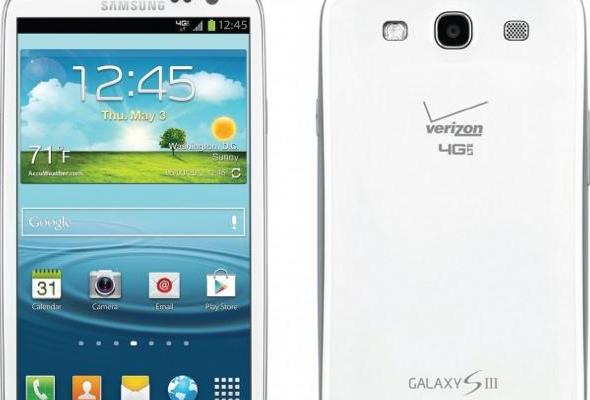
The Samsung Galaxy SIII came out on the 22nd of May 2012 and started off running Android 4.04 ice Cream Sandwich for a TouchWiz UX UI. From there it saw the following updates: Android 4.1.1, 4.1.2 Jelly Bean and 4.3 Jelly Bean. It failed to make any noteworthy moves from there. Suffice to say today is a big day and as the days turn into weeks everybody who owns one of these handsets will be treated to a real surprise and almost a complete rebirth of the phone.
We are starting to hear the Developer Preview of Android L noise and that means it won’t be far until the chocolate Kitkat build is a thing of the past. I wouldn’t hold my hopes too high if I was the owner of one of these handsets in regards to getting the next generation of software beyond the Kitkat, but this is something to be excited about now nonetheless.
Checklist
The guide we use today comes with instructions for Odin. Odin is made for computers running with Windows Xp, Windows Vista, Windows 7 and 8; however, it is not made for Mac OS X, Linux, Ubuntu or any other kernel; therefore, you will have to find a friend who owns WIndows if you don’t or look for an alternate method of flashing firmware files with a different tool. If you go down that path it isn’t easy, but if you bring up some old XDA Developer threads you will find a solution (hint, hint).
The S3 gives out lots of features including USB 2.0, microUSB connections, USB host and USB charging, The latter is important because it says to use that it will start charging the battery all by itself after we plug it into the computer’s system unit with the wire. We do the guide plugged into the PC the time, so as long as you have the USB charging working, there isn’t a problem. However, some of you will not have it working and you should charge the battery accordingly to make sure it doesn’t turn off before the guide is finished. Failing to do so can result in bricking of devices even when using official tools made by the real Samsung Developers.
As a refresher the battery is a 2100 mAh capacity that lasts for 22.5 hours talk time and 34.6 days standby time.
Make sure you have the USB Debugging Mode enabled from the Develop Options menu. Even though the handset is aging rapidly it still gets the same Develop Options menu from the Jelly Bean-based OS.
The one point you shouldn’t skip over is about backing up the device. There’s many ways this is done and if you are already a regular backup kind of person then that’s great and you can follow your preferred method. However, if you are somebody who doesn’t I’ll give you a few pointers that should hopefully help you out. The first problem people have is that backing up everything isn’t easy to do at the once place. For example, humanities like to sync the contacts with their Google account, or with Samsung Kies, but if you want to backup the market apps you can’t do it this way. That’s why I recommend checking out Helium available from Google Play because it offers an easy way to backup the app as well as extra data. Any extra data can then be stored either in the internal memory or the external memory. For internal memory the S3 comes with 32 GB before some of that space is used via the system app and programs that inevitably take up space. If people run out of that space they can buy another memory card and fit it into the back of the smartphone in the slot. These cards come in microSD, microSDHC and microSDXC variants and store up to 64 GB worth of data each. If you want to keep buying more cards the space is limitless.
How To Install I535VRUDNE Android 4.4.2 Kitkat On The Samsung Galaxy S3 For Verizon Subscribers
1. Download the I535VRUDNE zip file here.
– place it on the desktop if you want to delete the file after today.
– place it on the C: Drive if you intend on keeping it long-term.
2. Download the fresh Odin v3.09 here.
– the link is on the page.
– after the download is complete, run it so it’s already open on the desktop.
Tip: If you ever need to unzip a zip file, but can’t try to use WinZip or 7Zip. I prefer 7Zip because it is free thanks to the open source nature of the program. The WIndows version only comes as a free trial and after that period finishes it will request money.
3. Start with the smartphone fully off and waiting.
4. Boot the smartphone into DownLoad Mode.
– press Volume Down + Power + Home at the same time.
– do not let go until the Android animation shows on the screen.
5. Find the USB wire.
– check the phone charger.
6. Plug the USB wire into the smartphone and the PC system unit.
7. Look for the “added” message in Odin and watch the ID: COM port change to the color blue.
8. Click the mouse where it says AP.
– sometimes it displays PDA but the newest version tends to say AP.
9. Upload the tar.md5 file to the location.
– wait for the file extension to display before continuing.
Tip: If we didn’t get to this point successfully try re-installing the up to date Samsung Galaxy USB Drivers.
10. Do not touch any keys or buttons on either device until it finishes.
– it will tell us a “pass” message when it works and the ID: COM port will change to look favorable.
11. Close down the Odin app and safely remove the hardware from the computer by clicking the icon in the system tray.
– now stop the USB Mass Storage device.