Last Updated on December 24, 2022 by Mathew Diekhake
Sometimes the Windows operating system can give out the “Access is denied” message when you’re trying to change a registry key. This message can be confusing, especially if you’re already signed in as an administrator.
If you see access is denied, it means Windows is choosing to protect that particular registry key. You can solve the problem by taking ownership of the registry key. Once you’ve taken ownership of it, you can assign your user account the necessary permissions to modify it.
The following tutorial demonstrates how to take ownership of a registry key so you can assign the full permissions which will allow you to modify it.
How to Take Ownership and Assign Full Permissions to a Registry Key
Here is how you can take ownership of a registry key and then assign the full level of permissions to it so you can modify it in Windows:
Notes:
- You can use this guide for Windows 10, Windows 8, and Windows 7 operating systems.
- You must be logged in as an administrator to take ownership of files.
1. Open the Run dialog by pressing Win+R and then type Regedit and click on OK, or type Regedit into Search and click on the Registry Editor desktop app to open the Registry Editor.
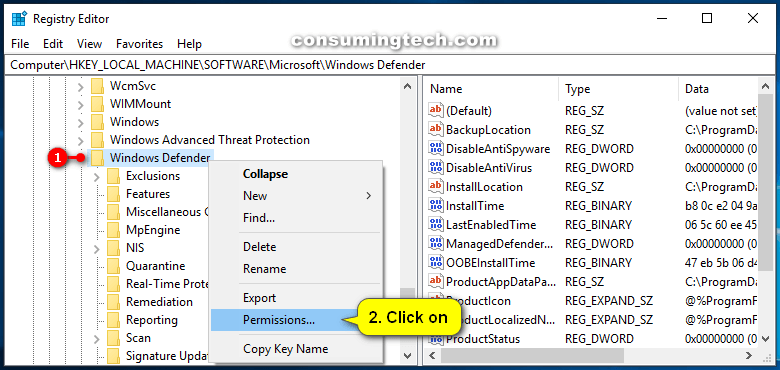
2. Using the Registry Editor’s left pane, navigate through to the key location that you want to take ownership of.
3. Right-click on the registry key and click on Permissions.
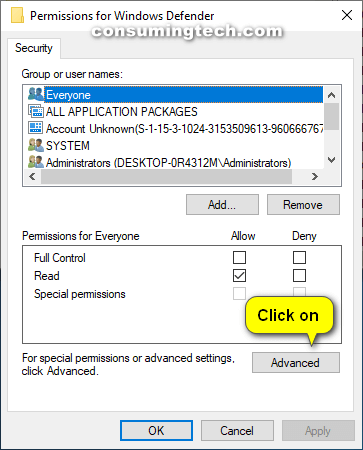
4. From the Security tab of the Permissions dialog, click on the Advanced button.
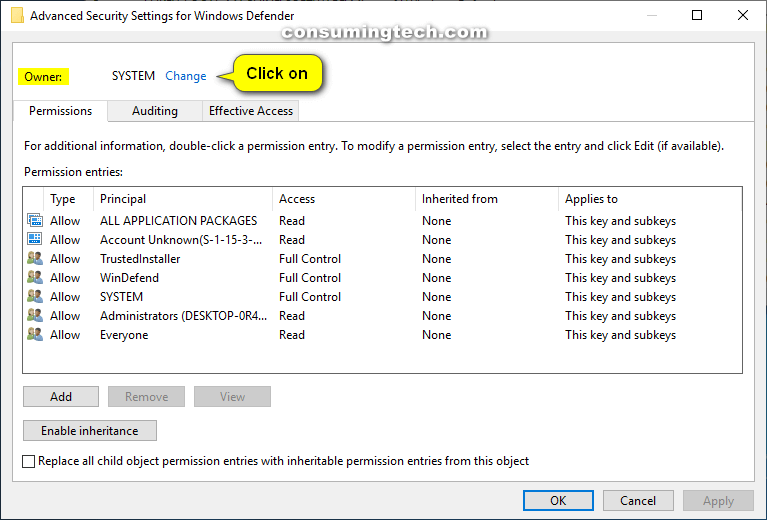
5. Next to where it says owner, click on the Change link to change the owner of the key.
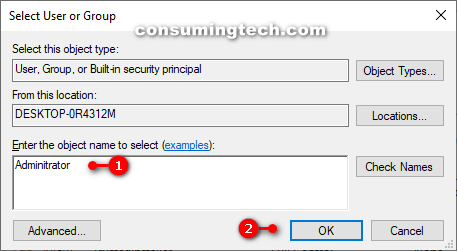
6. Type Administrators into the available field and then click on the OK button at the bottom of the window.
Note: You need to make sure you spell the word correctly because spellcheck doesn’t work in this window and incorrect spelling will prevent what you’re doing from working as well.
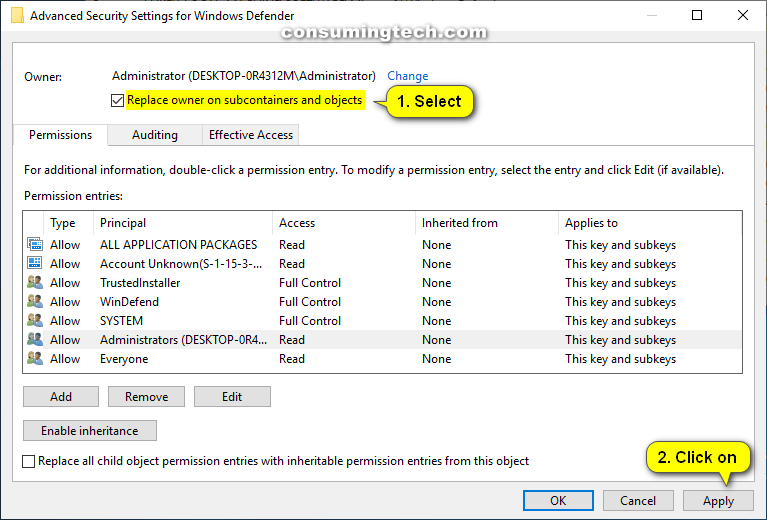
7. Check the Replace owner on subcontainers and objects box and then click on the Apply button.
8. In the Permission entries window, double-click on Administrators.
9. Under Basic permissions, check the Full Control box and then click on the OK button.
That’s all.

