Last Updated on December 24, 2022 by Mathew Diekhake
The following tutorial demonstrates how to set/unset the Read-only file and folder attribute when using a version of the Windows Vista operating system.
When a file is given the read-only attribute in Windows, it means it is a file that is not to be altered, aka it can only be read. By default in Windows Vista, folders are not given the read-only attribute whereas files are. Though a read-only file cannot be modified, it can be renamed, copied, moved, and deleted.
How to Set/Unset the Read-only File and Folder Attribute via Folder Properties Page in Windows Vista
You can set and unset the read-only attribute for files and folders from the Properties dialog of the folder itself. Here is how to do that:
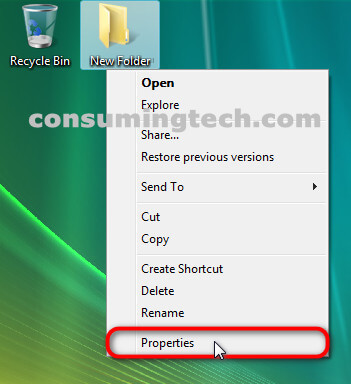
1. Right-click on the folder and click on Properties from the folder’s context menu.
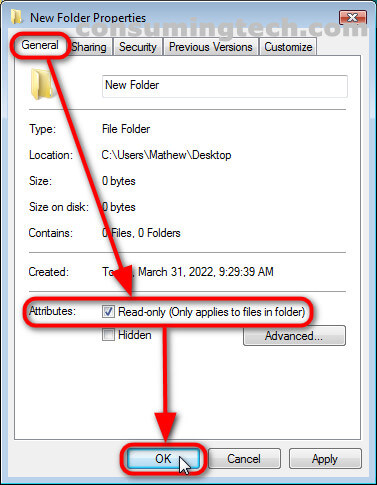
2. From the folder’s Properties dialog, click on the General tab and then click the Attributes: checkbox next to where it says Read-only (Only applies to files in folder).
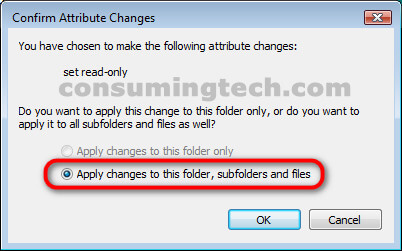
3. From the Confirm Attribute Changes dialog, select either Apply changes to this folder only or Apply changes to this folder, subfolders and files, and then click on the OK button.
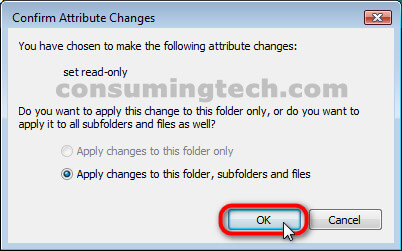
4. From the Confirm Attribute Changes dialog, click on OK.
How to Set/Unset the Read-only File and Folder Attribute via File Properties Page in Windows Vista
You can set and unset the read-only attribute for files and folders from the Properties dialog of the file itself. Here is how to do that:
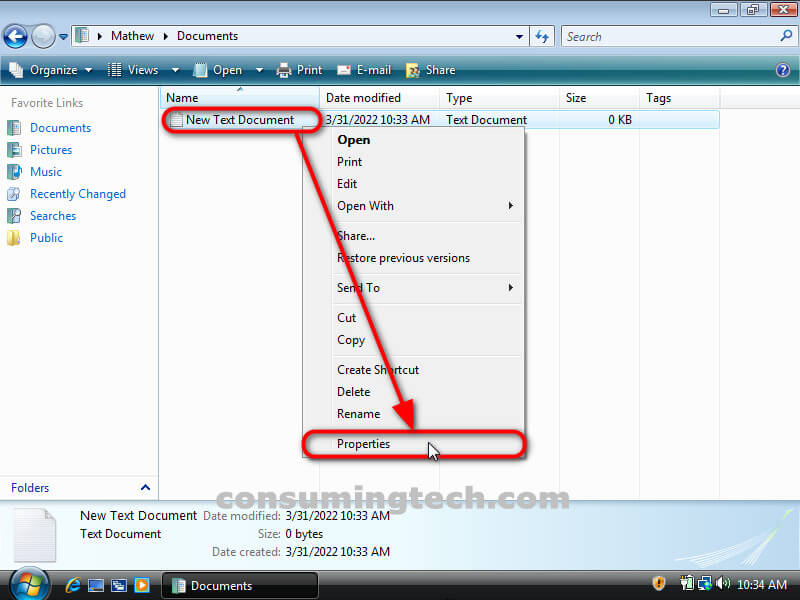
1. Navigate to the Start Menu > Documents and after locating the document in Windows Explorer, right-click on it and click on Properties from its context menu.
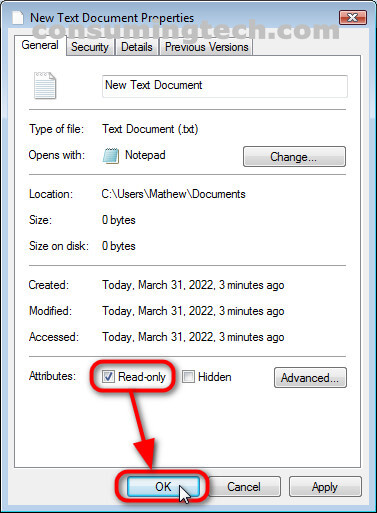
2. From the text document’s Properties dialog, click on the General tab, and then next to where it says Attributes: click on the Read-only checkbox and then click on OK.
How to Set/Unset the Read-only File and Folder Attribute via Command Prompt with the ATTRIB Command in Windows Vista
You can set and unset the read-only attribute for files and folders from the Command Prompt. Here is how to do that:
1. Right-click on the text document, open Properties, and then from the Details tab look for the Name of the document listed. In the example below, the name of our document is NewTextDocument.txt. Once you have the name, proceed to the next step.
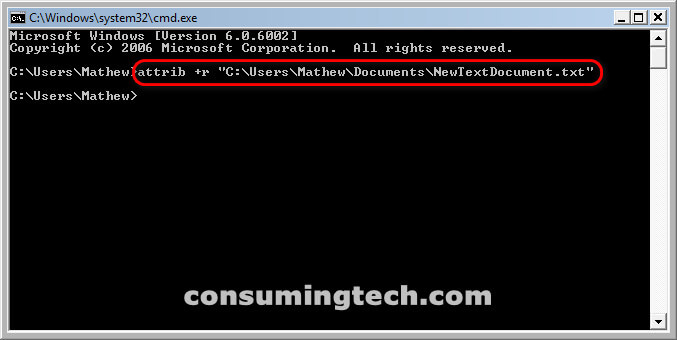
2. Open an elevated Command Prompt window and then type the following command into the command line and press the Enter key on your keyboard to execute it:
attrib +r “Full path of file”
For example, for my own computer, the command would be as follows:
attrib +r “C:\Users\Mathew\Documents\NewTextDocument.txt”
In conclusion, that is how to set the read-only attribute for files and folders when using Windows Vista.

