Last Updated on July 17, 2022 by Mathew Diekhake
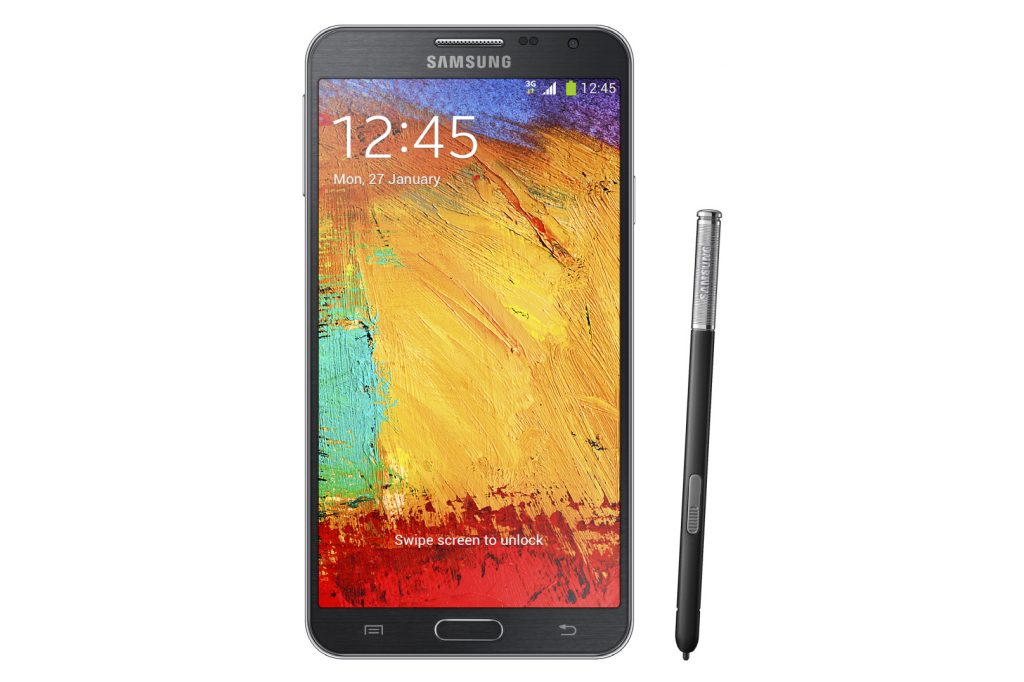
There is a good deal of information out there that is flat our wrong when it comes to rooting the Android operating system. For starters, it is not illegal, and there is no evidence to suggest that the manufacturers of our smartphones like the Samsung Galaxy Note 3 (Samsung) would even want it to be. There is a good reason as to why our Android operating systems come locked and with limitations and that is because people would fall victim to problems if they did not have it locked. Much like people benefit from keeping their home doors locked, some people also have additional security benefits by keeping the operating system locked.
It is important to understand that there are some upsides to opening up a front door for some people — they might want to let some air in the house, they ought to walk outside, walk the dog and it is the quickest way to the road and so forth. There should be oodles of legitimate reasons why one would want a front door open for their lives. You can apply that same kind of rational thinking to having an operating system that is unlocked — it allows certain people to do things that they find very practical. Moreover, as long as these people are not breaking any laws and are not up to foul play, there should be nothing wrong with that.

The naughtiest part about rooting the Android operating system is the fact that it comes with an element of risk involved. Those risks are usually slim, but it is possible to brick a device so that it needs fixing. Other times there is no way to fix it at all. We distinguish these two differences by calling one a soft brick and the other a hard brick. I am using a device with a hard brick situation now — yes, I said using. You can often still use a bricked device; it just means it is not ever going to run smoothly for you again — no factory reset, no official software update can fix the problem you have of the software freezing up on the screen every so often. That is the main symptom I have with my Samsung Galaxy Alpha. However, it is not the only problem that can arise with a bricked device, and sometimes the device cannot be used at all. Something to think about before you get started with the guide. It is also a reason as to why rooting the Android operating system should always be reserved for advanced Android users. Even the advanced users can come across problems.
The rooting exploit in this guide is based on KOT49H.N9002ZNUENG4, which is part of an Android 4.4.2 KitKat roll out. Chainfire, who is the developer of the CF-Auto-Root tool we are using in this guide, makes it clear that people do not necessarily have to flash that same firmware build number before using the rooting guide. The guide should work well for you regardless of the firmware build number so long as your firmware is part of the Android 4.4.2 KitKat software update. The reason Chainfire gives the build number that he used for the rooting to begin with is so you can use it as an indicator if you need to one day.
Files You Need
- Download the new CF-Auto-Root file for the Note 3 SM-N9002 on Android 4.4.2 updates from here.
- Download the Samsung USB Drivers from here.
The rooting exploit in this guide is for the Snapdragon 800 MSM8274 only. There are going to be two unique processor versions each with the N9002 model number — this occasionally happens with a few Samsung smartphones and tablets. Make sure you have the Snapdragon 800 MSM8274 processor and not the other version or else this will brick your device. There is another CF-Auto-Root package available for the other processor version for people to use instead.
Note that you can install a custom recovery either before or after using this guide to root the Samsung Galaxy Note 3 smartphone. The rooting and custom recovery installation guides will work just the same either way.
Also, note that rooting a Samsung device using the CF-Auto-Root tool by Chainfire will always trip the Knox security on the smartphone, and that means your warranty will not work again even if you do unroot the smartphone or tablet at a later date.
Some of the Android software updates that arrive for your Samsung Galaxy Note 3 smartphone may bring new bootloaders with them. These new bootloaders are usually only present if the update you are installing is a major update like when Android is being updated to a new number such s the jump up from Android 4.4.4 KitKat to Android 5.0 Lollipop. These updates can break the CF-Auto-Root tool from working until Chainfire fixes the files. Common issues people face if they are using a version of the CF-Auto-Root tool that needs updating includes a smartphone or tablet that does not flash and a smartphone or tablet that does not boot after flashing. The problem of a device, not booting is only a temporary one, just like the issue of the file not working being a temporary one too. People need to submit the new recovery image files to the official CF-Auto-Root tool thread at the XDA-Developers website so Chainfire, who is the developer of the CF-Auto-Root tool, can see your message and use the file to update his rooting tool. Those updates that Chainfire applies on his end will be automatically reflected in our guides, so you do not have to worry about if we have updated our guides or not.

Rooting the Samsung Galaxy Note 3 SM-N9002 smartphone running on the Android 4.4.2 KitKat software updates
- Unlock the Developer Options menu on the Samsung Galaxy Note 3 SM-N9002 Smartphone so you can enable the USB Debugging Mode.
- Turn on the USB Debugging Mode from your Developer Options.
- Extract the CF-Auto-Root tool to the desktop of the computer so you can use the rooting file and the Odin app’s flashing files on the desktop of the computer.
- Run in the Samsung USB Drivers on the computer, so your computer is ready to have your smartphone connected and detected by the apps like the flashing tool on the computer.
- Double-click the Odin executable file that is on the desktop of the computer and wait until you get the Odin user interface opening up on the display.
- Turn off the Samsung Galaxy Note 3 smartphone and reboot it up into the download mode and then connect it to the computer with the USB cable.
- Wait about five seconds and you should see a yellow or blue ID: COM port coming from the Odin user interface which is telling you that your smartphone is detected and connected with the USB drivers working properly.
- Leave all of the default settings from the Odin user to interface the same way as they are when you first opened your Odin flashing application.
- Click the AP button and browse the desktop location for the rooting file that you already extracted to the desktop at the beginning of the guide. (Make sure you do not extract the CF-Auto-Root tool a second time or else that file will not flash or root your device. The Windows operating system does allow for your data to be extracted again and again but make sure you do not do it.).
- Click the AP button from the Odin user interface when you are ready for the rooting to begin
- Look over at the display of the Galaxy Note 3 smartphone and check that you have some text rolling sown the screen that tells you the rooting file is now installing the SuperSU, cleaning up the cache partition and then reflashing the stock recovery.
- Check the display of the computer again and look for a green box to appear from the Odin user interface with a pass message inside the box.
In conclusion, that is all you need to root the Samsung Galaxy Note 3 SM-N9002 smartphone when it is running on the Android 4.4.2 KitKat software update (with any firmware build number). The Note 3 handset will now automatically reboot thanks to the CF-Auto-Root tool programming, and you will see the SuperSU application there on your device amongst your other apps now. That SuperSU is going to be giving you pop-up a message on the display after you head over to the App Stores and download your apps like the Titanium Backup app. You need to grant root permissions from the pop-up message for any apps that you have installed and want to have root access. Likewise, it is important that you deny the root permissions from the pop-up message SuperSU gives when something you do not recognize wants you to grant root access. That rule always applies if you do not know what it is. Nothing can get through your SuperSU without you knowing, but malware can indeed request root access to your system, and if you are not paying attention, you might accidentally let it through. Check that your Samsung Galaxy Note 3 did get through the guide and is now rooted by installing the root checker application from the Google Play Store.
There will be times when people have followed the guide, but it has not worked for them. There are a few things you can try with Odin and your Samsung Galaxy Note 3 to get the CF-Auto-Root tool working properly. The first thing you want to check is if your smartphone is getting into the recovery mode after the flashing of the CF-Auto-Root tool is complete. The rooting process from start to finish is a quick one and often it is difficult to tell if yours went into the recovery mode of if it did not. Regardless if you saw or not, you can test it out manually by holding the hardware button combination for the recovery mode after your flashing complete and getting into the recovery mode that way. Chainfire states that it should help yo and get your device rooted if it was refusing to get into the recovery mode automatically like it is programmed to do.
Moreover, another thing you can try if all else fails on the Samsung Galaxy Note 3 smartphone is installing one of the other versions of the Odin flashing tool. The Odin app comes in about five versions that are worth mentioning, and there is no change log for any of them because Samsung never officially released the tool. However, we can assume the later versions are probably compatible with more devices. Chainfire thinks the same thing and packages the latest possible version of the Odin flashing app in with his rooting file. However, there are times when people use a version — whether it is the latest or not — and it does not work. For all those times, try another version because everyone always finds at least one version of the Odin flashing app that works for every device.
