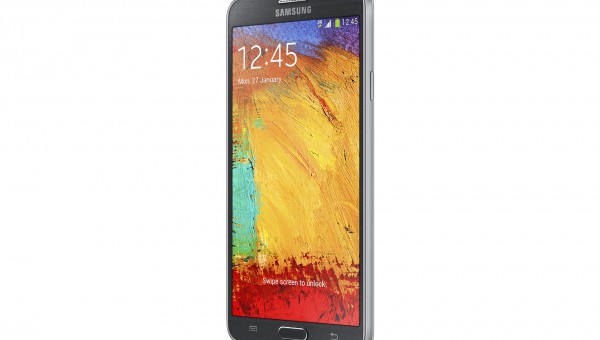
The Samsung Galaxy Note 3 isn’t going to stack up well against some of the modern-day smartphone and phablets we are seeing today that is given better hardware to outperform that of a device coming from three years ago. The world of smartphones, tablets and mobile devices, in general, is one that moves very quickly. It moves much faster than yesteryear when desktop PCs were the “in thing” — at least for geeks if nobody else.
Whether companies like Samsung do this on purpose or not isn’t what’s important. Regardless of the reason they do not update often, we are still going to be buying the devices because we need them. In truth, I’m almost certain they do purposefully give us devices slightly better than the next when in fact they could have given us the better version already. Moreover, they do that all because it makes them more money. Regardless of the fact, anyone with the Samsung Galaxy Note 3 smartphone is undoubtedly falling behind the times and we can help you with that if you do not have the money to update the device.

Without spending even so much as a cent from your pockets, you can root the Samsung Galaxy Note 3 smartphone using the CF-Auto-Root too land then install a custom recovery. Once you have both of those working on your Samsung Galaxy Note 3 smartphone you can head over to our custom ROMs lists and check out the best custom ROMs for the Samsung Galaxy Note 3 smartphone. A great many of these ROMs can help you update the software to versions of Android that never officially rolled out over the air for your device. Furthermore, there are plenty of applications out there that can help improve your performance, almost as if your device does have better hardware. One way we can help you increase the performance of your hardware is to overclock the CPU. You can also install apps like the Titanium Backup application that can help you remove the system apps that are slowing you down.
The firmware build number in this guide is KOT49H.N7500QXXUCNK2, and it is available for some regions around the world. That same firmware build number for the Samsung Galaxy Note 3 smartphone does not need to be flashed on your device. The developer of the rooting method in this guide, Chainfire, states that it is only to be used as an indicator. He says that some Samsung devices will not boot old images.
Files You Need
- Download the new CF-Auto-Root package for the Note 3 SM-N7500Q smartphone running Android 4.4.2 KitKat from here.
- Download the Samsung USB Drivers from here.
- Following this guide to root the Galaxy Note 3 will void the Samsung warranty. You can get the Samsung warranty working again for the Note 3 smartphone by flashing the stock ROM, which then unroots the device without you having to do anything else.
Rooting the Samsung Galaxy Note 3 SM-N7500Q running Android 4.4.2 KItKat
- Enable the USB Debugging Mode on the Samsung Galaxy Note 3 SM-N7500Q smartphone before connecting it to the computer.
- Extract the Note 3’s CF-Auto-Root tool to the desktop of the Windows computer.
- Install the USB Drivers from the files section above and run them before you follow the next step.
- Double-click the Odin executable file that is now on the desktop of the computer.
- Hold the Power button and select the option to switch the Note 3 smartphone off before rebooting it back up in download mode this time.
- Connect the Samsung Galaxy Note 3 smartphone to the computer with the USB cable.
- Check that you can see a yellow or blue ID: COM port coming from the Odin application user interface before going on to the next step. (No color means the Samsung USB Drivers you were meant to install in the beginning of the guide are not installed properly. You will need to reboot the computer or at least login and out again to get the drivers working.)
- Click the AP button from the Odin user interface and then browse the desktop location for the rooting file for the Note 3 that is ending in the tar.md5 extension.
- Do not make any changes to the default settings coming from your Odin flashing tool’s user interface.
Click the Start button. - Click the Start button from the Odin user interface and then wait until you can see some text scrolling down your Samsung Galaxy Note’s display.
- Check that you can see the text on your smartphone saying that it is installing the SuperSU, cleaning up the cache, and reflashing the stock recovery.
- Check that the Odin app on the computer is now showing a green box with a pass message inside the app.
In conclusion, that is how to root the Samsung Galaxy Note 3 smartphone with the SM-N7500Q model number running Android 4.4.2 KitKat software updates. The Note 3 smartphone will automatically reboot back into normal mode, and you should head over to the Google Play Store and install the root checker application to check that it did work. Those who are finding the Samsung Galaxy Note 3 is not rooted might be suffering from a smartphone that is not getting into recovery mode. You can boot the Samsung Galaxy Note 3 smartphone into recovery mode manually if that happens.
Furthermore, anyone who still finds the Note 3 smartphone unrooted can try installing a different version of the Odin flashing app and try again. We have seen YouTube videos of people flashing with the Odin flashing too land it not working; however, when they change Odin versions all of a sudden it flashes.