Last Updated on December 26, 2022 by Mathew Diekhake
In Windows 10, you can have sets of system and hardware settings bundled together to create power plans. These plans can help you quickly choose a set of settings to either conserve power, give a blend of performance and power, or just maximize the power.
Windows 10 offers you the chance to choose from premade power plans—including Power Saver, Balanced, and High Performance—or adjust them, so they are customized to suit your needs, or even just create new plans entirely and leave the premade plans left alone.
How to Reset Power Plans to Default Settings Using Power Options
You can reset and restore the Power Plans so they are back to their default settings by using the Power Options dialog box from the Settings application in Windows 10. To get started, you need to find the advanced power settings. To do that, head to the “Start” button.
Then click on the “Settings” gear icon available from the Start menu’s left side pane.
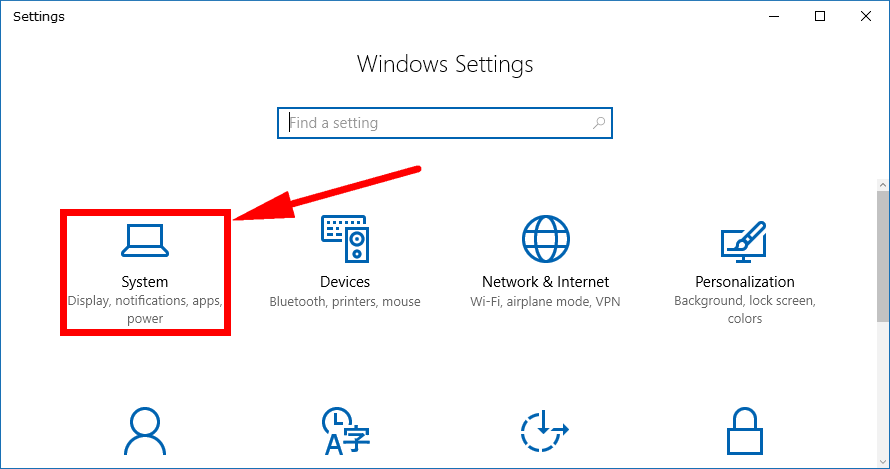
Now click on the “System” link from the Windows Settings window.
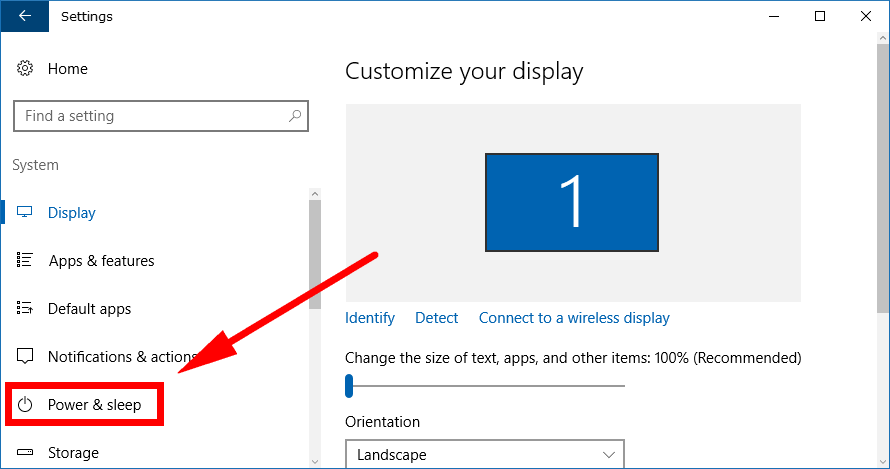
Look for the “Power and sleep” link in the left side pane and click on it, so you get everything to do with the power available in the right side pane.
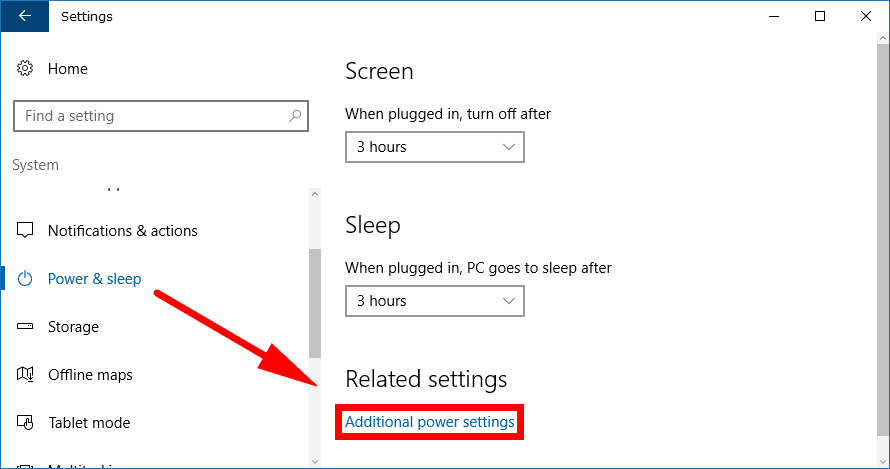
Next, click on the “Additional power settings” link.
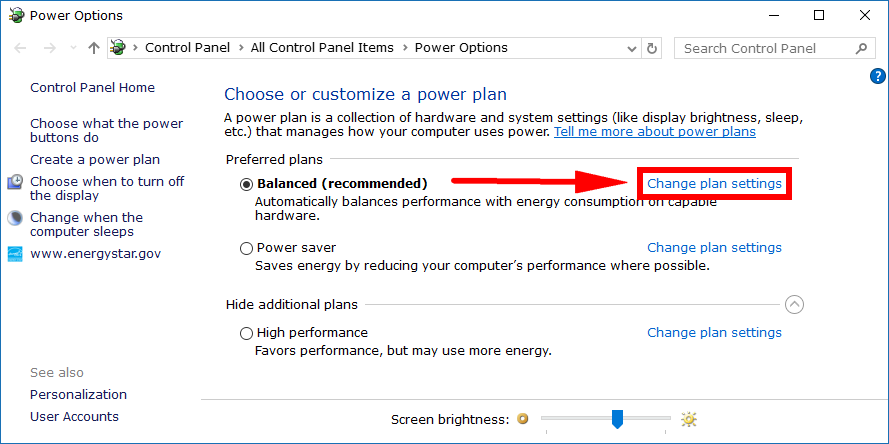
You’ll now see the “Preferred plans” or the plan that you have it set on available from this screen. Click on the “Change plan settings” link that’s directly to the right side of the plan that it is currently in use.
You’ll then see the “Change advanced power settings” link available from the next window.
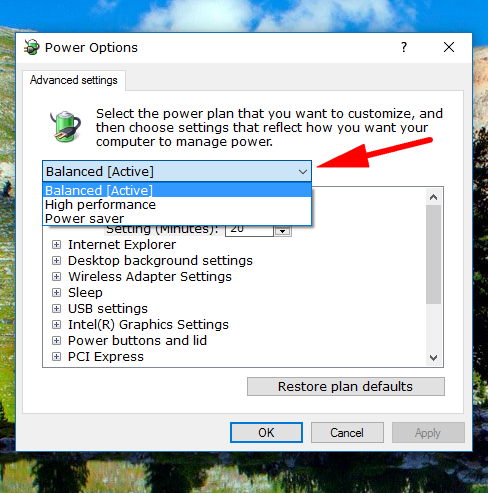
From the drop-down menu, choose the power plan that you want to be reset back to its default state.
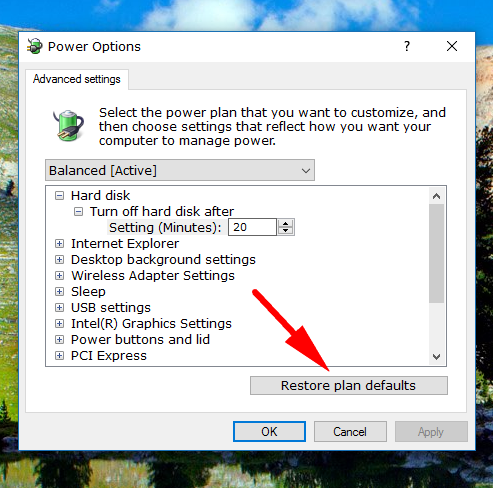
Then click on the “Restore plan defaults” button at the bottom of the Power Options dialog box.
How to Reset Power Plans to Default Settings from Command Prompt
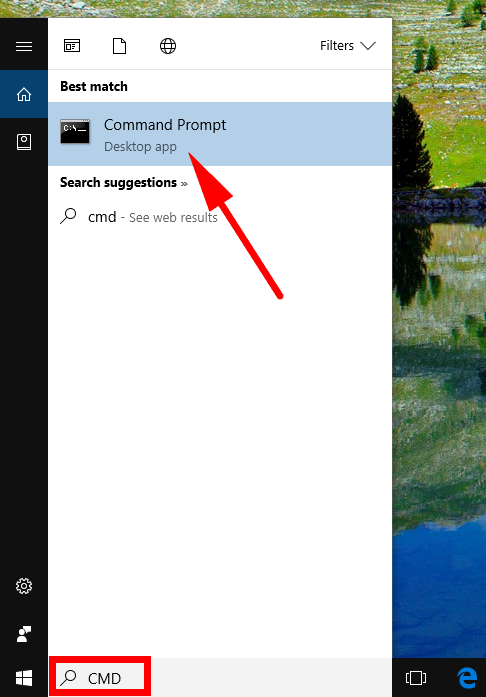
It’s also possible to reset and restore a power plan back to its default settings by using the Control Panel in Windows 10. To do it this way, open the Command Prompt window any way you like—typing “CMD” into the search field and then clicking on the “Command Prompt” desktop application is the quickest if you haven’t changed your Windows 10 layout.
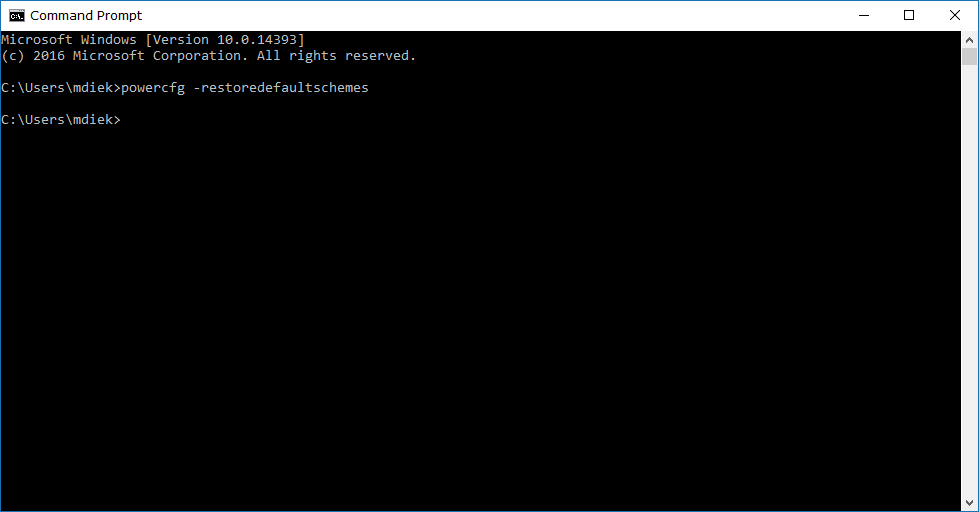
Now type the powercfg -restoredefaultschemes command into the command line window and hit the Enter key on your keyboards.
Being able to restore your power plans back to their default settings means you can feel more comfortable playing around with them because you don’t need to remember what the defaults were before you adjusted them. The choice between the three default power plans should be sufficient for most since it’s rare for people to even use the power plans at all, but the chance to customize them further becomes more important if the computer is being utilized by a professional or someone who it’s behind a computer more often than the average human.
You might also be interested in:
- How to Use Google Chrome Remote Desktop on Any Computer with Chrome Browser Installed
- Download Avast Free Antivirus For Windows 10
- How to Adjust Processor Resources Between Programs or Background Services in Windows 10
- How to Turn On/Off Automatic Device Driver Installation in Windows 10
You can subscribe to our RSS, follow us on Twitter or like our Facebook page to keep on consuming more tech.


