Last Updated on April 9, 2025 by Mat Diekhake
The Microsoft Windows operating system offers a native way to remotely connect to other computers [from the computer you are currently using]. I say native, but it does require the installation of an app that is developed and owned by Microsoft called the Remote Desktop app.
We have already covered the guide on how to add a remote desktop connection in the Remote Desktop app in Windows 10. Now we will walk you through how to remove a remote desktop connection in the remote Desktop app in Windows 10.
The following tutorial demonstrates how to remove the remote desktop connection when using the Remote Desktop app when you run it in any version of the Windows 10 operating system.
How to Remove Remote Desktop Connection in Remote Desktop app on Windows 10
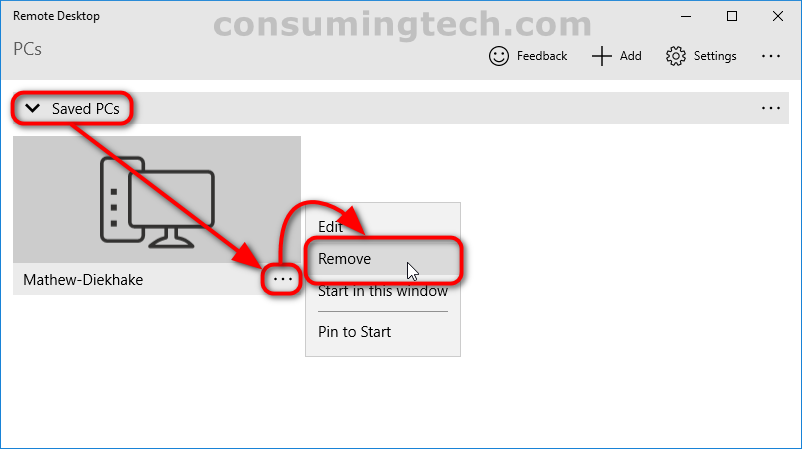
You can remove a remote desktop connection in the Remote Desktop app via the Saved PCs section. Here is where to find it:
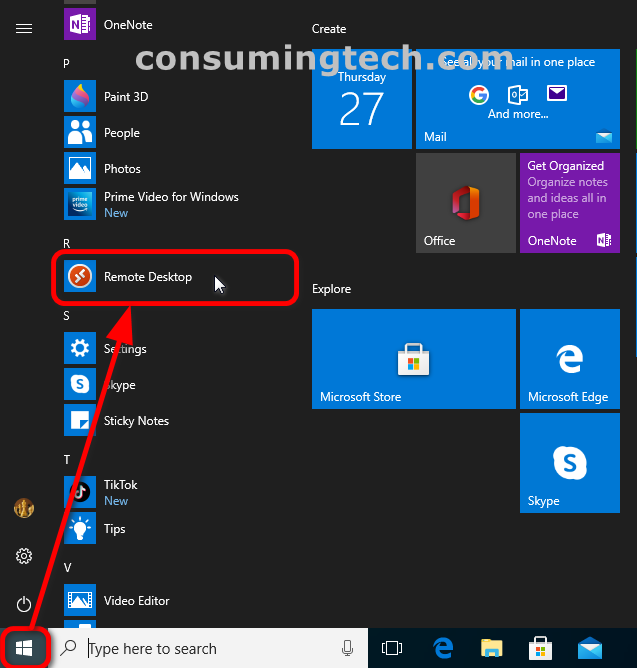
1. You need to install the Microsoft Remote Desktop app first is available from the Microsoft Store for free. Once you have downloaded the Microsoft Remote Desktop app, click on the Start button to open the Start menu and then from the list of All Apps, click on the Remote Desktop app.
Note: Some versions of Windows 10 will let you know when a new app has been installed with the text “new” next to the app’s icon in the Start menu.
2. Assuming you have already added a remote desktop connection before, click on the Saved PCs drop-down menu, click on the three-dotted settings and then click Remove.
In conclusion, that is how to remove a remote desktop connection when using the Microsoft Remote Desktop app in Windows 10.
Images: Mathew Diekhake/ConsumingTech.com