Last Updated on November 15, 2019 by Mathew Diekhake
While Apple has built Safari with all of the required features, the company has kept a door open for third-party developers to add new features to the browser using the so-called extensions. An extension helps you extend the functionality of a browser on your computer. For instance, if your browser doesn’t have the ability to view document formats, you can add that feature using an extension.
Safari supports a number of extensions, and there are many of those available in the market for you to use on your computer. As you feel good with adding new features to your browser using extensions, sometimes users go a little too far and end up adding thousands of extensions to the browser. That doesn’t help you in making Safari be more useful to you; it just slows down the entire browser as it has to load all of your extensions when you launch the browser.
If you find that you really have added a lot of extensions that you don’t actually use on a regular basis, then you may want to remove some of those less-useful extensions from the browser. By doing so, you’re helping to improve the performance of the browser which you will be able to see when you launch the browser after you have removed the extensions.
While you may already know how to add an extension to the Safari browser on your computer, in this guide we will show you how you can remove an extension from Safari to speed up the browser and to get rid of the clutter you don’t really use.
Removing an Extension from Safari on a Mac
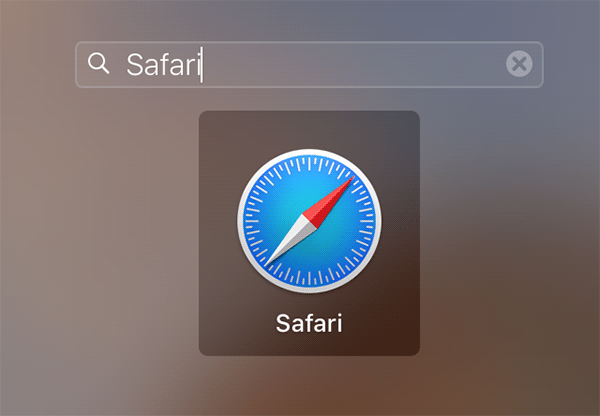
1. Open Safari on your Mac by clicking on Launchpad in the Dock and searching for and clicking on Safari. The browser will open.
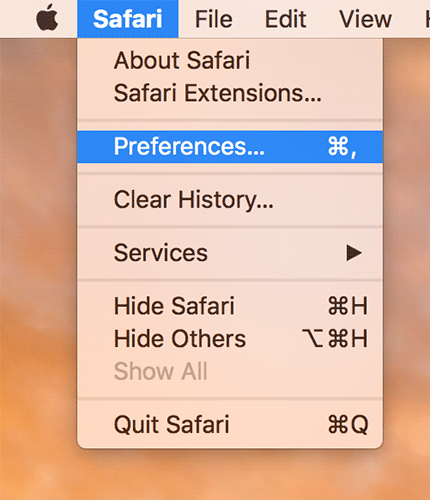
2. When Safari opens, click on the Safari menu at the top and select the option that says Preferences. The preferences panel is where you can change all the settings related to Safari on your Mac. It’s a place from where you can configure everything related to the browser on your Mac.
3. When the preferences panel opens, you will see a number of tabs on the top panel. These tabs let you access various settings of Safari. By default, you will land in the General tab when you open the preferences panel. So, what you need to do is you need to go to the tab that says Extensions. It should be second-last on the top panel, and you can get there by single-clicking on the tab name.
4. When the extensions tab opens, you will see all of the extensions that you have installed so far in the left-hand side panel. It’s a full list of all the extensions that Safari currently has for you. It shows both activated and deactivated extensions, so nothing is left out.
Our aim is to remove an extension from Safari. To do that, find the extension that you want to get rid of from your Mac. You can single-click on an extension, and it will be selected.
When you have selected an extension, you will see its details in the right panel. The panel shows options for enabling or disabling the extension, and it also has an option that lets you remove the extension from your browser. The button that allows you to remove an extension is called Uninstall so click on it, and it will let you remove the selected extension from your browser.
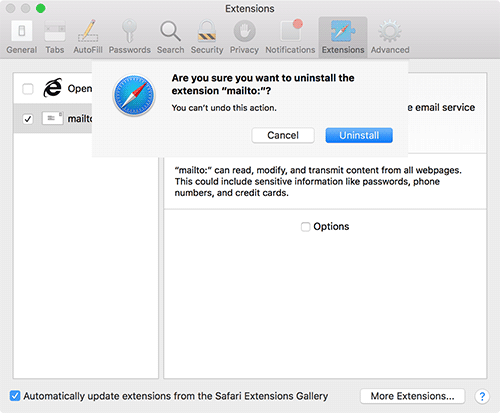
5. As with all the removal operations, you will be prompted if you would really like to remove the extension. Safari wants to make sure that you really want to remove the extension and that you have not clicked the Uninstall button by mistake.
Click on Uninstall in the prompt, and it will let you remove the extension.
6. The selected extension should now be removed from Safari on your Mac. If you want to remove another extension, just select it in the left panel and then click on Uninstall in the right panel and accept the prompt and the extension will be gone for good.
So, that was how you could remove an extension from Safari on your Mac.
Manually Removing an Extension from Safari
While it doesn’t always happen, sometimes an extension causes issues that don’t let you open Safari or let you see the extensions list. If you are in such a situation, you really can’t remove an extension using the browser. So, what can you do then?
Well, you can then manually remove extensions using the Finder app on your Mac. Safari keeps all of its extension files in a folder on your Mac which can be accessed and manipulated using Finder. Here’s how to do that:
Make sure that Safari is not open while you are doing the following steps. Close the browser if it is already open and then do the following steps.
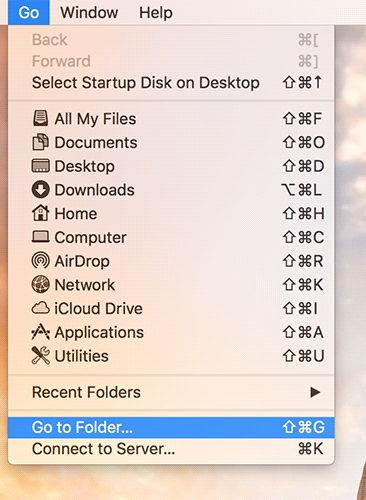
1. Head to your Mac’s desktop so that you are inside a Finder window. Click on Go at the top of your screen and select Go to Folder. It will bring forth the go to folder panel from where you can go to any folder on your Mac by just specifying the path of it.
You can also press Command + Shift + G to open the Go to Folder panel.
2. When the Go to Folder panel launches, you need to enter a path where you want to go. Enter the following path in the field and click on Go to go to that folder on your Mac using Finder.
~/Library/Safari/Extensions/
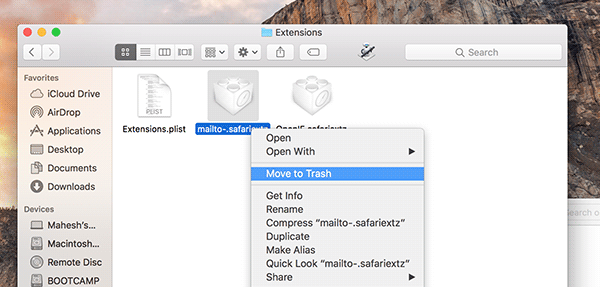
3. When the folder opens, you will be able to see all the extensions that you have added to Safari. In order to remove an extension, what you need to do is select the extension by single-clicking on it and then dragging and dropping it onto the Trash icon in your Dock.
Alternatively, you can right-click on the extension and select Move to Trash, and it will get the extension removed for you.
4. Once the extensions have been removed, relaunch Safari from the Launchpad, and it should work just fine.
So, that was the manual way of removing extensions from the Safari browser on your Mac.
You might also be interested in:
- How To Get The Escape Key Back On Your New Mac
- How To Convert PDF To DOCX Using Google Docs On Your Mac
- How To Get The Old Boot Chime Back On Your New Mac
- How To Change The Downloads Folder In Various Browsers On Your Mac
- How To See What Apps Are Using The Webcam On Your Mac
Have something to say? You can contribute to this tech article by leaving a comment below.

