Last Updated on September 20, 2024 by Mathew Diekhake
 Rooting methods, whether they be different tools or different ways the same tools need to navigate through the operating system, come and go, but one thing that never changes is the state of your custom recovery images.
Google has shown some resistance to allowing root access, most notably when applications like Android Pay came out and it wanted to make sure people didn’t have root access at the same time of using these new types of financial apps. However, Google has never done anything to show signs of wanting people to stop swapping the stock recovery image with a custom version, making it still a part of customizing Android that you can do with ease.
Since the Android operating system is based on open source software that allows developers to tinker with it, there’s likely going to always be custom ROMs available in the future. Even though CyanogenMod is now defunct, I still expect custom ROMs to continue progressing and more to the point where they are viable solutions to offering people something that suits their needs better than just the stock version of Android that’s supposed to suit everyone around the world.
Team Win’s TWRP recovery is the leading custom recovery image in today’s market—there isn’t really any other custom recovery image being developed at all—and it’s all you need to have all the features you want out of a custom recovery partition: the chance to flash zip files that aren’t signed, the NANDroid backup option as well as an easy restore for backups, plus the chance to do the same things you could do from the stock recovery, such as take a factory reset if ever your device needs it.
Files We Need
- Download on your computer the latest version of TWRP Recovery: Primary (Americas) | Primary (Europe).
- Download on your computer the platform-tools from the Android SDK.
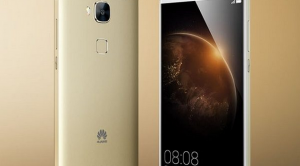
How to Install TWRP Recovery on Huawei G8 Smartphones
1. Make sure you’ve installed the universal ADB driver on the computer.
2. You need to have the platform-tools part of the Android SDK on your computer.
3. Once you have the SDK Manager on your computer, check the box only for the platform-tools, so you end up with the adb and fastboot binaries installed on the computer.
4. Pick up the Huawei G8 smartphone and navigate to the Settings > About and tap your finger over the build number at least seven times so that the Developer Options menu becomes unlocked. Then go back to the Settings, enter the Developer Options menu and then enable the USB debugging mode.
5. Connect the Huawei U8815 smartphone to the computer by using the USB cable that it comes with.
6. Now on the computer open the Command Prompt and type the adb reboot bootloader command and hit “Enter” on your keyboard to get the Huawei G8 smartphone into the bootloader mode and ready for the flashing.
7. Make sure you have copied the TWRP image file to the same folder as the adb and fastboot binaries. Also when you’re there, change the name of the TWRP to “twrp.img” by right-clicking the mouse pointer on it and selecting the “rename” option from the menu.
8. From the command line type the fastboot flash recovery twrp.imgcommand and hit “Enter” on your keyboard to flash the custom recovery.
9. Lastly type the fastboot reboot command and as soon as the Huawei G8 smartphone reboots, hold down the key combination to boot directly into the recovery mode. (If you don’t sometimes the stock recovery will wipe over the custom recovery you just installed.)
The custom recovery image for the Huawei G8 smartphone is now installed, and you are ready to boot into recovery mode and start flashing the custom ROM or rooting zip files.
