Last Updated on January 28, 2020 by Mat Diekhake
When you search your Mac using the Find feature in the Finder app on your Mac, you are presented with all of the files you can usually get access to on your Mac. What these search results don’t include, though, is system files.
If you are looking for some specific system files and they are not showing up in the Finder search, then you will want to add a search filter that will let you include system files in the Finder searches on your Mac.
Once you add the filter, all of your searches in that session will have system files included as results. Doing so is incredibly easy, and the following guide shows how:
How to Have System Files in Search Engines on Mac
To do the task, you are going to use the Finder’s search feature on your Mac. When you search using Finder, you have a number of options for a filter, and that is where the option for including system files in the search results exist.
First of all, open a Finder window on your Mac. It can be done using many ways. You can either go to your desktop, and you will be inside a Finder window, or you can double-click on your hard drive, and that should take you inside a Finder window. Both do the same thing: taking you inside a Finder window.
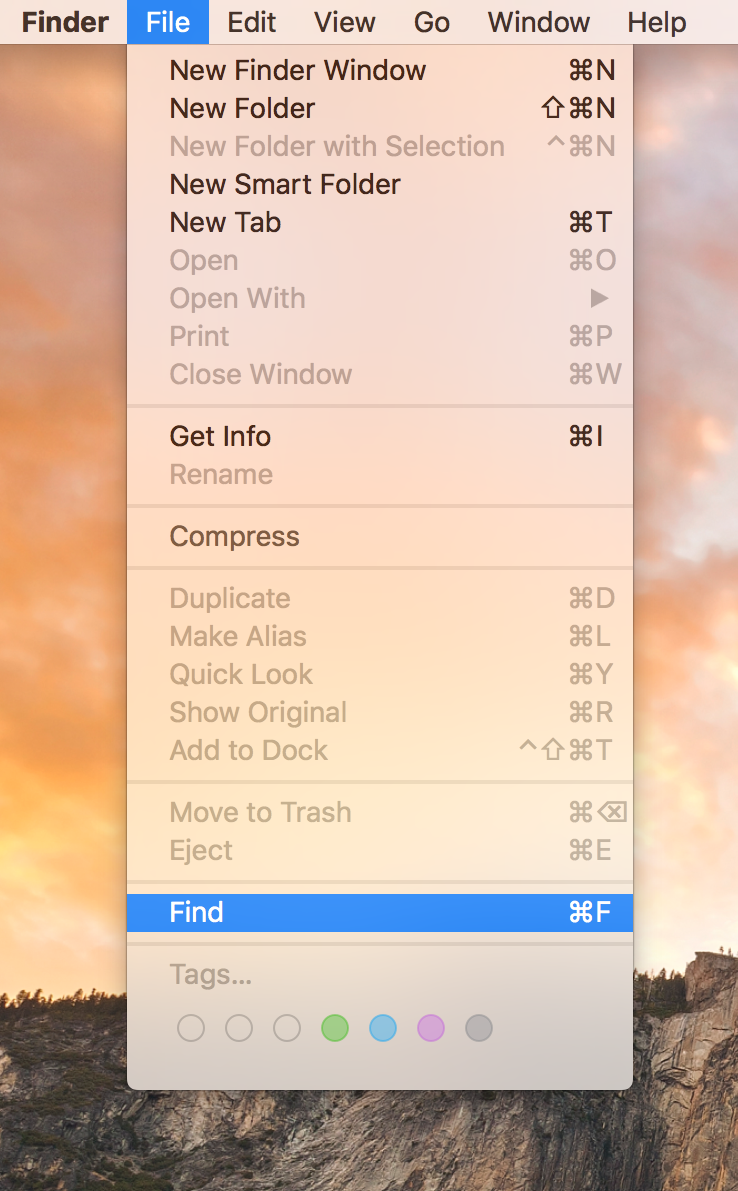
Once you are inside a Finder window, click on the “File” menu at the top and then select the option that says “Find.” That option is for searching files on your Mac. Alternatively, if you want to do it quickly, you can just press the “Command + F” key combo on your keyboard, and that should bring forth the search feature on your screen.
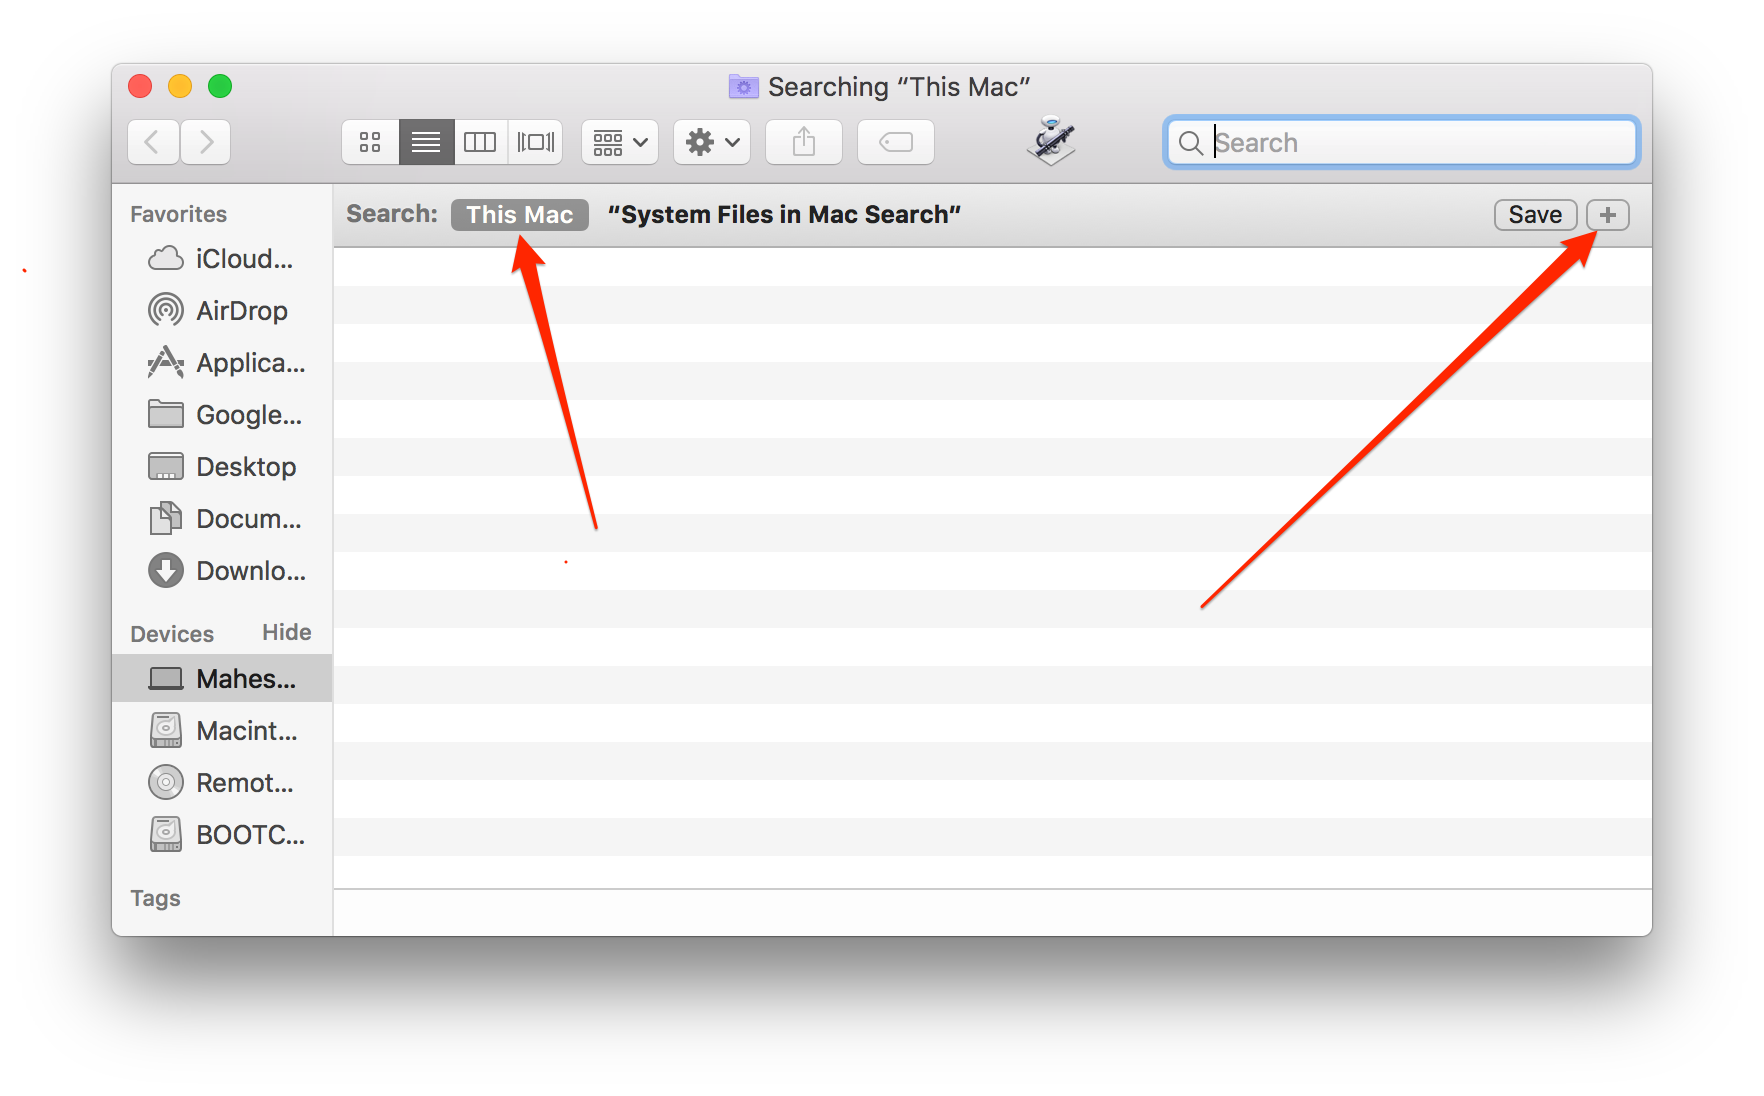
When the search feature opens, ensure that “This Mac” is selected at the top. This makes sure your whole Mac is searched when you type in a keyword. Then, click on the “+” (plus) sign in the top-right corner to add a filter to the search.
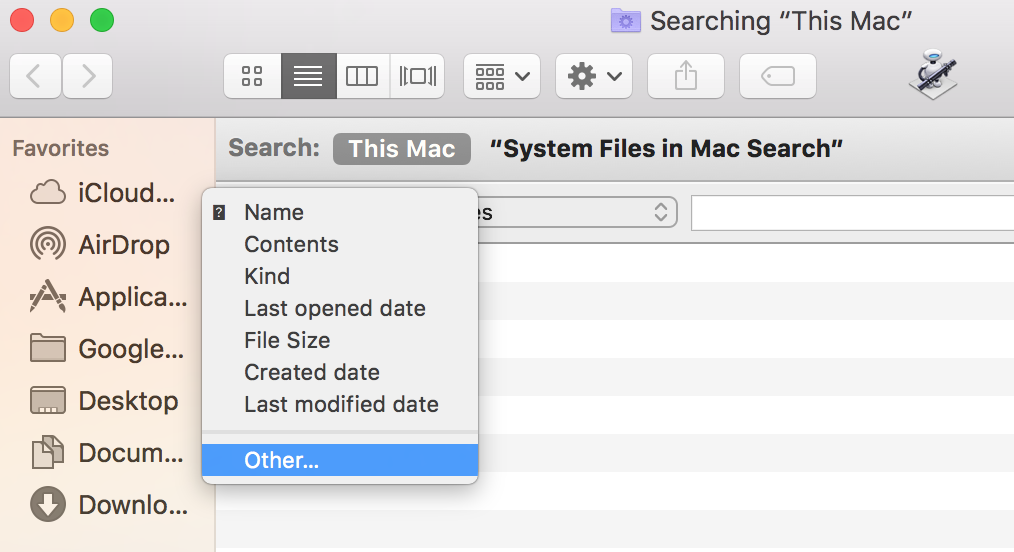
On the following screen, you will see a couple of drop-down menus. From the first such menu, select the option that says “Other.”
A new box will open on your screen letting you select a search attribute. What you need to do here is find and select the attribute that says “System files.” Click on it when it appears to select it and then click on “OK” to move forward.
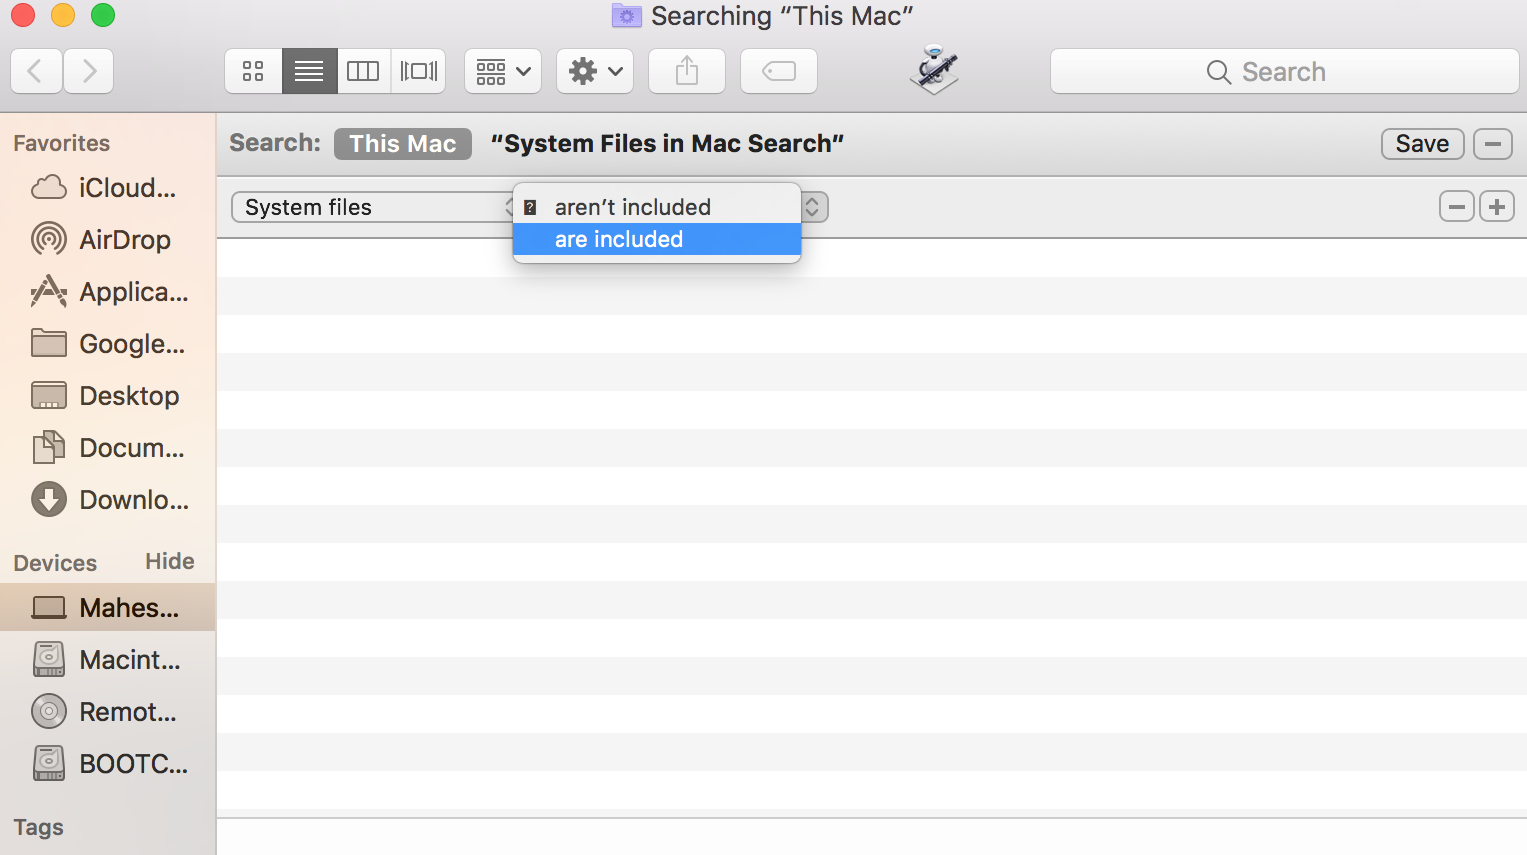
You should be back to the Finder window. On this screen, make sure the drop-down menu next to System files says “are included.” The whole sentence would be “System files are included.”
The search filter has been successfully added, and you can now begin to search your Mac for the files you want. This time around, when you type in a keyboard, the Finder will show regular files as well as system files in the results. The system files include cache files, preferences files, and so on.
So, that was how you could include system files in search results on your Mac.


