Last Updated on July 19, 2022 by Mathew Diekhake
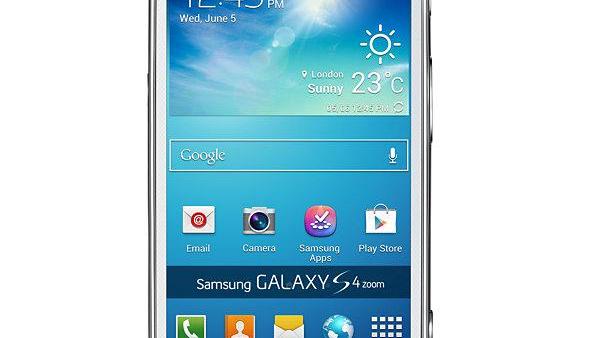
Those of you who wanted smartphone that optimizes taking snapshots would likely want to look toward buying the Samsung Galaxy Zoom. The great news is that even though this is almost as much as a camera as it is a smartphone, you can still gain root access to the device just like most other handset from the Samsung range. There are some distinct advantages to doing that with the Zoom too, such as using some extra root-requiring apps from Google Play that are related to photography.
Before you start the guide, you should backup the data using an app from Google Play or the built-in backing up features that come with your device. Those of you looking for apps will enjoy checking out Helium. Titanium backup is another one, but that’s only available if you have root access already. The Helium app is available for those who are running stock Android currently.

Files you need
- Download Odin from here.
- Download the rooting package you need from here (SuperUser).
- Download the ClockworkMod recovery (CWM) file here.
- Download the Samsung USB Drivers for if your Windows computer doesn’t talk to the Galaxy S4 Zoom.
Rooting the Samsung Galaxy S4 Zoom SM-C101
- Start by unzipping the ClockworkMod recovery and Odin files to the desktop.
- Run the Odin tool and leave it open because we need to open first.
- Have the Samsung Zoom turned off by holding the power button in for ten seconds, then letting go of the power button.
- Hold the Volume Down + Home + Power keys in at the same time. You should now be in Download Mode. You might need to press Volume Up from a warning screen.
- Enable the USB Debugging Mode by going to the Settings > Developer Options > USB Debugging and check the box.
- Those who cannot see any Developer Options menu from the Settings can unlock it by going to the Settings > About Device > tap the build number until it’s unlocked.
- Now connect the Galaxy Zoom to the Windows computer where you have the files. Do that with the USB cable you use for charging.
- Transfer the Superuser file to the SD card (internal storage). Do that with the SuperUser file still zipped.
- Now click the PDA or AP button in Odin, depending on what version of Odin you are running, and browse the computer for the CWM file. Remembering, you must first unzip that file for it to upload.
- Now click the Start button in Odin and you should have CWM flashed soon.
- Unplug from the computer once Odin tells you it’s complete and you passed.
- Hold the power button down for ten seconds again to completely switch off the Galaxy Zoom.
- Hold the Volume Up + Power + Home keys now and you should enter the recovery mode you just finished flashing.
- from the recovery menu, choose to “install from zip” and browse the SD card for the SuperUser file.
- Once you finish loading the rooting file, go back to the main recovery menu and choose to reboot the system now.
You should find your device now has the root access and custom recovery installed. You can anytime go back to Odin and flash the other version of ClockworkMod if you want to change between touch and non-touch version. Furthermore, you might find a different custom recovery available such as TWRP. However, the method for installing TWRP might differ from the Odin we have here.
Moreover, you might want to download the root checker app from Google Play. Use the app to double-check you do indeed have the root access working before wasting time searching for ROMs and other root-only apps.
Troubleshooting:
Sometimes people get stuck in boot loops when attempting to root their Android devices. If you find yourself in that situation, you can enter the recovery mode by pressing the Volume Up + Home + Power keys and choosing to wipe the data/factory reset. Doing so will restore your device back to the original state. The downside is you do lose any data that you didn’t save before starting.
