Last Updated on October 9, 2022 by Mathew Diekhake
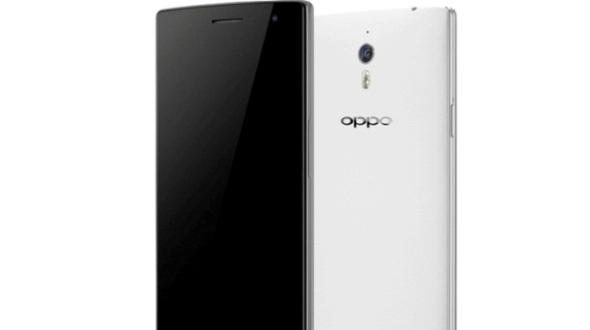
The Oppo Find 7a wasn’t as popular as perhaps it should have been because this top-end device was made in China and a lot of Westerns don’t affiliate Chinese smartphone as being the best there is. That resulted in a smartphone that had high pixel density, good quality camera, big display and high resolution for March of 2014 when it was announced being snubbed. Nevertheless, whether you own this handset in China or anywhere else in the world it is still great to root and I will show you how with this simple method.
Gaining root access is an unofficial and custom operation that’s sole purpose is to unchain the internal systems of the Android-based device. To gain full advantage of the built-in OS and programs you will have to follow this guide firstly and it will allow you to optimize and customize a lot more.

Checklist
- Do note that this way is only good for the Oppo Find 7A and not the first generation model; therefore, do not try and install it on many other devices because it won’t work. It is only a few steps if you do it correctly but attempting to install the file on something else can soft brick and require a lot of efforts to fix. Moreover, using files such as these will void the manufacturer’s warranty because it increases the flash counter so nobody will be there to help you if something goes wrong. The reason the warranty is void is because the root is not granted by Sony or any other manufacturer even though Google call themselves an open company and they own Android. In fact, Sony set a lot of default restrictions on the hardware to keep it in line with their business module. Opening it up means that no longer have full control over the device and all the extra Custom ROMs and applications are not owned by them so they do not make money from this.
- Always backup the smartphone before starting a tutorial such as this. The Find 7a has impressive hardware to say the least. In it is the Qualcomm Snapdragon 801 8974-AB system chip, Quad core, 2300 MHz, Krait 400 processor, but it only has 16 GB of built-in storage space. Hopefully most of you can backup to this internal memory. Sometimes the space is used up by music and pictures you do not want to delete.Go to the market and pick out a microSD, microSDHC, microSDXC storage expansion memory card that holds up to 128 GB of extra space if that is the case here. Now there is no incentive not to backup contacts, call logs, apps, SMS and MMS texts, video, images and more.
- The following is an easy operation, however, users must always read carefully and stick to the guidelines to end up with successful results.
- The Find 7a came with Android 4.3 ColorOS UI and that is compatible with this guide here today. It has not received any update yet even though it has NFC, 4G and is a flagship.
- Enable USB Debugging Mode from the Develop Options. This smartphone started at Android 4.3 so it is not hidden like it was in the earlier Android 4.2.
- Make sure your computer features the Oppo USB Drivers. If you don’t have them you can download the Oppo Find 7a PC Suite that comes complete with the USB Drivers.
- This mobile has a lot of connectivity features and one of them is USB charging. When you plug the handset into the computer using the USB cable it will automatically start charging. Nonetheless, some blogs are still recommending people set at least 59% battery charge before starting.
- Make sure you have enough experience because only you are liable for what happens after following this guide. If you do not feel confident about something, please leave us a comment and we can help. Alternatively try seeking a friend that knows how to help you or can assist in finishing the job.
- Deactivate, temporarily disable or completely uninstall security features on both the phone and the computer before starting the steps. Programs such as antivirus and antimalware can cause interruptions and prevent us being successful in our first attempt. They can also lead to notifications popping up and that can veer away from our steps and leave people confused. To avoid these at all costs, please turn them off for now. On the smartphone to the app and adjust the settings. From Windows PC visit the task-bar and right-click the security icon to open its options.
How To Root Oppo Find 7a
1. Turn on the computer.
2. Download the root package to the C: Drive.
3. have the USB cable ready to connect. If you cannot find it that might be because it is used as a cable to your phone charger.
4. Connect the Oppo Find to the computer with a USB cable.
5. Transfer the file to the phone.
6. Turn off the phone.
7. Boot the Find 7a in recovery mode by pressing Power and Volume Down at the same time until it vibrates.
8. Select the English language and install from SD card.
9. Select the zip file that you previously downloaded in the second step and transferred over in the fifth step.
10. Confirm the installation process.
11. Go back to the recovery main menu and select reboot.
The handset is now successfully rooted. You can head to the Google Play Store and download the root checker app to verify this.
Remember to disconnect the Oppo mobile from the computer properly to avoid any data corruption. To do this rick click, the safely remove hardware icon in the taskbar and select to stop the USB Mass Storage device. Confirm it by clicking OK and then waiting for the message that says “it is now safe to remove your device.”
