Last Updated on September 20, 2024 by Mathew Diekhake
 There are two main ways for people to start modding on the Android operating system, the most common choice being to get root access, followed by the option of getting a custom recovery image installed.
Unlike with root access, you don’t need to worry about what version of Android you’re running when you’re doing your research with what files to flash, which makes installing a custom recovery a favorable choice. In addition, you can do everything from a custom recovery that you wanted to do from having root access, apart from installing the root applications. The custom recovery image also offers features that you want to get from root apps, such as the chance to take NANDroid backups and restore data just as quickly, too.
There are applications out there for backing up that rooted users can take advantage of such as Titanium Backup, but even Titanium is no match for what the NANDroid from a custom recovery can do: the NANDroid backup allows for backing up of each individual partition, and choosing these partitions is as simple as tapping on the checkboxes for the ones you want to back up. When you’re flashing new ROMs, you always need to wipe the current ROM which means backing up is a must, and something that people modding in a regular basis need to do often, which is why getting the best tools for backing up as efficiently as possible is important, and that’s one thing that a custom recovery offers.
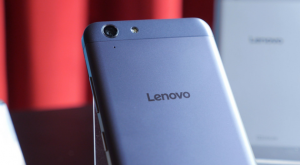
This is how to install the TWRP Recovery on the Lenovo Vibe K5 smartphone.
Details of Note
- The custom recovery images available in this guide are only to be installed on the Lenovo Vibe K5 smartphone. Most devices have a custom recovery image developed specifically for it, and you shouldn’t install one that is intended for another device unless advised it is okay by a professional.
Files Required
- Download on your computer the latest version of TWRP Recovery: Primary (Americas) | Primary (Europe).
- Download on your computer the platform-tools from the Android SDK.
How to Install TWRP Recovery on Lenovo Vibe K5 Smartphones
1. Make sure you’ve installed the universal ADB drivers on the computer.
2. You need to have the platform-tools part of the Android SDK on your computer. From the download link scroll down until you get to the command line tools section and then download the package that is made for your operating system.
3. Once you have the SDK Manager on your computer, check the box only for the platform-tools, so you end up with the adb and fastboot binaries installed on the computer. (You could also install the drivers from there as well if you wanted.)
4. Pick up the Lenovo Vibe K5 smartphone and navigate to the Settings > About and tap your finger over the build number at least seven times so that the Developer Options menu becomes unlocked. Then go back to the Settings, enter the Developer Options menu and then enable the USB debugging mode.
5. Connect the Lenovo Vibe K5 smartphone to the computer by using the USB cable that it comes with.
6. Now on the computer open the Command Prompt and type the adb reboot bootloader command and hit “Enter” on your keyboard to get the Lenovo Vibe K5 smartphone into the bootloader mode and ready for the flashing.
7. Make sure you have copied the TWRP image file to the same folder as the adb and fastboot binaries. Also when you’re there, change the name of the TWRP to “twrp.img” by right-clicking the mouse pointer on it and selecting the “Rename” option from the menu.
8. From the command line type the fastboot flash recovery twrp.img command and hit “Enter” on your keyboard to flash the custom recovery.
9. Lastly type the fastboot reboot command and as soon as the Lenovo Vibe K5 smartphone reboots, hold down the key combination to boot directly into the recovery mode. (If you don’t sometimes the stock recovery will wipe over the custom recovery you just installed.)
The custom recovery image for the Lenovo Vibe K5 smartphone is now installed, and you are ready to boot into recovery mode and start flashing the custom ROM or rooting zip files.
