Last Updated on February 25, 2024 by Mathew Diekhake
The following tutorial demonstrates how to add and remove Quick Access from the navigation pane in File Explorer when using a version of the Windows 11 operating system.
Quick Access was introduced to File Explorer in Windows 10. For most people who aren’t interested in hiding files of any sort, Quick Access is an unquestioned asset to their computing because it offers not only quicker navigation through File Explorer’s files but will give instant access to the most recently used files and folders as well.
Having Quick Access in the Navigation Pane can also make File Explorer easier to use for “dummies” as well because no longer do novice Windows users need to click on This PC to bring up additional locations to browse; the Desktop, Downloads folder, Documents, and Pictures are there to begin with via the Quick Access menu.
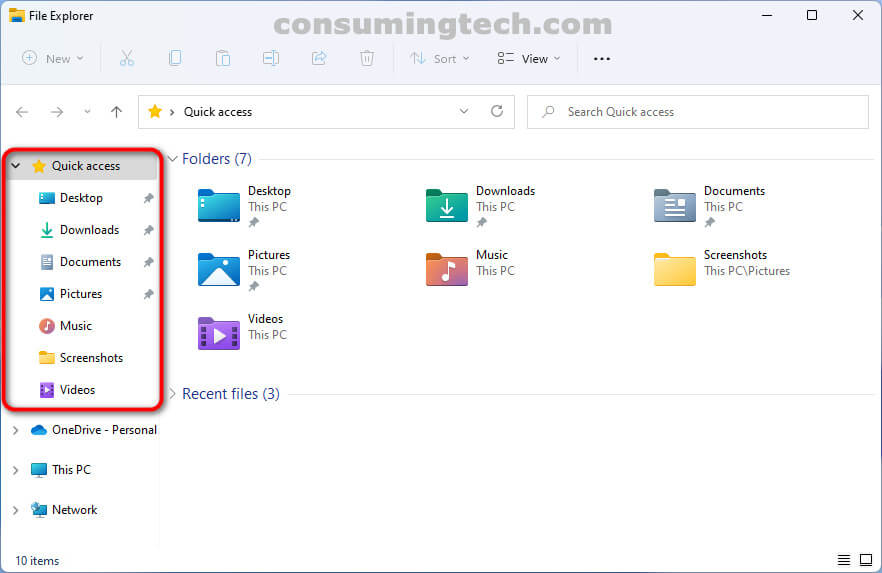
Quick Acess will also expand by itself to go beyond only the default pinned folders to include other folders you use over time: Music, Screenshots, and Videos are some examples of extra folders showing up in our Quick Access now.
An example of File Explorer’s Quick Access menu in the Windows 11 operating system:
How to Add/Remove Quick Access in Navigation Pane of File Explorer
You can add and remove the Quick Access section from File Explorer’s navigation pane via the ShellFolder key in the Registry Editor. Here is how to do that:
1. Open the Registry Editor by typing “Registry Editor” into Search.
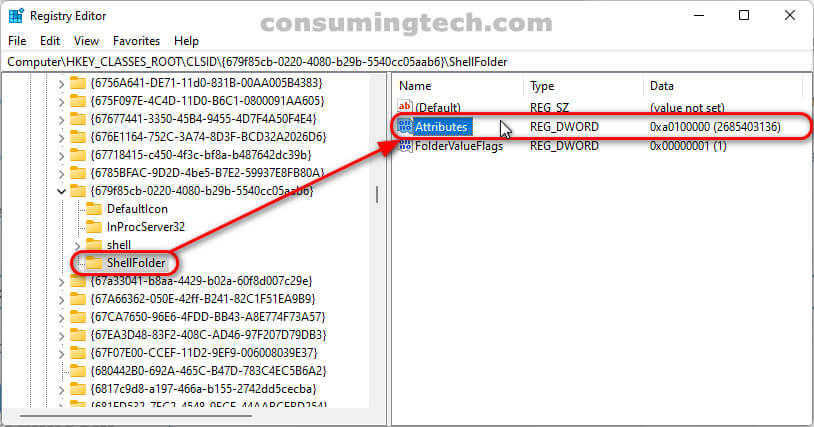
2. Using the Registry Editor’s left pane, navigate through to the following registry keys:
HKEY_CLASSES_ROOT\CLSID\{679f85cb-0220-4080-b29b-5540cc05aab6}\ShellFolder
3. With the ShellFolder selected, double-click on the Attributes DWORD in the right side of the same window to modify its value.
4 a. To Remove Quick access from Navigation Pane
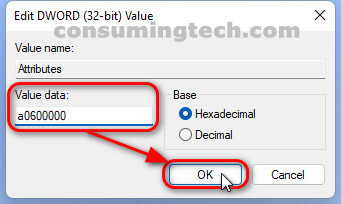
b. Type a0600000 into the Value data field and then click on the OK button to apply the changes and close the DWORD dialog box.
5 a. To Add Quick access to Navigation Pane
b. Type a0100000 into the Value data field and then click on the OK button to apply the changes and close the DWORD dialog box.
6. Close the Registry Editor and restart the computer to apply the changes.
In conclusion, that is how to add and remove Quick Access in the Navigation Pane of File Explorer in Windows 11.
Related Articles
- How to Set Up Fingerprint Recognition Sign-in for Account in Windows 11 [Tutorial]
- How to Open Quick Settings in Windows 11 [Tutorial]
- How to Open Windows Security in Windows 11 [Tutorial]
- How to Open Settings in Windows 11 [Tutorial]
- How to Enable/Disable Cloud-Delivered Protection for Microsoft Defender in Windows 11 [Tutorial]
- How to Enable/Disable Periodic Scanning in Microsoft Defender Antivirus in Windows 11 [Tutorial]
- How to Turn On/Off Tamper Protection for Microsoft Defender Antivirus in Windows 11 [Tutorial]


