When you open the Start menu, you can choose to have folders visible in the spare space between your user icon and the Power icon. By default, this space is left blank by Windows; however, you can fill this space with up to nine default folder icons if you prefer.
Why have icons on the Start menu? Some people want quicker access to folder than from File Explorer but don’t want them on their taskbar because they remove everything that isn’t essential from the taskbar. If you work all day from a laptop, you probably don’t want taskbar clutter to take away from the focus of your tasks, espcially as the display gets smaller.
Example:
To add or remove folders on the Start menu in Windows 11, you can customize which default folders appear next to the Power button. Here’s how you can do it:
Steps:
1. Open Settings:
- Press Windows + I or click the Start button and select Settings.
2. Go to Personalization:
- In the Settings app, navigate to Personalization from the left sidebar.
3. Select Start Settings:
- Under Personalization, click on Start.
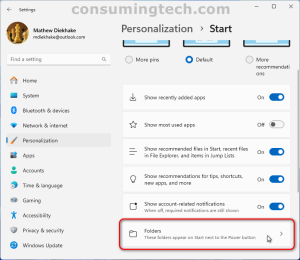
4. Click on Folders:
- In the Start settings, click on Folders. This option allows you to choose which folders appear on the Start menu next to the Power button.
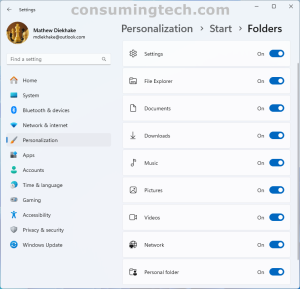
5. Add or Remove Folders:
- Toggle the switches to On for the folders you want to display (e.g., File Explorer, Settings, Documents, Downloads, Music, Pictures, etc.) or Off to remove them.
These folders will now appear on the Start menu next to the Power button for quick access.


