Last Updated on November 12, 2024 by Mat Diekhake
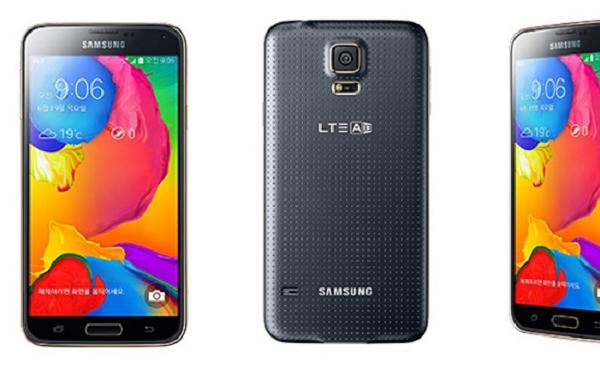
We are continuing to report on the first batch of CM 12 custom ROMs which are readily available for Android devices. Now we are telling you about the same Nightly ROM for the Samsung Galaxy S5 LTE variant of this years flagship under the Sammy name. There are a few different smartphones that come under the 4G “LTE” description for the S5. The following is working for all of them except for the AT&T and Verizon. Even though they are two of the largest available within the United States, there are other phone carrier networks and model numbers in other countries. Hopefully the CyanogenMod team can find a solution for the two unlucky network in the States. As soon as that happens we will create the guide.
Some rooting guides we create allow people to install a custom recovery after unlocking the device from the system internal. However, in this instance we must have a custom recovery such as ClockworkMod recovery or team Win’s TWRP recovery running on the device before starting the installation.

Furthermore, the steps we are providing are working for both versions of the CWM and TWRP. Therefore, you can make the choice.
- Take a full Nandroid backup of the current ROM. A Nandroid backup lets you store pictures, video, music, settings, WiFi passwords, other passwords, phone contacts and even the saved game data so you can pick up any application where you left off. That said, some people don’t like using the Nandroid option. For you people we recommend the Titanium backup app available from the Google Play Store.
- You may take a Nandroid without rebooting the device by installing the Online Nandroid backup application.
- You must enter recovery mode during the steps. There you will upload the files for the ROM and Google Gapps pack. It’s also the same place where you want to take the Nandroid backup. Just remember to apply the same before selecting the “wipe data” option or else the device is left empty.
- There is nothing we can do if you accidentally wipe the device so there’s no data left.
- Allow USB Debugging permissions from the Developer Option available at the Settings menu.
- Make sure you have the latest USB drivers. Most of you already have the up to date drivers from Samsung. You know this if you are connecting to the computer and accessing the pictures.
- Try downloading the ROM Manager app if you cannot access the custom recovery mode during the guide. The normal way of opening recovery is with the button sequence.
- You must have an Apple, Linux or Windows computer, notebook, or laptop before starting. We are transferring the files from the desktop to the phone.
- If you search for “how to install CM 12 without a computer,” you will get the same guide we have here minus the transferring of the files. That’s because there is no other way. The computer is inserted in the guide because it’s the safest way to transfer the data.
- You should backup the EFS folder since this is a Samsung device. The EFS is where the IMEI number stays. If you accidentally wipe the data you are left without the number and the recovery is difficult. We recommend you look for the Samsung EFS backup application from Google Play. You must have root access before installing.
- You can learn more about CyanogenMod 12 here.
How to update the Samsung Galaxy S5 LTE with CM 12 Android 5.0.2 Lollipop
- Download the nightly ROM here.
- Download the Lollipop Gapps pack here.
- Use the desktop of the computer for the files.
- Connect the S5 LTE to the computer using the USB cable.
- Transfer the files using the Copy/Paste feature.
- Power off the handset.
- Boot it up in recovery mode.
- Note: it’s the last chance to make a backup of the OS!
- Select the “wipe” option for TWRP or “wipe data/factory reset” for CWm users.
- Select “install” or “install zip from SD card,” followed by “choose zip from SD card.”
- Upload the Cm 12 nightly build file.
- Repeat the process and upload the Gapps pack.
- Boot the phone in normal mode by selecting the option from the main recovery screen.
- The first boot can take several minutes longer the first time.
- Disconnect the phone properly by stopping the USB mass Storage device.
