Last Updated on February 25, 2024 by Mathew Diekhake
In Windows 7 and 8, the WinSXS folder would continue to grow the longer you had the computer, taking up what many believed to be unnecessary hard drive space. In Windows 10 and Windows Server 2016, things have changed, and Windows will now automatically delete any unnecessary files that were being stored on the WinSxS folder, so you don’t have to worry about it using up hard drive space that you could have been using on other things.
While Windows 10 does automatically clean the PC, it still keeps many of the components for a period of time before removing them. It does this so you can potentially roll back and use them—in other words, to live on the safe side. However, in doing so, it is using up hard drive space before being eventually deleted.
Windows gives you the chance to clean up the component store and remove all unneeded files quicker if you prefer. That way you’re always getting the maximum amount of hard drive space possible.
The following tutorial demonstrates how to remove all unnecessary files of the component store when you’re using a version of the Windows 10 operating system.
Method One: How to Clean Up Component Store (WinSxS folder) using StartComponentCleanup Task
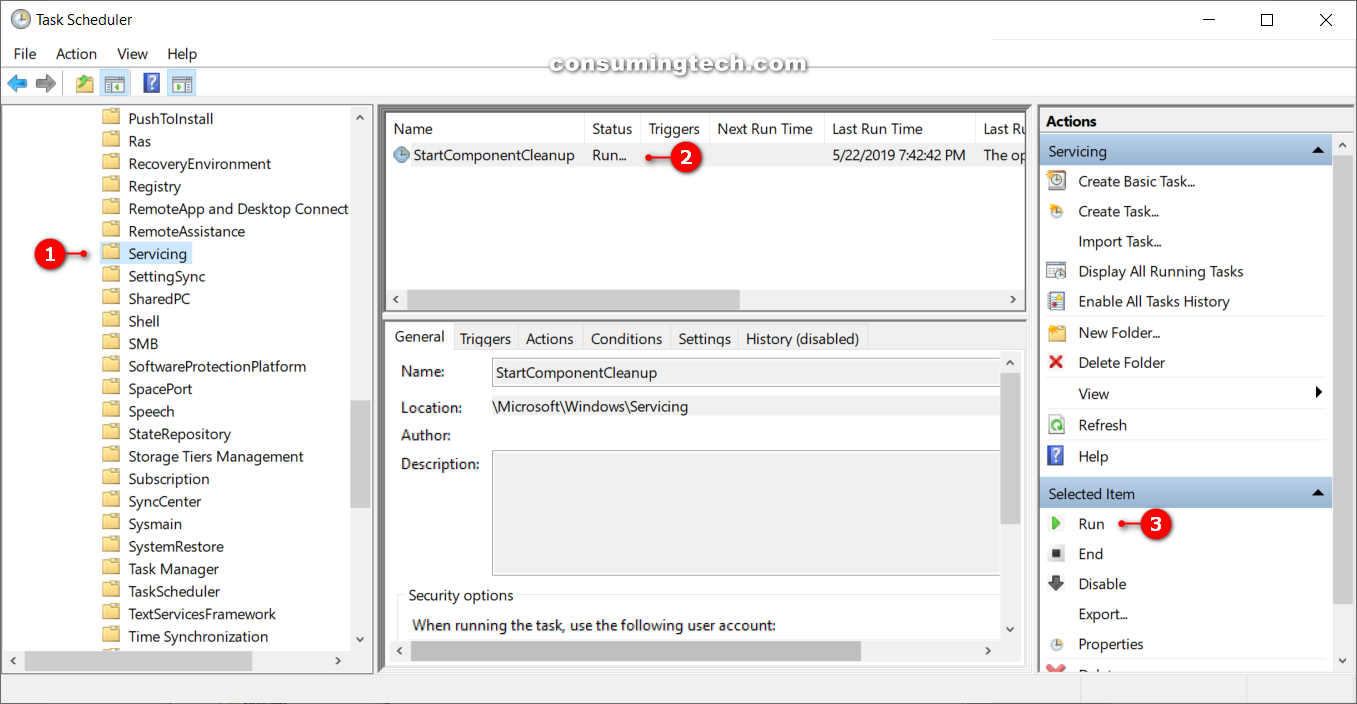
Here is how you can clean up the component store using the StartComponentCleanup task from the Task Scheduler.
Note: You can only run the StartComponentCleanup task from the elevated version of the Command Prompt.
1. Open the Run dialog by pressing Win+R keys, and then type taskschd.msc and click on the OK button to open the Task Scheduler.
2. Using the Task Scheduler left pane, navigate through to the following folders:
Task Scheduler Library\Microsoft\Windows\Servicing
3. With Servicing selected, select the StartComponentCleanup task from the middle pane, and then click on the Run button under the Selected Items heading in the right side pane. (click to enlarge screenshot below)
Method Two: How to Clean Up Component Store (WinSxS folder) using /StartComponentCleanup with Dism Command
1. Open the elevated Command Prompt.
If you’re prompted by User Account Control, click on the Yes button.
Type the following command into the command line and then press the Enter key on your keyboard to execute it. (click to enlarge screenshot below)
Dism.exe /online /Cleanup-Image /StartComponentCleanup
You can now close the elevated Command Prompt window and continue using your computer if you like.
Method Three: How to Clean Up Component Store (WinSxS folder) using /StartComponentCleanup and /ResetBase with Dism Command
1. Open the elevated Command Prompt.
If you’re prompted by User Account Control, click on the Yes button.
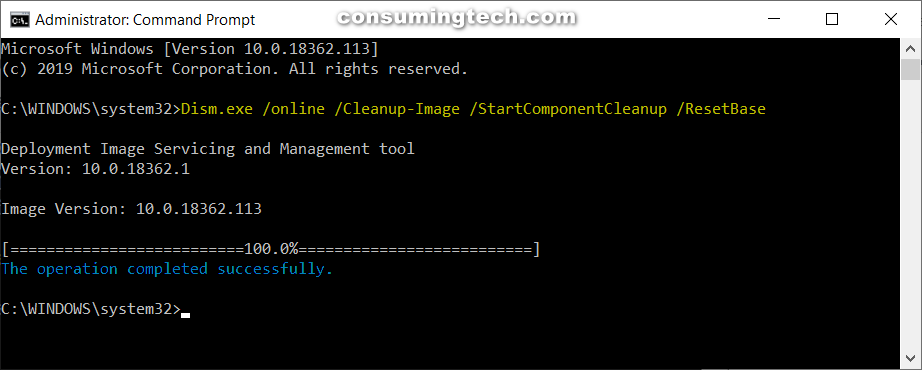
Type the following command into the command line and then press the Enter key on your keyboard to execute it. (click to enlarge screenshot below)
Dism.exe /online /Cleanup-Image /StartComponentCleanup /ResetBase
You can now close the elevated Command Prompt window and continue using your computer if you like.
Method Four: How to Clean Up Component Store (WinSxS folder) using /SPSuperseded with Dism Command
1. Open the elevated Command Prompt.
If you’re prompted by User Account Control, click on the Yes button.
Type the following command into the command line and then press the Enter key on your keyboard to execute it. (click to enlarge screenshot below)
Dism.exe /online /Cleanup-Image /SPSuperseded
You can now close the elevated Command Prompt window and continue using your computer if you like.
That’s all.


