If you want to make changes to the Windows operating system, one of the places you’ll venture into the most is the Registry, and the way you can do that is by using the Registry Editor application.
The good thing about the Registry is that you don’t need to have a particular edition of Windows to use it—as long as you’re signed in as an administrator, then you can get access to the Registry Editor app even if you’re using the “Home” edition of Windows, which is the one that comes with most PCs.
The other way you can make changes to Windows is with Group Policies and by opening up the Local Group Policy Editor application. However, Group Policies do require you to have at least the Pro version of Windows.
When you’re making changes to the Registry Editor, you do it by expanding keys that are found in the left side pane. With the Local Group Policy Editor, however, these are called folders that you can see in the left pane.
What is Registry Editor
All the different settings on offer within the Windows operating system are exposed and on show for everyone to see when they enter the Registry. If ever you want to change something on Windows that goes beyond the traditional settings that you get from the Settings application or the Control Panel then it can be done within the Registry.
While the Registry is how you can customize your Windows experience, it isn’t a good idea to enter the Registry to delete its existing files in the hopes that it will enhance by speeding up the operating system. Windows doesn’t work that way, and instead of creating a quicker experience you may be deleting important files that your OS needed to run properly. Alternatively, you should use the Registry when you want to make changes to existing settings. And if you aren’t an experienced Windows user, you should probably leave your registry experience for your administrators to handle.
How to Open Registry Editor in Windows
You can always open the Registry Editor app using the same universal method across all versions of the Windows operating system, including the latest iteration, Windows 10. Here are the different ways you can do it:
To Open Registry Editor Using Run Dialog
1. Press the Windows logo + R key combination on your keyboard to bring up the Run dialog box. In the Run dialog, type Regedit and then click on the OK button. You’ll be prompted by User Account Control — a new Windows security feature — where you then need to click on the Yes button to allow the app to make changes to your device.

To Open Registry Editor from Search
2. You can also type Regedit into the search field in the taskbar and then click on the Registry Editor app from the list of available apps.
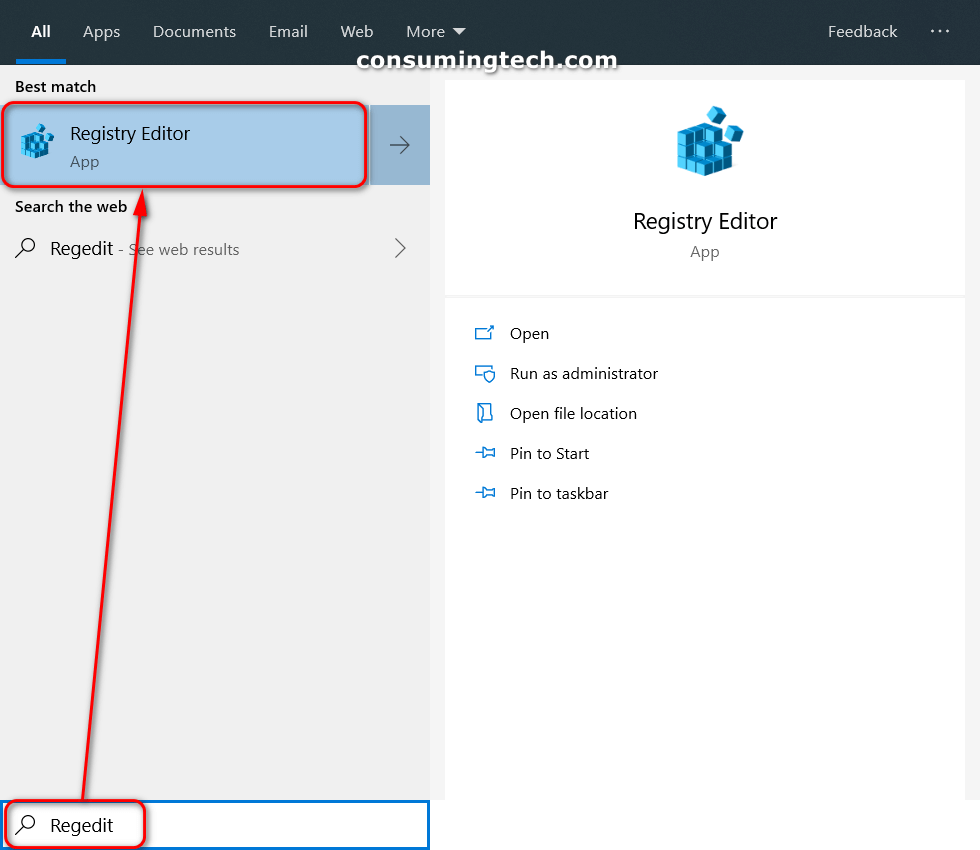
3. The Registry Editor window is now open on your computer’s display.
The above method is always available and how Windows expects most people to open up the Registry; however, there are other ways that you can do it as well. You can open up File Explorer and then navigate to the C:\Windows which you’ll find from This PC. In here you will find the regedit.exe file, which can be double-clicked on to open the Registry Editor directly. You may also create a new shortcut for the regedit.exe and have it on your desktop or in the Start menu.
Understanding Registry Editor Layout
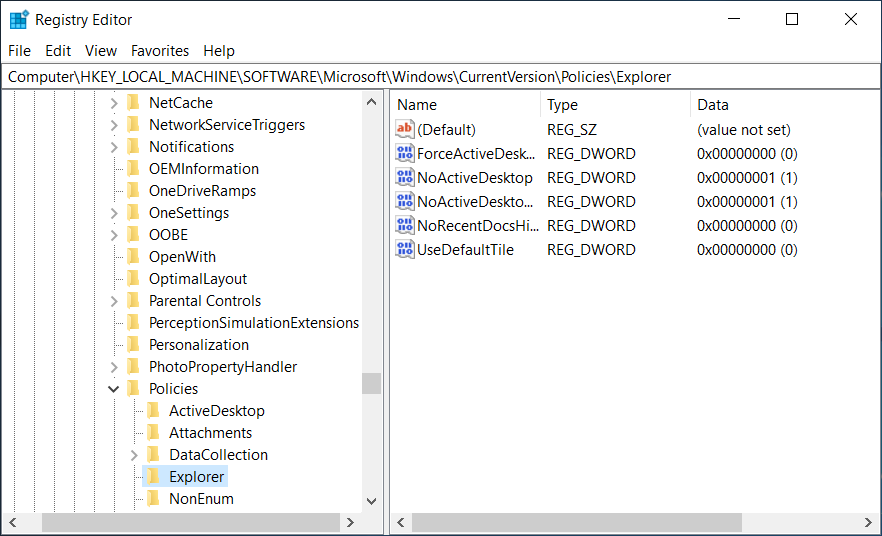
When you first open up the Registry Editor, you’ll see a left pane and a right pane. The left pane consists of the keys that you can click on to expand and navigate. Many of the keys you can see are parent keys, meaning they expand to reveal subkeys. This is how you go about navigating through the key paths. Each key you click on will be opened in the right side pane. It’s in the right pane for each key that you can modify existing settings or even create new ones.
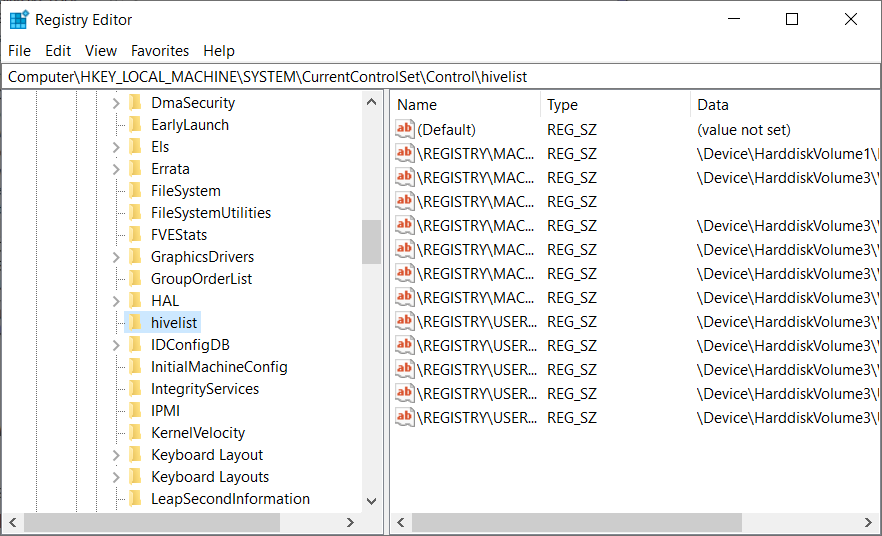
The keys offer you a way to see the virtual data listed inside several files. These together make up what is known as the registry database. There’s even a key you can head to to take a look at what files make up your registry database, which can be seen below.
Most of the files that you get in the Registry are shown in a hierarchical tree structure with keys. However, you can also get some virtual root keys that exist for backward compatibility. For instance the HKEY_CURRENT_CONFIG and HKEY_CLASSES_ROOT and both virtual views, with the latter also having system keys.
While you’ll be able to modify existing keys, some parts of the registry database that make up the Windows operating system don’t get shown in the Registry Editor. This is so you can’t change them. One example of this is the Security Accounts Manager.
How to Create New Keys
To create a new key, navigate to the path you want to find the key after you’ve created it, and then right-click on the key that you want to create a subkey for. Now hover your cursor over New and select the Key option from its submenu.

You’ll want to name the key appropriately so you know how to identify it later. There are no limits as to what you can call a key, but it’s only useful to you if you can understand what the key is representing in the future, so name carefully. Also worth noting is that the key names appear in alphabetical order usually, but the keys you create yourself don’t. Our guess is Windows does it this way so you can also see the keys you’ve created easier than you otherwise would if it were following the same rules as the existing keys.
How to Create New Values
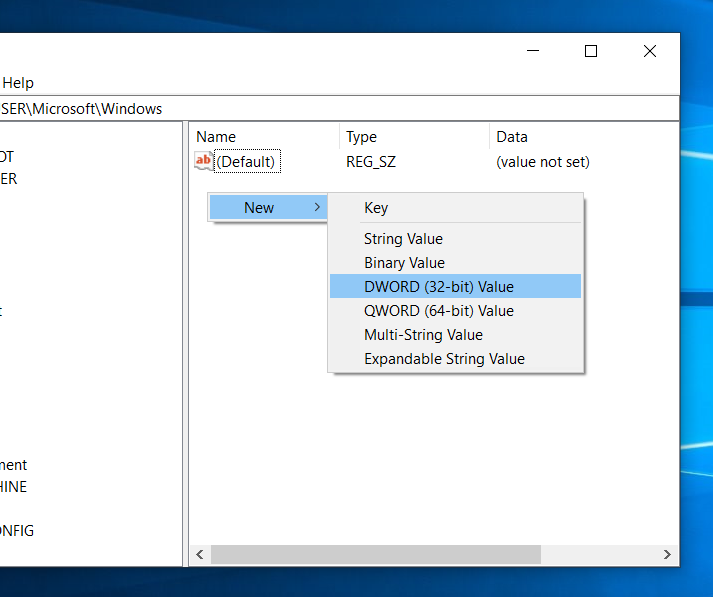
To create a new value, right-click in the right side pane of your chosen key and then hover the cursor over New and then select the type of value that you want from the list. Most times you’ll probably want to be creating a new DWORD 32-bit value for adding features around Windows.
Each existing key has a set of values in the right side pane. You can use these existing values to change the settings of the keys. You can also create new keys that aren’t there yet if you want to change a setting that isn’t available to you by default.
How to Take Ownership of Registry Keys
New permissions in Windows 10 are pretty straightforward to understand: you’re either an admin or you’re not. But if you’re still used to using Windows 7 or Windows 8 then you might be more accustomed to taking ownership of files. Just like with files, you can take ownership of a registry key as well if you want. If you ever wind up in a situation where you don’t have the necessary permissions to modify a registry key in a situation, such as needing to change the Windows Resource Protection, then you can use this next part of the guide to take ownership so that modifying it becomes possible.
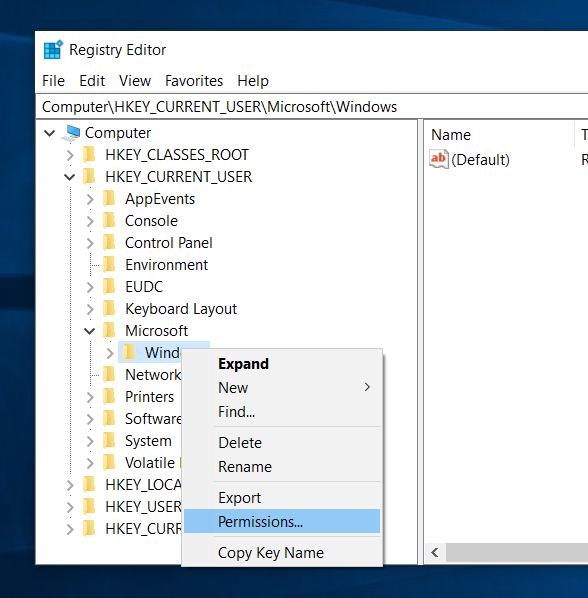
1. To take ownership, navigate to the key you want to own and then right-click on it and select the Permissions option from the menu.
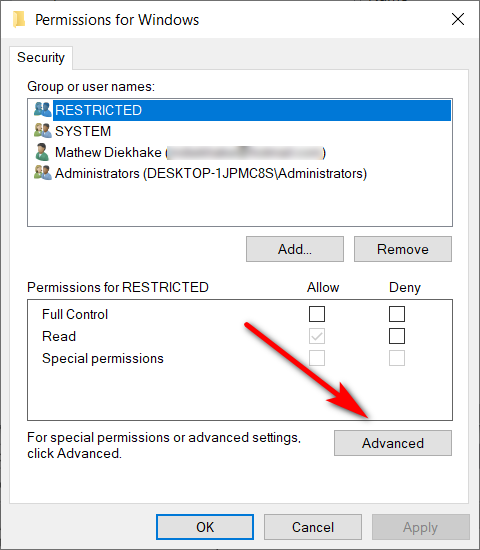
2. From the Permissions dialog, click on the Advanced button.
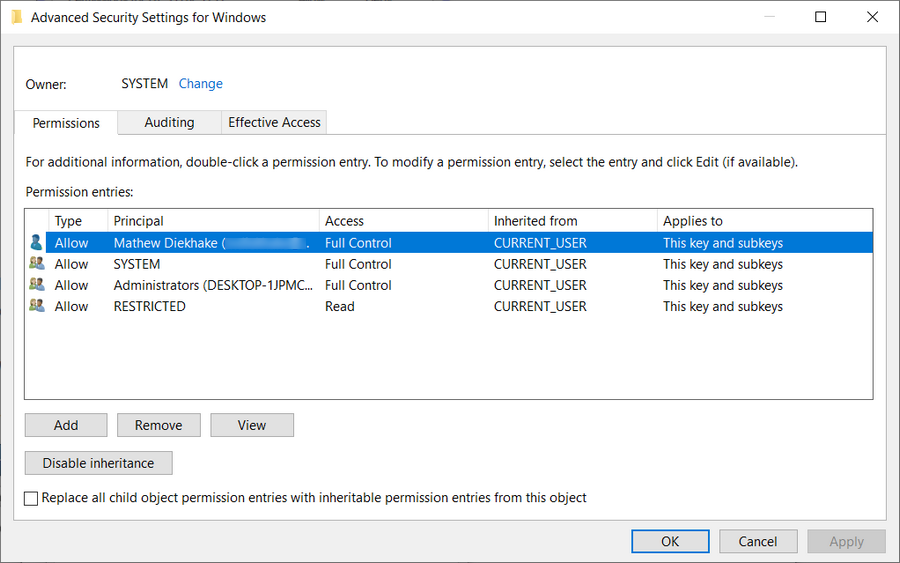
3. Now from the Advanced Security Settings for Windows screen, you can choose the permissions.
That’s all.
This article was last updated on May 21, 2019.
Related Tutorials
- How to Remove Details Tab from File Properties in Windows 10
- How to Uninstall Mixed Reality Portal in Windows 10
- How to Disable Cortana in Microsoft Edge in Windows 10
- How to Disable Telemetry and Data Collection in Windows 10
- How to Turn Off and Disable UAC in Windows 10
- How to Add or Remove People Icon from Taskbar in Windows 10
- How to Automatically Login in Windows 10
- How to Fix “You’ve been signed in with a temporary profile” Error in Windows 10
- How to Change Touch Scrolling Friction in Windows 10
- How to Delete a Service in Windows 7, Windows 8, and Windows 10