Throughout Windows’ history, Microsoft preferred to defer antivirus protection to third-parties, so it was common to use antivirus from a company that wasn’t owned or operated by Microsoft. Windows Defender originally began as just spyware protection; however, with the release of Windows 10, Windows Defender was now a full-fledged antivirus solution and one that is optimized by Microsoft to run seamlessly in the background while you use your computer.
Few things are as important as running antivirus on your Windows 10 computers. The viruses that Windows users get gives the operating system a bad wrap. But viruses are more common because Windows is such a popular operating system, so it’s frequently targeted by the bad guys who try to get something out of the masses of people who flock to it. All operating systems would be just as vulnerable to the common trick that awaits you when you use Windows if they were as popular as Windows is.
Windows Defender has been around for a while now, but it wasn’t until Windows 8 that Microsoft decided to offer it preinstalled and for free on the computer, so you guys didn’t have to source out what antivirus to install all on your lonesome. In Windows 10, Windows Defender continues to shine and there’s no need to replace it as your antivirus for something else coming from a third-party vendor no matter how much they want to try to tell you that their product is amazing and Windows Defender isn’t good enough, although you could replace it with something else if you preferred.
Windows Defender is already working in the background, running scans every so often and keeping your computer protected as soon as you start using Windows 10. You can replace it if you want—lots of people still do after having developed a relationship with antivirus they used in the past—but the there’s no need to anymore. Windows Defender also has some additional upside with it now being fully integrated into the Settings application, so you can get access to it easily whenever you want. It may even prove a wise choice if you like your software as light weight as possible as Microsoft has the added advantage of being able to manipulate their own products to work more seamlessly with their environments than other companies ever could—we see them do this with the Microsoft Edge browser that is clearly the quickest and apparently offers a battery advantage for laptops and tablet users as well.
Note: There are times when people will want to turn off Windows Defender for a short period, and that’s fine. But you should be very careful about using the computer without any antivirus protection. If you were to go online and start browsing the Web, it wouldn’t take long for your computer to pick up some potential malware that’s sole intention was to stop you from being able to use your computer. I’ve done this myself and wound up not being able to use my PC without a complete reinstallation of Windows, which took several hours and recovery disks because the malware had altered my Advanced Recovery menu. If you want to change antivirus programs, instead of turning Windows Defender off before you install the next one, you should just install the third-party antivirus and let WIndows turn off the Windows Defender automatically. That way your computer is always protected.
Windows Defender is the default antivirus that ships with Windows 10. You don’t have to do anything to set it up; just starting using Windows 10 and it’s already working in the background automatically and comprehensively protecting your computer from all the different types of malware that are threats to your computer: viruses, worms, trojan horses, spyware, and other rogue security software.
For more on Windows 10 threats and to understand exactly what they are, see: How to prevent and remove viruses and other malware
The following tutorial demonstrates how to turn on and off the Windows Defender real-time protection when you’re using a version of the Windows 10 operating system.
Method One: How to Turn On/Off Windows Defender Read-Time Protection in Settings
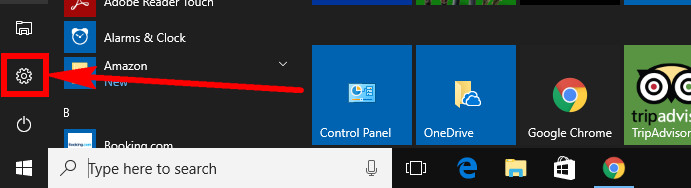
You can enable or disable the Windows Defender real-time protection directly from the Settings application in Windows 10. To get started, click on the Start button that’s in the bottom left-hand corner of the taskbar and then click on the Settings gear icon from the Start menu’s far left side pane.
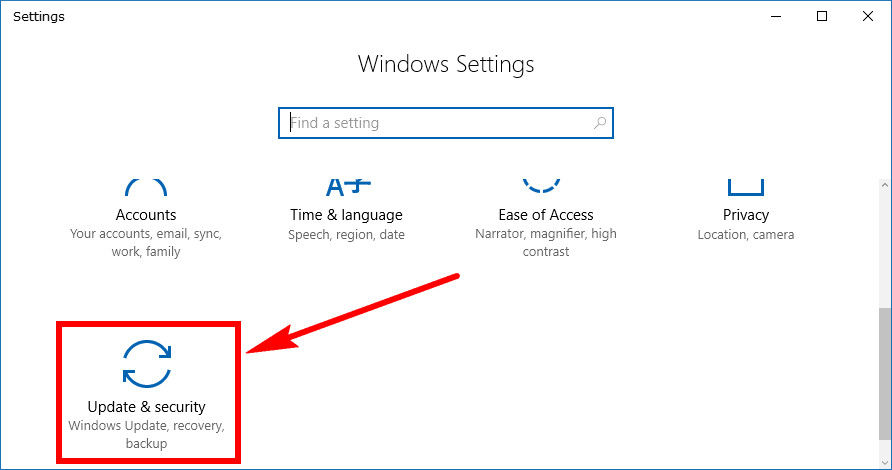
From the Windows Settings click on the Update and security link. (click to enlarge screenshot below)
It opens up showing you the options available for Windows Update first. Click on the Windows Defender in the left pane and then look for the Real-time protection heading and toggle beneath it in the right side pane. That’s the toggle you need to switch on or off depending on what you want. Toggling it off means the Windows Defender real-time protection will be off and vice versa. (click to enlarge screenshot below)

If you toggle the real-time protection from Windows Defender off from the Settings application, you’ll get a notification appearing in the bottom right corner of your computer’s display letting you know that your PC is currently unprotected from viruses and that you should turn it back on. To do that, you can click on the notification if you like.
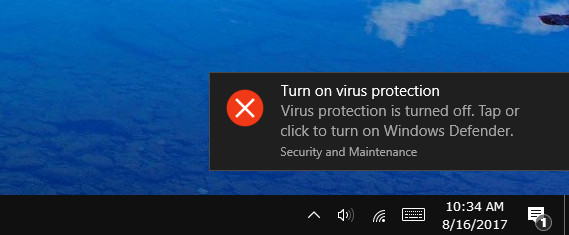
The notification is only on the screen for a few seconds so that you might miss it. If that happens, just click on the Action Center icon from the taskbar and then’ you’ll see the notification for turning on your Windows Defender protection. All you need to do is click on that notification.

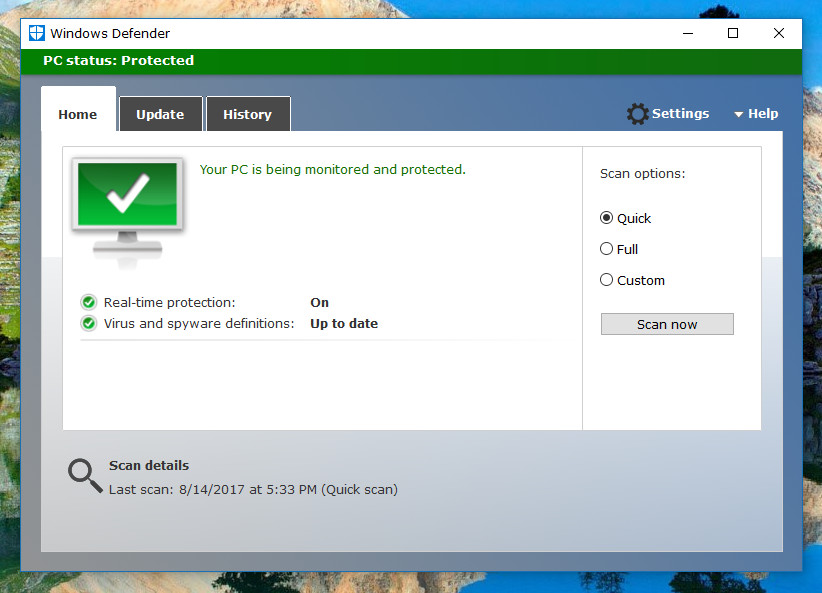
The Windows Defender user interface then opens on your screen. In the beginning, you’ll see a button for turning the protection on. For most computers that button then disappears, and Windows 10 automatically turns it on for you. If that happens to happen on your computer though, then you’ll need to click on that button for turning it on. The button is located roughly in the middle of the Windows Defender window and to the left, just below the picture of the computer monitor. (click to enlarge screenshot below)
You can close the Windows Defender user interface and continue using the computer.
Method Two: How to Turn On/Off Windows Defender Read-Time Protection in Group Policy
You can turn the Windows Defender real-time Protection on or off from within the Local Group Policy Editor as well if you like. To do it this way, press the Windows logo key + R and then type gpedit.msc into the Run dialog box to open up the Local Group Policy Editor to make changes to the Group Policy.
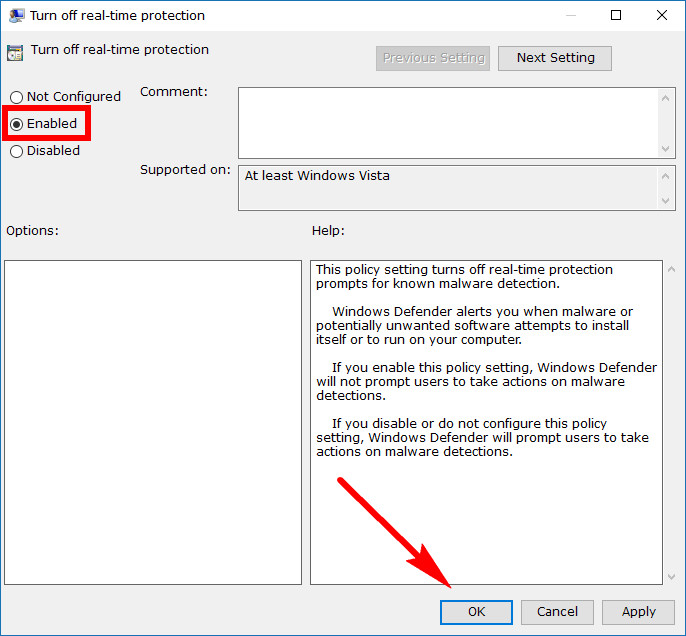
Now with the Local Group Policy Editor open, navigate to the Computer Configuration/Administrative Templates/Windows Components/Windows Defender/Real-time Protection path. You’ll then see an option from the right-side pane to Turn off real-time protection that you need to double-click your mouse on so the options for it open. (click to enlarge screenshot below)

By default it’s not configured, so you’ll need to switch it over to the Enabled checkmark and then click on the OK button at the bottom of the window. (click to enlarge screenshot below)
You can close the Local Group Policy Editor and continue using the computer.
Method Three: How to Turn Off Windows Defender Real-time Protection in Windows Defender Security Center
Here is how you can turn off the Windows Defender real-time protection from within the Windows Defender Security center app.
1. Open Windows Defender Security Center.
2. Click on the Virus and threat protection icon.
3. Under the Virus & threat protection settings heading, click on the Manage settings link.
4. Use the toggle to turn off real-time protection.
5. If prompted by User Account Control, click Yes.
6. Windows Defender is turned off when you can see the message that says Real-time protection is off, leaving your device vulnerable.
That’s all.
Method Four: How to Turn On Windows Defender Real-time Protection in Windows Defender Security Center
Here is how you can turn on the Windows Defender real-time protection from the Windows Defender Security Center app:
1. Open Windows Defender Security Center.
2. Under Virus & threat protection, click Turn on.
OR
1. Click on the Virus & threat protection icon.
2. Under the Virus s& protection settings heading, click on the Manage settings link.
3. Use the toggle to turn on real-time protection.
4. If prompted by User Account Control, click Yes.
5. You know the Windows Defender is working for your computer when the toggle is blue again.
You can now close the Windows Security app.
Method Five: How to Turn On Windows Defender Real-time Protection in Windows Defender Antivirus
Here is how you can turn on the Windows Defender real-time protection from within the Windows Defender antivirus client:
Note: Starting from Windows 10 version 1703, Windows Defender is now integrated into the Windows Security app. You no longer get the dedicated Windows Defender client; instead, all the settings from Windows Defender and Windows Security have been combined into the one place. If you disable the Windows Security Center service, it will not result in Windows Defender AV or the Windows Defender Firewall being turned off. Read more: Windows Defender Antivirus in the Windows Security app
1. Open Windows Defender.
2. Click on the Turn on button.
3. You know it is working when the computer diagram changes from red to green.
You can now close the Windows Defender client.
Method Six: How to Enable/Disable Windows Defender Real-time Protection in Group Policy
Here’s how you can enable and disable the Windows Defender real-time protection from a Group Policy:
Note: You will only find the Local Group Policy Editor on one of the following Windows 10 editions: Windows 10 Pro, Windows 10 Enterprise, and Windows 10 education.
1. Open the Local Group Policy Editor.
2. From the Local Group Policy Editor’s left pane, navigate through to the following folders:
Computer Configuration/Administrative Templates/Windows Components/Windows Defender Antivirus/Real-time Protection
3. With Real-time Protection selected, double-click on the Turn off real-time protection policy in the right side pane.
4. From the Turn off real-time protection policy window, choose between Not Configured (to enable Windows Defender real-time protection), Enabled, (to disable Windows Defender real-time protection), and Disabled (to enable Windows Defender real-time protection).
You can now close the Local Group Policy Editor.
Method Seven: How to Turn On/Off Windows Defender Real-time Protection in Windows PowerShell
Here is how you can turn on and off the Windows Defender real-time protection from the elevated version of the Command Prompt:
Note: Turning off the Windows Defender from Windows PowerShell only temporarily disabled the Windows Defender antivirus. Windows will eventually turn it on automatically once it senses it has been turned off from PowerShell, and it won’t necessarily stay off until you turn the computer back on again.
1. Open the elevated Windows PowerShell window.
2. Type one of the following commands into the PowerShell window and then press the Enter key to execute it:
3. To Turn On
Set-MpPreference -DisableRealtimeMonitoring 0
or
Set-MpPreference -DisableRealtimeMonitoring $false
4. To Turn Off
Set-MpPreference -DisableRealtimeMonitoring 1
or
Set-MpPreference -DisableRealtimeMonitoring $true
You can now close the Windows PowerShell window.
Method Eight: How to Turn On/Off Windows Defender Real-time Protection in Command Prompt
Here is how you can turn on and off the Windows Defender real-time protection from the elevated version of the Command Prompt:
1. Open the elevated Command Prompt.
2. Type one of the following commands into the Command Prompt window and then press the Enter key to execute it.
3. To Turn On
PowerShell Set-MpPreference -DisableRealtimeMonitoring 0
or
PowerShell Set-MpPreference -DisableRealtimeMonitoring $false
4. To Turn Off
PowerShell Set-MpPreference -DisableRealtimeMonitoring 1
or
PowerShell Set-MpPreference -DisableRealtimeMonitoring $true
You can now close the Command Prompt window.
If you do decide to roll with Windows Defender as your antivirus solution, you should always keep it on unless you have valid reasons for temporarily needing to turn it off. If you have turned it off, always turn it back on again as soon as you can. Even if you think your web browsing skills are top-notch, it doesn’t mean you won’t still pick up in infections when roaming the internet without protection turned on.
This article was last updated on April 30, 2019.
Related Tutorials
- How to Enable/Disable Disk Write Caching in Windows 10
- How to Turn On/Off Fast Startup in Windows 10
- How to Use Alarms in Windows 10
- How to Add/Remove Windows Defender Exclusions in Windows 10
- How to Remove Windows Defender Icon in Windows 10
- How to Turn On/Off Windows Defender in Windows 10
- How to Scan with Windows Defender in Windows 10
- How to Manually Update Windows Defender in Windows 10
- How to Remove Windows Defender Permanently in Windows 10
- How to Get Rid of Windows Defender Notification Icon in Windows 10
- How to Windows Modules Installer Worker High CPU & Disk Usage in Windows 10
- How to Run System Maintenance Troubleshooter in Windows 10
January 14, 2019 @ 13:36
When I bought my new laptop it came with a bunch of crapware over the top from McAfee even though Windows already comes with Windows Defender antivirus/antimalware protection out of the box.
I know this is because my laptop manufacturer is making extra money on the side from McAfee by allowing McAfee to be installed on the computers. Probably a figure large enough to satisfy the manufacturer but low enough so that McAfee still makes a profit by the number of people who then sign up to McAfee products.
All up I spent about 10 minutes removing this crapware from my computer. There was a range of McAfee antivirus files that needed to be uninstalled (and one of them was a pain in the butt, on purpose). And then to top it off there was also McAfee web browser protection, so half the web pages I visited from Google Chrome would come up with a notification about how McAfee is apparently doing my computer wonders at alerting me to potential threats.
Being someone who is into tech, I am able to see through all this nonsense. But I do really feel for all the people who are none the wiser. One can only assume that is most of the people who wind up signing up to be McAfee subscribers also.
January 14, 2019 @ 13:38
It doesn’t seem like those types of deals are going away anytime soon. There is actually a tool you can use now that helps you remove all McAfee-related programs on your computer so you don’t have to waste too much time going around and manually uninstalling them.
You can find it here: How to remove McAfee products from a PC running Windows