System protection is a feature that Windows 10 has so you do not lose data if something goes askew in your operating system. System protection allows you to rewind the clock and restore an older snapshot of the computer by doing a system restore.
It’s well documented that system protection is not always turned on for every computer that runs on Windows 10. What was not understood outside of the Redmond grounds is why Microsoft had chosen to have some copies of Windows 10 rollout with system restore off. With still no definitive answers coming from Microsoft, we still are only able to guess, but we have learned more about why Microsoft is potentially thinking of getting rid of it altogether which could eventually prove to be the key for understanding what is happening with Microsoft’s system restore.
Before you can do a system restore with system protection, your computer needs to be taking restore points. Those restore points take up hard disk space. You can choose how much disk space you want to limit the restore points to, but if it is going to be taking enough restore points to be useful, then you need a computer that has a decent amount of storage up for grabs. With devices changing over the years and geared more toward being smaller and away from desktops, Microsoft may be looking at bringing out devices that do not have much storage at all, in which case it would make the system restore feature redundant in those devices. Microsoft would then have a decision to make: would it be better not having system restore available at all so that people do not get confused or would it be better to have some devices that come with it and some that do not. They might be planning that now.
The following tutorial demonstrates how to turn on and off the system protection for drives when you are using a version of the Windows 10 operating system.
How to Turn On/Off System Protection for Drives in Windows 10
The quickest way to turn the system protection feature in Windows 10 on or off is by opening up the Quick Links menu. Here is how you can do that:
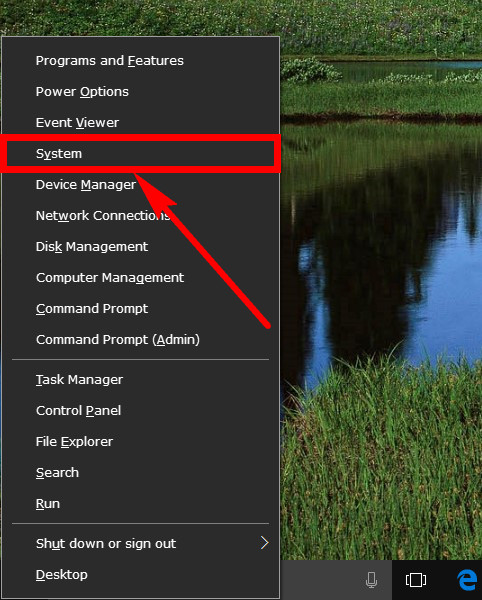
1. Do that by pressing the Windows logo key + X and then click on the System link from the menu.
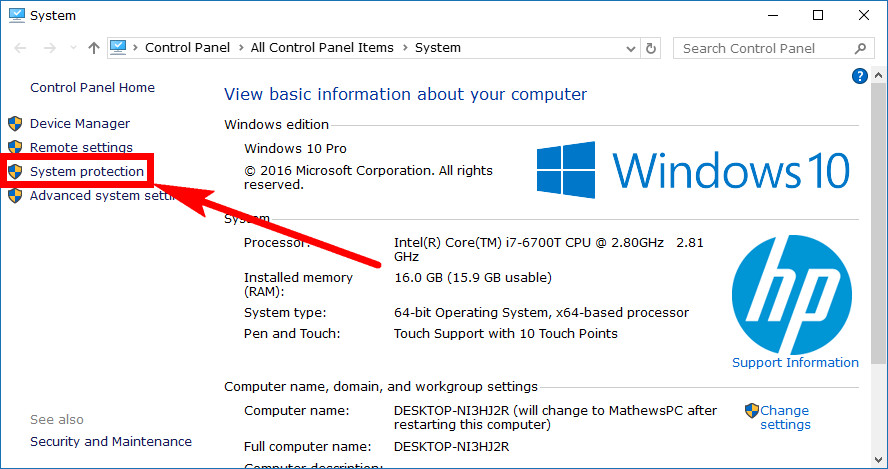
2. You then get to the System area of the Control Panel quicker by doing that. Now just click on the System protection link from the left pane.
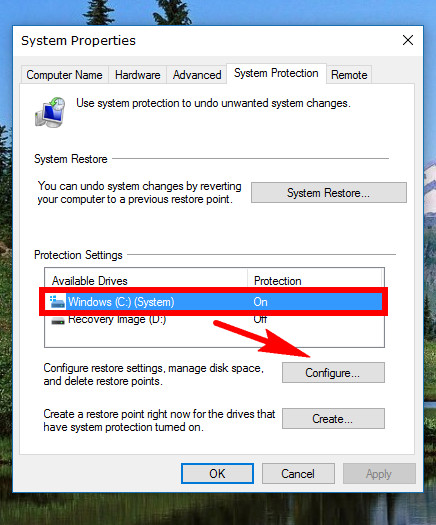
3. You now have the System Properties dialog box open. Select the drive that you want to have system protection turned on or off for and click on the Configure button.
4. Now from within the System Properties for your drive, look under the Restore Settings heading for the two options for turning the system protection on or off. If you want to have it turned on, then keep the checkmark in the Turn on system protection checkbox.
If you want it off, then put the checkmark in the Disable system protection checkbox instead.
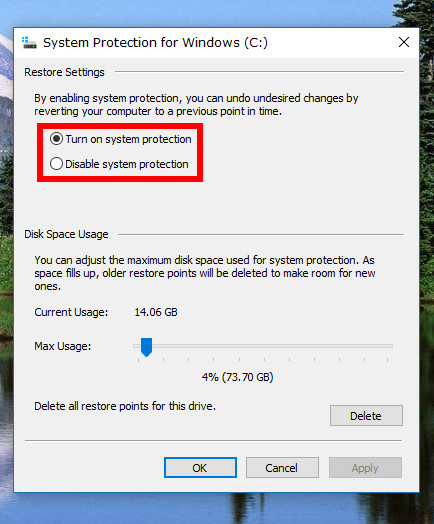
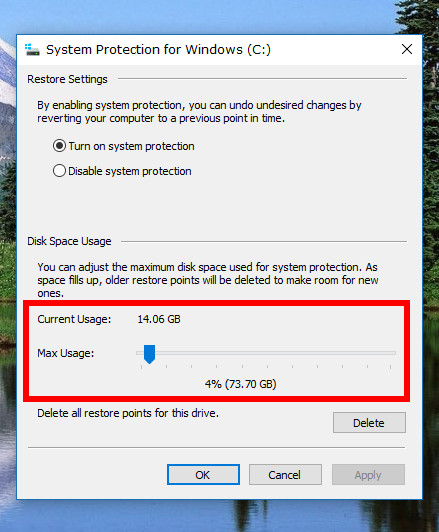
5. Under the Disk Space Usage heading, you also get the chance to choose what the maximum usage is for the restore points. You can see how much space it is going to be using up of your disk space under the bar.
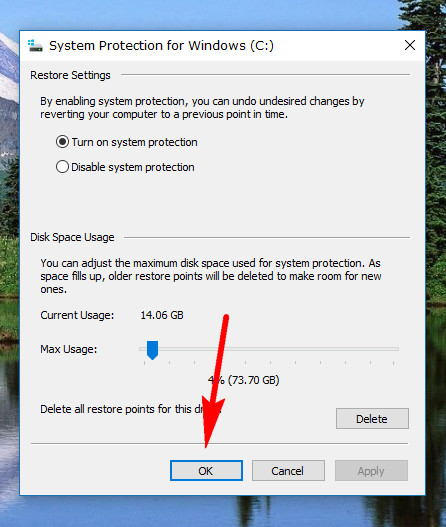
6. Click on the OK button at the bottom of the System Protection dialog box when you are happy with your selections.
If you suffer from crashes and computer problems and your antivirus isn’t fixing it, then the next thing most people think to do is to take a system restore. Just remember that in order to be able to use system restore, you first need to have the system protection turned on first.
Related Tutorials