Windows Search in Windows 10 offers all users a simple way to navigate around the operating system without having to remember the directions: If it’s an application you’re looking for, then simply type the name of it into Search and then click on the app when it appears under the Best Match section to open it.
To save time when searching, the default search index won’t search through every possible location that you might want to be searching if you were an advanced searcher. Instead, it searches the most obvious locations which is where most people’s answers are going to come from. If you ever use Windows Search and you don’t find what you were looking for, then you’re the kind of person the Enhanced Mode for the search index was designed for.
The following tutorial demonstrates how to turn on and off the Enhanced Mode for the search index when you’re using a version of the Windows 10 operating system.
How to Turn On/Off Enhanced Mode for Search Indexer in Settings
You can turn on and off the Enhanced Mode for the search index from the Settings application by choosing either Classic or Enhanced from the Searching Windows section. Here is how you can do that:
1. Open the Settings app and then click on the Search icon from the main Windows Settings menu. This tutorial shows you all the different ways in which you can open the Settings app in Windows 10: How to Open Settings in Windows 10
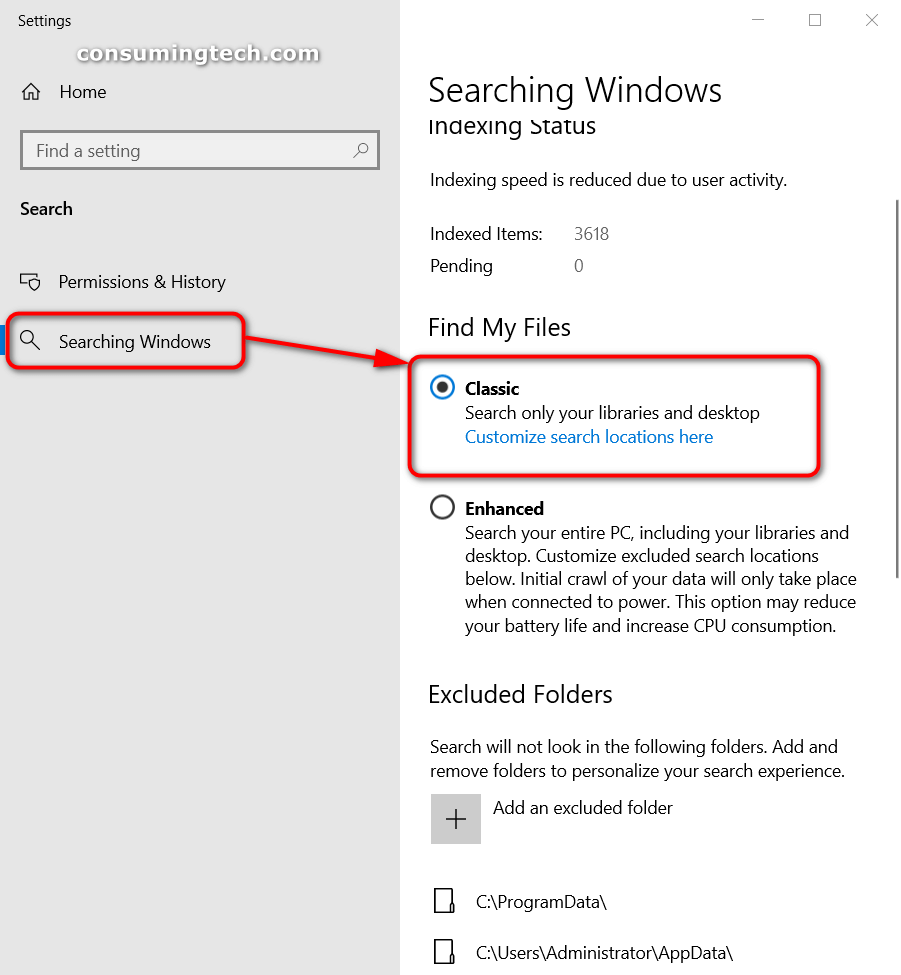
2. To Turn off Enhanced Mode for Search Index
a. From the Searching Windows menu on the left side, click on Classic under the Find My Files heading.
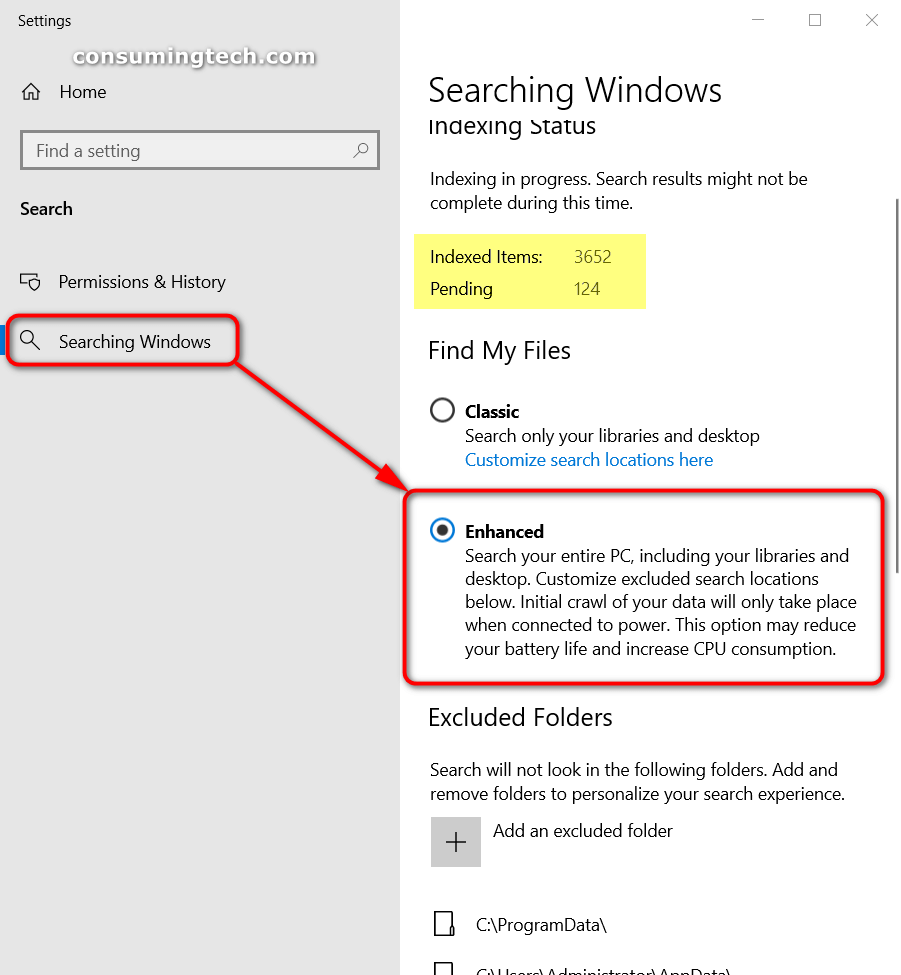
3. To Turn off Enhanced Mode for Search Index
a. From the Searching Windows menu on the left side, click on Enhanced under the Find My Files heading.
You can now close the Settings app and continue using your computer if you like.
How to Turn on/off Enhanced Mode for Search Indexer in Registry Editor
You can also turn on or off the Enhanced Mode for the search index from the registry if you like. Here is how you can do that:
1. Open the Registry Editor app by pressing the Windows logo + R keys to open Run and then typing regedit into the Run dialog and clicking on the OK button.
2. If you get prompted by User Account Control for security reasons, click on the Yes button to allow the Registry Editor app to make changes so you can continue.
3. In the Registry Editor app, navigate to the following location:
HKEY_LOCAL_MACHINE\SOFTWARE\Microsoft\Windows Search\Gather\Windows\SystemIndex

4. Double click on the EnableFindMyFiles DWORD and then click on Edit DWORD.
5. Choose one of the following options depending on what it is you would like to do.
a. To keep Find My Files in Classic Mode, type 0 in the Value Data field and then click on the OK button to close the dialog and save the changes.
b. To put Find My Files in Enhanced Mode, type 1 in the Value Data field and then click on the OK button to close the dialog and save the changes.
You can now close the Registry Editor app and continue using your computer if you like.
That’s all.
(This article was last updated on July 28, 2020.)
Related Tutorials
- How to Turn On or Off Presentation Mode in Windows
- How to Enable/Disable Microsoft Edge Pre-launching in Windows 10
- How to Save List of Running Processes in Task Manager to File in Windows
- How to Add Website to All Apps in Start Menu in Windows 10
- How to Create Custom Font with Microsoft Font Maker App in Windows 10
- How to Reset Windows Mobility Center Default Open Position in Windows 10