The following tutorial demonstrates how to select a power plan and check the advanced power plan settings for your computer when using a version of the Windows Vista operating system.
Windows Vista allows for the setting of power plans. These power plans are most often utilized for choosing between getting the most performance out of the hardware or the most out of the battery. By default, the power plan is set up to offer a perfect blend between the two.
Beyond selecting a vague plan for your needs, you can choose when to turn the computer’s display off when it’s being powered by the battery and set a different time if you wish for when it’s plugged into a power source and not relying on the battery. Moreover, via the advanced power plan settings on the screen that proceeds the former, you can get into more detail yet again and select what you would like the power to do for the hard disk, wireless adapter, USB settings, power buttons, and lid, search indexing and more.
How to Select Power Plan and Check Plan Settings in Windows Vista
You can select a power plan and check the power plan’s advanced settings from the Control Panel in the Windows Vista OS. Here is how to do that:
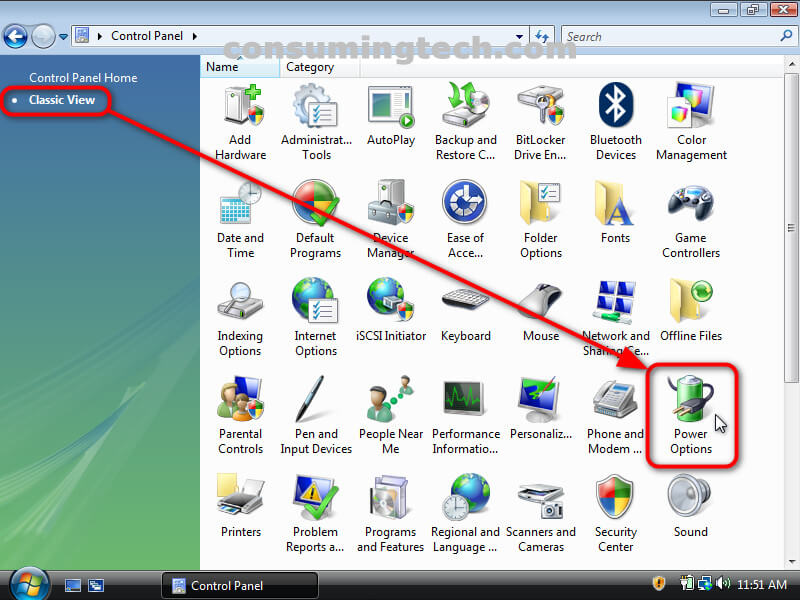
1. Open the Control Panel and click on Classic View from its left menu.

2. From the list of Control Panel icons, click on Power Options.
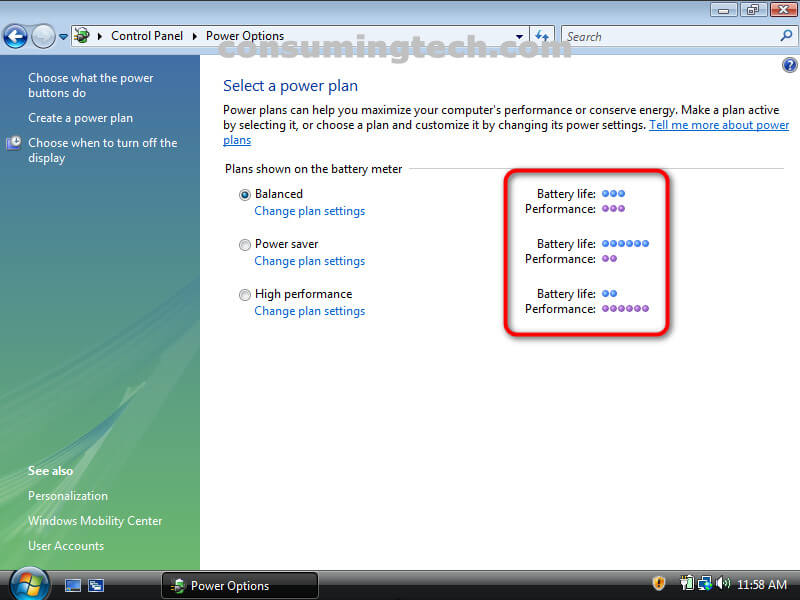
Note: You will see three power plans available to select: Balanced, Power saver, and High performance. You can probably tell by the names what each of them means, but to give you an even better idea, there are stat bars on the right side of each of the names. The Balanced power plan means there will be a 50/50 balance between performance and battery-saving; the Power saver power plan means the battery life will be heavily favored; and the High-performance power plan means the performance of the computer’s hardware will be heavily favored over the battery life.
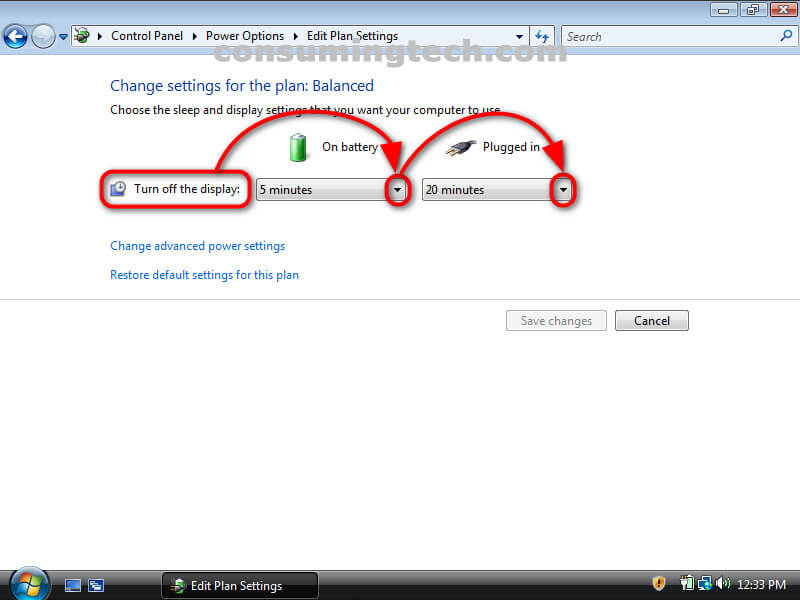
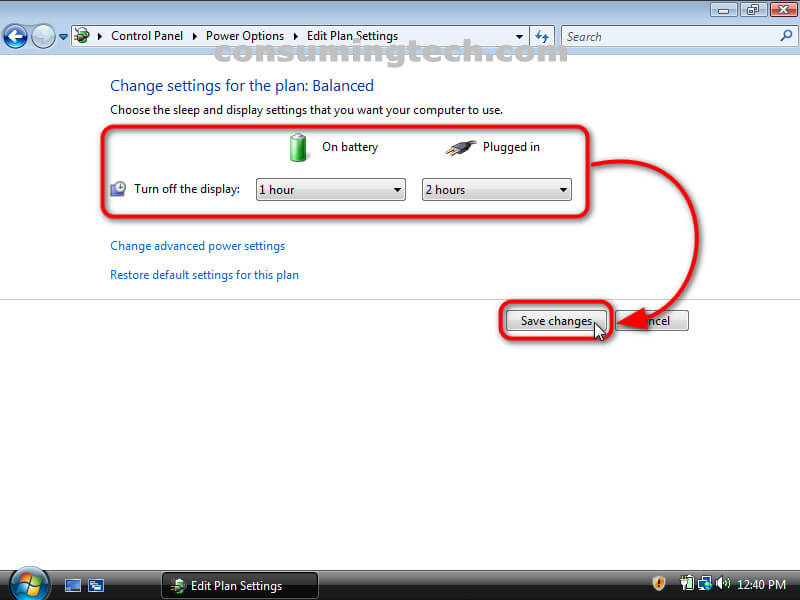
3. Next to the Turn off the display: heading, click the drop-down menus for On battery and Plugged in and select the times you would like for each.
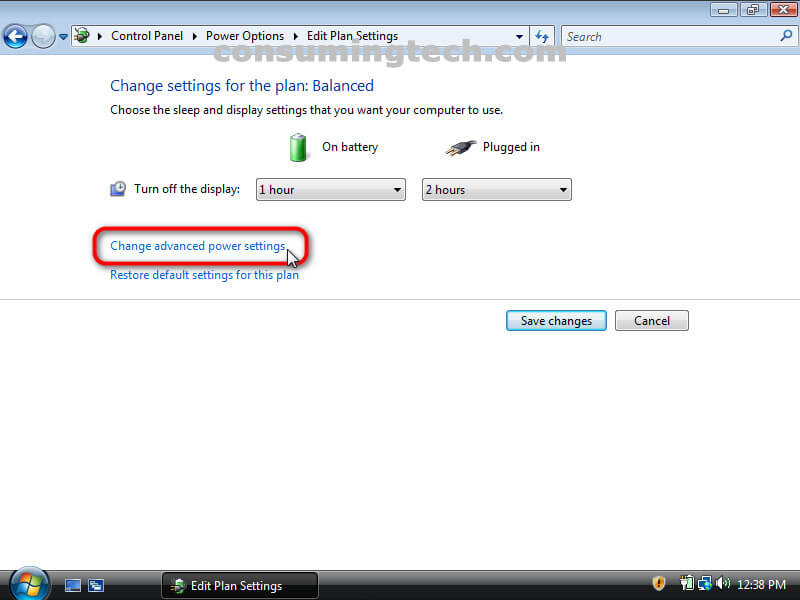
Note: We find these settings are much too short for our preference and prefer to extend them to one hour and two hours respectively.
4. You can also click on the Change advanced power settings link located directly beneath the drop-down menus to get access to additional settings related to the computer’s power settings.
5. From the Power Options dialog box, scroll down and expand the power option you would like to adjust.
Note: This Power Options dialog is a common place for Windows enthusiasts to venture into. Subsequently, Microsoft has also made it possible to adjust the same display settings from this dialog that could have been adjusted from the main Power Options screen of the Control Panel that was open in the previous steps in the article.
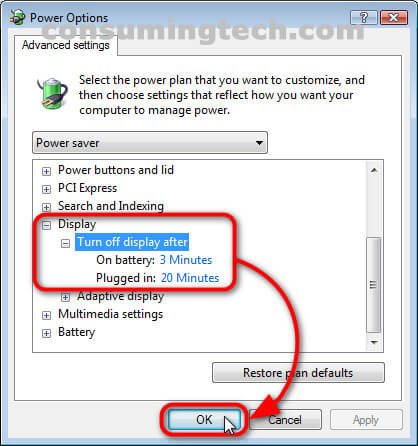
6. Once you are happy with your selections, click on the Save changes button.
In conclusion, that’s how to set a power plan and check the power plan’s advanced settings when using Windows Vista.
Related Tutorials
- How to Change Internet Time Synchronization Update Interval in Windows Vista [Tutorial]
- How to Adjust Cookie Preferences in Internet Explorer in Windows Vista [Tutorial]
- How to View Boot Information at Startup in Windows Vista [Tutorial]
- How to Select Power Plan and Check Plan Settings in Windows Vista [Tutorial]
- How to Use Disk Cleanup in Vista [Tutorial]
- How to Change Menu Show Delay Time in Windows Vista [Tutorial]
- How to Troubleshoot Using Reliability and Performance Monitor in Windows Vista [Tutorial]
- How to Setup Event Viewer to Send Email Notifications in Windows Vista [Tutorial]
- How to Fix Program Installation Errors in Windows Vista [Tutorial]
- How to Change Recycle Bin Storage Size in Windows Vista [Tutorial]