I want to keep using the same Windows default backup feature that I had first learned in Windows 8 called File History. When I go to access File History though I can’t work out how to choose what drive the backups will be stored on. I realize that I can’t use my C: drive because I’m already using it and the point of a backup is to have it stored on another drive. I’d like to select either my external hard drive or USB thumb drive as the drive to use for the backups. Resolution:
Before Windows 8 was released, the Windows operating system had Backup and Restore (formerly Windows Backup and Restore Center) for taking backups. Microsoft stated that due to its low use, it would be deprecating the way users since Windows Vista had been taking backups via the traditional Backup and Restore; however, those using Windows 7 still could find the Windows 7 File Recovery Control Panel applet which allowed them to take similar backups.
File History is an application, that when turned on, will continually back up the files it finds on your desktop, in your libraries, in your Favorites folder, and your Contacts folder. If you leave File History on its default settings, it will back up these locations every hour, though you can change the amount of time you wish to elapse between backups to be as long as only once per day if you prefer. The backups can only occur for as long as you have the external hard drive or USB thumb drive connected to the computer; File History will not back up to the existing locations on the computer; it perceives them as useless locations to store backups since the point of a backup is in case your existing drives fail. File History will not ever erase files and folders that were previously saved to the drive; everything File History saves is saved to its own unique folder called “FileHistory.”
The following tutorial demonstrates how to select a drive for File History when you are using a version of the Windows 10 operating system.
Method One: How to Add File History Drive via Settings
You can add a drive to be used by File History for your backups from the Settings application. Follow these guidelines for adding a drive to File History so you can begin creating backups:
Note: There will be an automatic additional 26 characters added to the full path of the backup. The maximum full path that Windows 10 allows for is a total of 210 characters. This means any file with a path longer than 185 characters will not be backed up.
1. Open the Settings app. This tutorial shows you all the different ways in which you can open the Settings app when you are using a version of the Windows 10 operating system: How to Open Settings in Windows 10 [Tutorial]
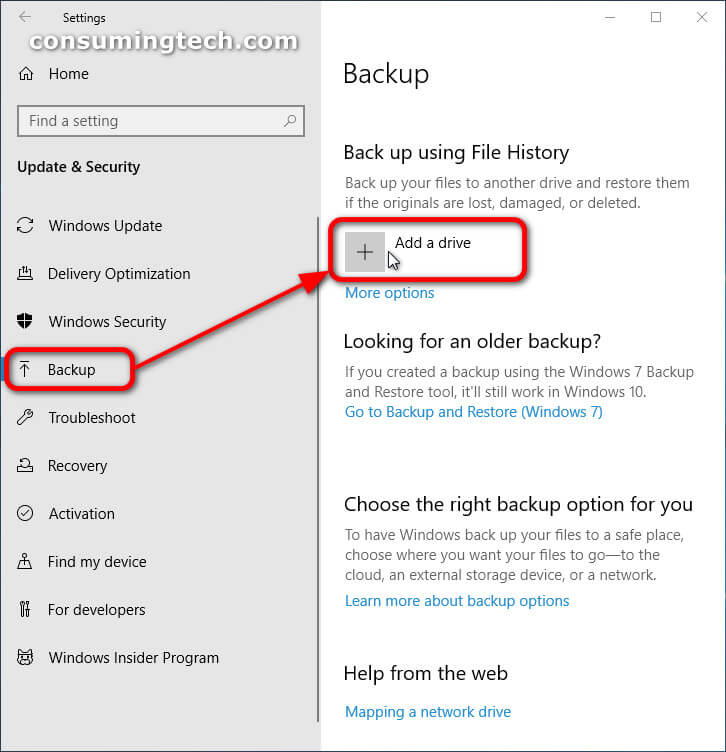
2. From the left side of the Update and Security menu, click on Backup, and then under Back up using File History click on the Add a drive link. (Click to enlarge the screenshot below.)
Note: This Add a drive link and icon only appears if you have not added a drive already. File History will not show you the option to add another drive if one is already set up. To remove a drive and set up another, you can navigate to from the same location More options > Stop using drive which is a button that appears under the Backup to a different drive heading.
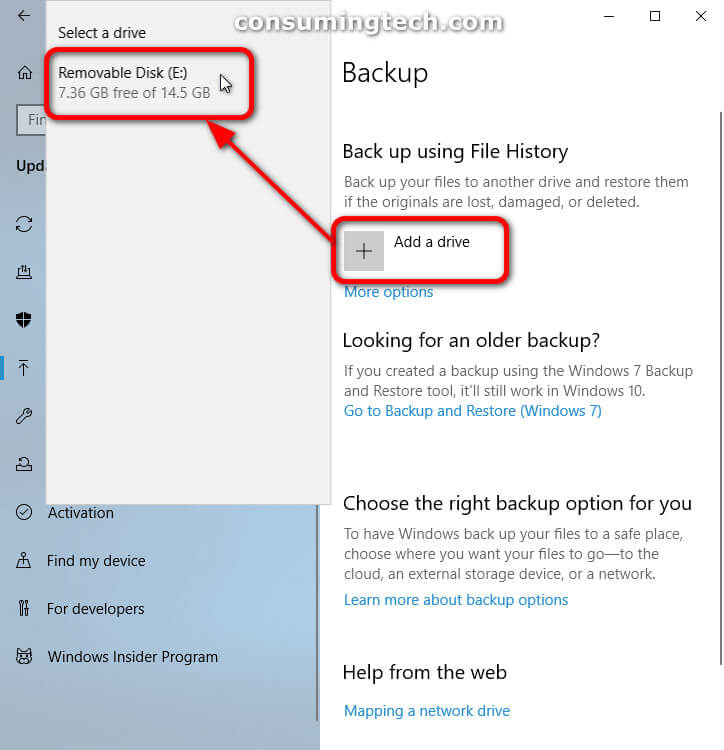
3. Select the drive (e.g. Removable Disk [E:]) you want to use for the File History Backups. For most people this will be the (D:) or (E:) drives by default. (Click to enlarge the screenshot below.)
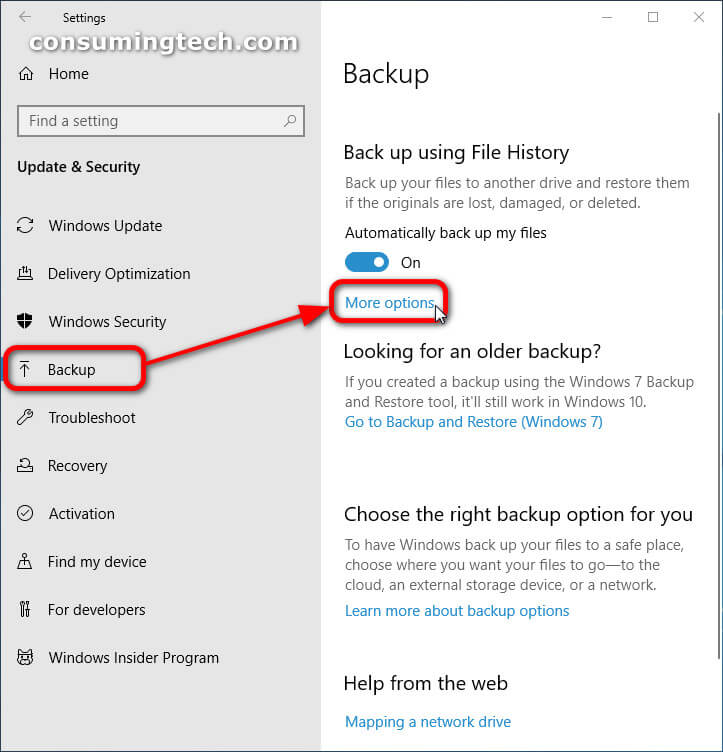
4. Once you have chosen a drive, File History will turn itself on, which is signified by the Automatically back up my files toggle being turned on in the Settings app. You will see this happen in front of you without having to navigate anywhere else. (Click to enlarge the screenshot below.)

You can now close the Settings app and continue using the computer.
Method Two: How to Change File History Drive via Settings
You can change the drive to be used by File History for your backups from the Settings application. Follow these guidelines for changing a drive to File History so you can begin creating backups:
1. Open the Settings app. This tutorial shows you all the different ways in which you can open the Settings app when you are using a version of the Windows 10 operating system: How to Open Settings in Windows 10 [Tutorial]
2. From the left side of the Update and Security menu, click on Backup, and then under Back up using File History click on the More options link. (Click to enlarge the screenshot below.)
Note: If you see the Add a drive link and icon, as shown in the method above, instead of the Automatically back up my files toggle turned on, then you will need to proceed to add a drive by using the tutorial in the method above until a drive has been added.
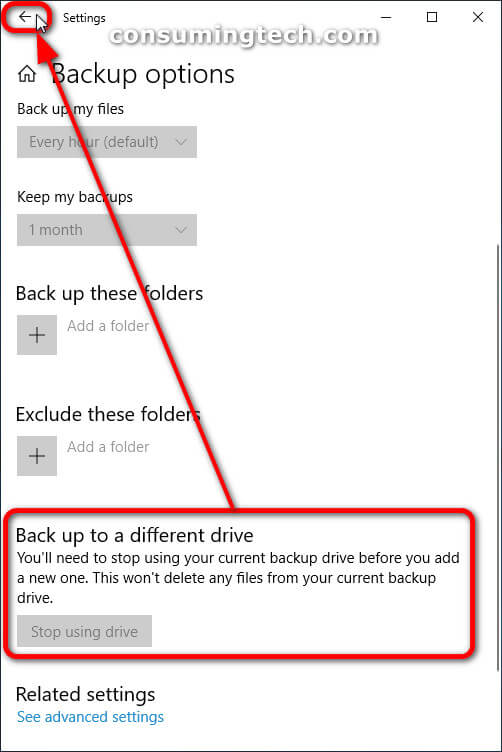
3. Scroll down until you get to the Back up to a different drive heading, and then click on the Stop using drive button. (Click to enlarge the screenshot below.)
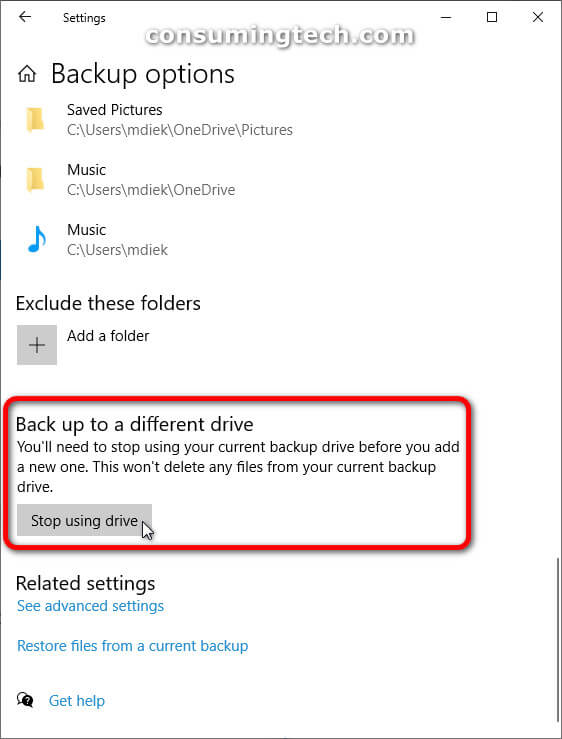
4. You know the drive has stopped being used when all the surrounding buttons become grayed out in the same region of the Settings app. You will need to click on the Back arrow in the top left corner of the Settings window to go back to where you came from. (Click to enlarge the screenshot below.)
You can now close the Settings app and continue using the computer.
Method Three: How to Add or Change File History Drive via Control Panel
You can add or change a drive to be used by File History for your backups from the Control Panel application. Follow these guidelines for adding or changing a drive to File History so you can begin creating backups:
1. Open the Control Panel in icons view. This tutorial shows you all the different ways in which you can open the Control Panel when you are using a version of the Windows 10 operating system: How to Open Control Panel in Windows 10 [Tutorial]
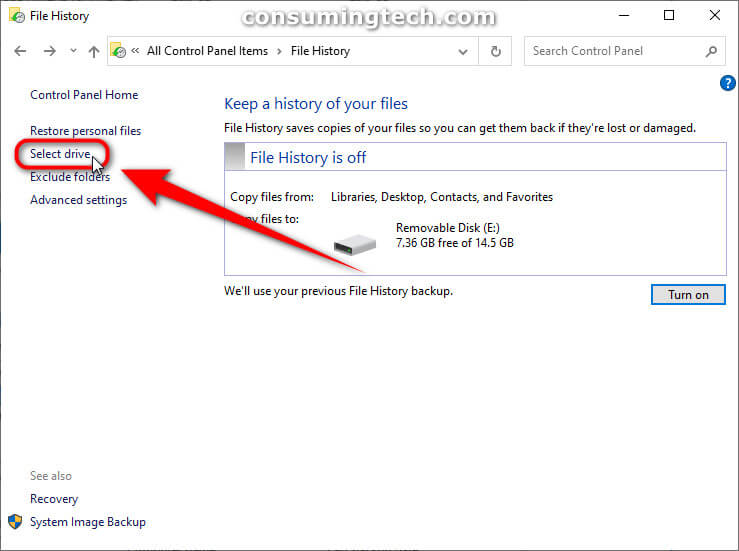
2. Click on the File History icon from the list of All Control Panel Items.
3. Click on Select drive from the left side of File History. (Click to enlarge the screenshot below.)
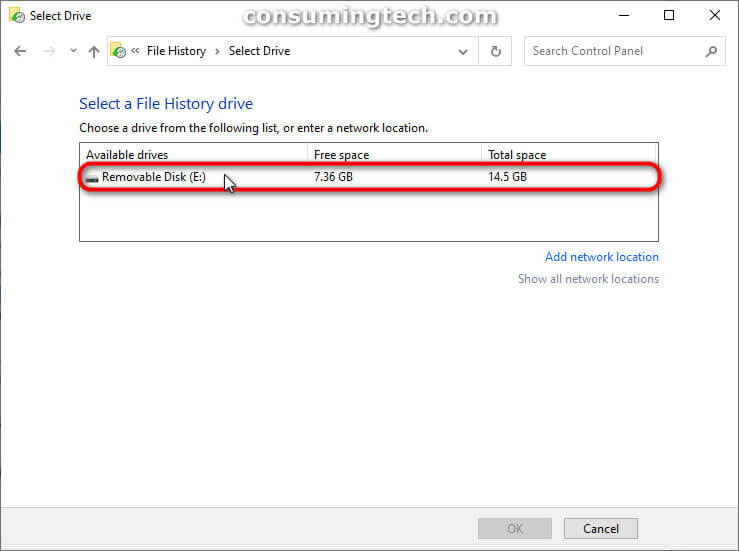
4. Select the File History drive you want (e.g., Removable Disk [E:]) by clicking on it once so that it is highlighted. (Click to enlarge the screenshot below.)
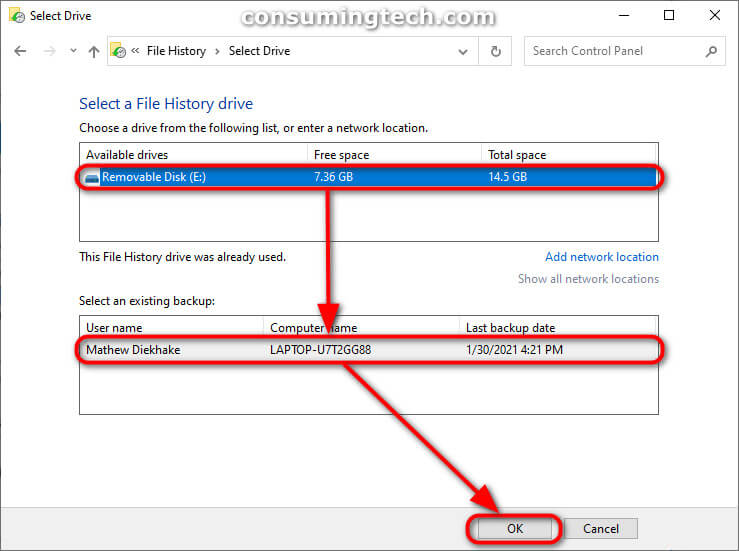
5. Click on the OK button at the bottom of the Select Drive window to finish the selection. (Click to enlarge the screenshot below.)
Note: If the drive you selected has already been in use by File History, you will need to select an existing backup under the Select an existing backup: heading on the same page.
The Control Panel has now automatically turned on File History which can be observed from the same window where it says File History is on; it will also be automatically preparing to back up your files which can take some time to complete. Luckily this generally means you also have ample time to cancel the backup if you should so desire, which can be achieved by clicking on the Turn off button at the bottom of the same window. By turning off File History, it will automatically prevent it from backing up your files at the same time. What’s more, the backup will not automatically resume if you were to turn it back on again; for that, it would wait until you prompted it to begin or the time between backups has elapsed. (Click to enlarge the screenshot below.)

You can now close the Control Panel and continue using the computer.
That’s all.
Related Tutorials
- How to Backup/Restore Network Shares and Permissions in Windows 10 [Tutorial]
- How to Change How Often to Save File History in Windows 10 [Tutorial]
- How to Backup/Restore Sticky Notes App Settings in Windows 10 [Tutorial]
- How to See List of All Available System Restore Points in Windows 10 [Tutorial]
- How to Backup and Restore with Macrium Reflect [Tutorial]
- How to Change Windows Backup Settings in Window 10 [Tutorial]
- How to Restore Files/Folders from File History in Windows 10 [Tutorial]
- How to Automatically Create System Restore Point on Schedule in Windows 10 [Tutorial]
- How to Backup and Restore Sticky Notes in Windows 10 [Tutorial]
- How to Backup Files/Folders via File History in Windows 10 [Tutorial]
- How to Exclude Folders from File History in Windows 10 [Tutorial]
- How to Change How Long File History Stores Backups in Windows 10 [Tutorial]