The Windows 10 operating system offers you a variety of ways for you to change the name of a file: keyboard shortcuts, Properties dialogs, context menus, File Explorer ribbons, and even the command line and Windows PowerShell as well.
There are a few things to note before you can understand how to rename a file all the different ways in Windows 10:
- You can only rename a file when it is not in use. Close the file and then try again if it’s not letting you change the name,
- If you rename multiple folders at once, the second folder keeps the same name as the first folder but will have a (2) at the end, so you can see it’s the second file with that same name.
- Don’t change the file extension when you’re changing the file name (i.e., .txt) or it breaks the file, and the file can’t be used again until the extension name is changed back again.
- You can’t use any special characters for the file name: \ / : * ? ” < > | are all out of the question.
This tutorial demonstrates how to change the name of a file when you’re using a version of the Windows 10 operating system.
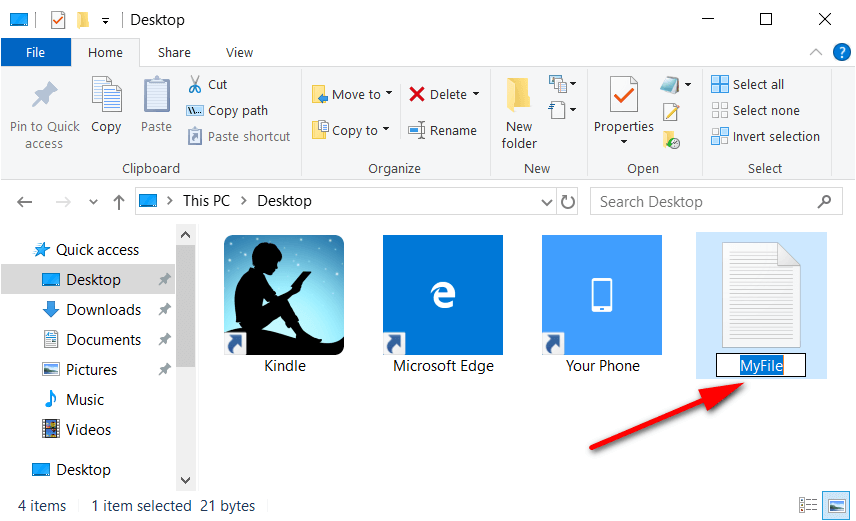
Option One: Rename File Using Keyboard Shortcut
1. With the desktop or File Explorer open, highlight the file you want to rename by clicking on it once.
2. Press the “F2” key on your keyboard.
3. You’ll now see the name of the file has opened up where you can type in the new name.

You can now close the File Explorer window.
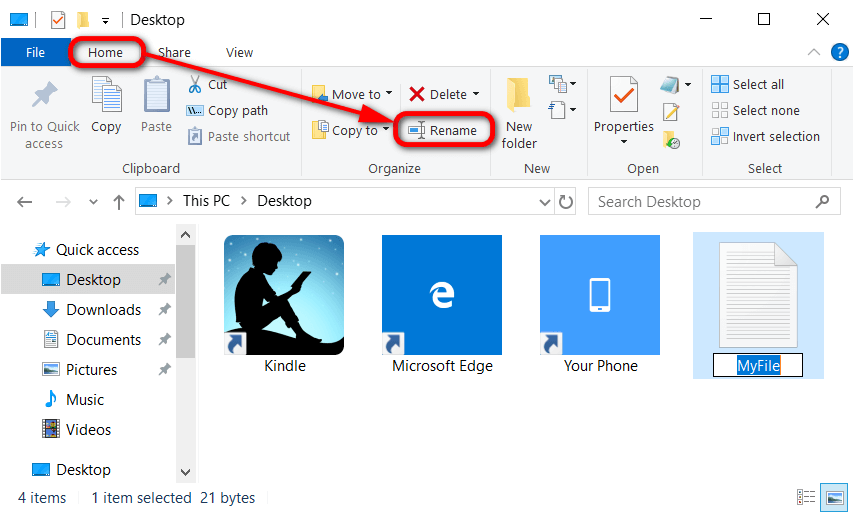
Option Two: Rename File from File Explorer Ribbon
1. Open the File Explore window.
2. Highlight the file you want to change the name of by clicking on it once.
3. Click on “Home” from the top menu and then click on “Rename.”
4. You’ll now see the name of the file has opened up where you can type in the new name.
You can now close the File Explorer window.
Option Three: Rename File from Context Menu
1. Open the File Explorer window.
2. Highlight the file you want to change the name of by clicking on it once.
3. Right-click anywhere within the highlighted area of the file and then click on “Rename” from the context menu.
Note: You could also press and hold the “Shift” key and right-click on the highlighted file, release Shift and then press the “M” key or click on “Rename.”
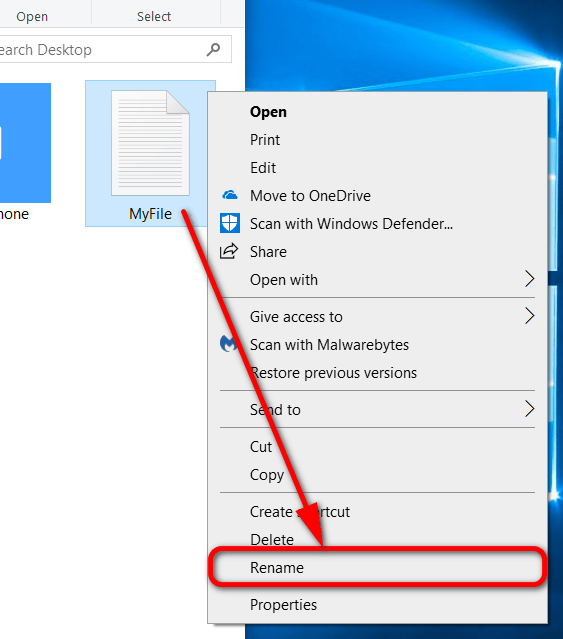
4. You’ll now see the name of the file has opened up where you can type in the new name.
You can now close the File Explorer window.
Option Four: Rename File from Properties
1. With the desktop or File Explorer open, highlight the file you want to rename by clicking on it once.
2. Right-click anywhere within the highlighted area of the file and then click on “Properties” from the context menu.
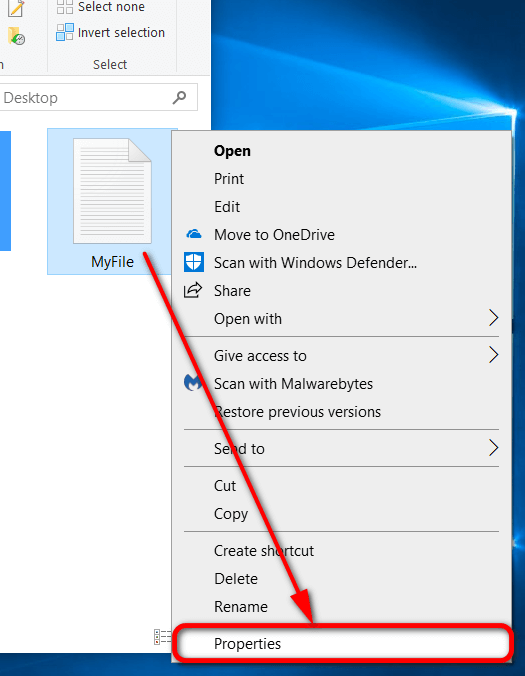
3. Under the General tab, enter the new name of the file where it shows you the current name and the available field to change it.
4. Click on the “OK” button to save the changes and close the file’s Properties dialog.

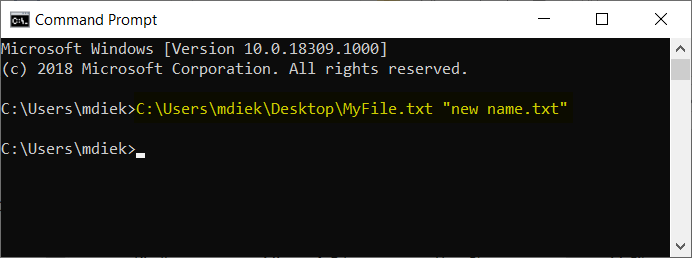
Option Five: Rename File in Command Prompt
1. Open the Command Prompt. (You may need to open the elevated Command Prompt if your file requires administrative permissions to change it.)
2. From the Command Prompt window, type the following command: ren "path of file" "new name"
Note: Change where it says “path of file” for the real full path of the file. Also, change where it says “new name” for the new name that you want the file to have.
 You can now close the Command Prompt window.
Option Six: Rename File in Windows PowerShell
1. Open the Windows PowerShell. (You may need to open the elevated Windows PowerShell if your file requires administrative permissions to change it.)
2. From the PowerShell window, type the following command: Rename-Item -Path "path of file" -NewName "new name" -Force
Note: Change where it says “path of file” for the real full path of the file. Also, change where it says “new name” for the new name that you want the file to have.

You can now close the Windows PowerShell window.
That’s all.
Related Tutorials
- How to Add/Remove Network in Navigation Pane of File Explorer in Windows 10
- How to Apply Default User Picture For All Users in Windows 10
- How to Rename a Folder on Start List in Windows 10
- How to Enable/Disable Thumbnail Previews in File Explorer in Windows 10
- How to Start Picture Slideshows from File Explorer in Windows 10
- How to Add/Remove “This PC” in Navigation Pane of File Explorer in Windows 10
- How to Disable Ads in File Explorer in Windows 10
- How to Fix File Explorer Opening Slowly in Windows 10
- How to Choose Between Having Emoji Panel Close Automatically in Windows 10
- How to Add/Remove File Explorer from Start Menu in Windows 10
January 30, 2019 @ 05:59
Microsoft always automatically syncs my files to OneDrive, even when I feel as though I don’t read any option to allow this. I usually take it slow during the setup process and can recall choosing whether or not I would like location services turned on et cetera. From experience every time I upload a picture to a Google account they always want me to store it there probably so they can get views for it or benefit from it in some way in the future. I’m sure it’s no coincidence that it’s always a maze trying to work out how you delete that pile of pictures you apparently shared on public from your accounts. The same feelings apply to this OneDrive picture uploads. Just because I take a picture of my balding head doesn’t mean I want to upload the picture automatically to the internet for everyone to see how my hair is going. I don’t even upload these pictures anywhere. They just sync directly from my phone.
I assume I can adjust these settings from within OneDrive itself, but I cannot get into my account because I get an error message. OneDrive still continues to have no problem getting my pictures upload to my account though. How can I troubleshoot OneDrive and change my OneDrive sync settings?
January 30, 2019 @ 10:27
See: How to Turn On/Off Auto Save Photos and Videos to OneDrive in Windows 10