The following tutorial demonstrates how to open Control Panel—when you’re using a version of the Window 7 operating system—and then set it to open showing the categories, small ions, and large icons view.
Changing how the links appear on the list of all Control Panel items only applies the changes to the main Control Panel menu. It won’t make any other changes throughout the rest of the Control Panel.
Method One: How to Set Default Control Panel View in the Control Panel
When you set the default Control Panel view using the method directly from the Control Panel that is easily made available to you, it is only applying the change to your user account. Subsequently, it means that each person with a different user account can choose how they want their personal user accounts to show the default Control Panel view.
1. Open the Control Panel by clicking on the Start button and then typing Control Panel into the available search field at the bottom of the Start menu and then clicking on the Control Panel program when it becomes available under the list of results.
2. Follow steps 3, 4, and 5 depending on how you would like to set the Control Panel as its default view.
3. To Have the Control Panel with the Category View
a. From the Control Panel window, click on the View by drop-down menu and select Category.
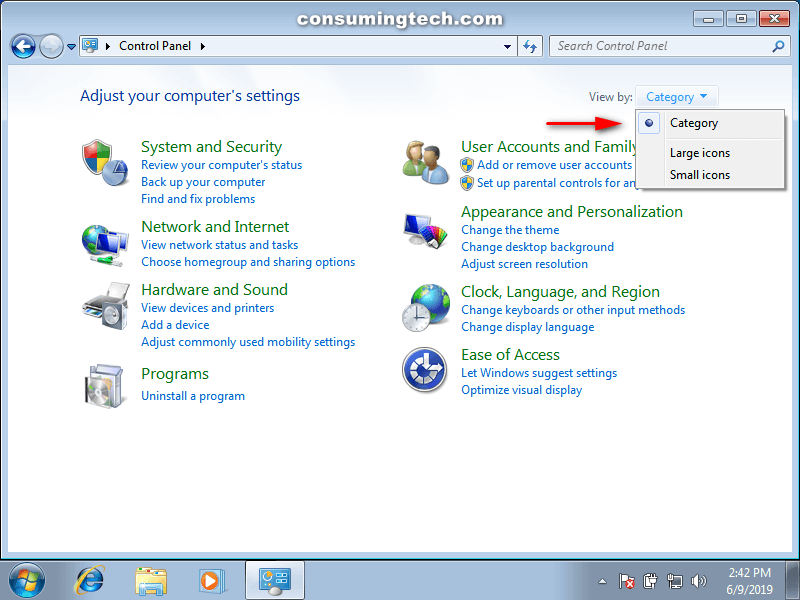
4. For All Control Panel Items with Large Icons View
a. From the Control Panel window, click on the View by drop-down menu and select Large icons.
![]()
5. For All Control Panel Items with Small Icons View
a. From the Control Panel window, click on the View by drop-down menu and select Category.
![]()
You can now close the Control Panel window and continue using your computer if you like.
Method Two: How to Set Default Control Panel View in Registry Editor
You can force the classic Control Panel view from the Registry Editor application. You can also use the same policy to no longer force classic Control Panel which will result in the icons view. Here is how you can do that:
Note: You must be logged in as an administrator to set the Control Panel’s default view from the Registry Editor.
1. Open the Run dialog by pressing the Windows logo + R keys on your keyboard and then type Regedit and click OK at the bottom of the Run dialog box.
2. If you are notified by User Account Control, click on the Yes button.

3. Using the Registry Editor’s left pane, navigate through to the following registry keys:
HKEY_CURRENT_USER\Software\Microsoft\Windows\CurrentVersion\Policies\Explorer
4. Follow steps 4, 5, and 6 depending on how you would like to set the Control Panel as its default view.
5. To Force Icons as the Default Control Panel View
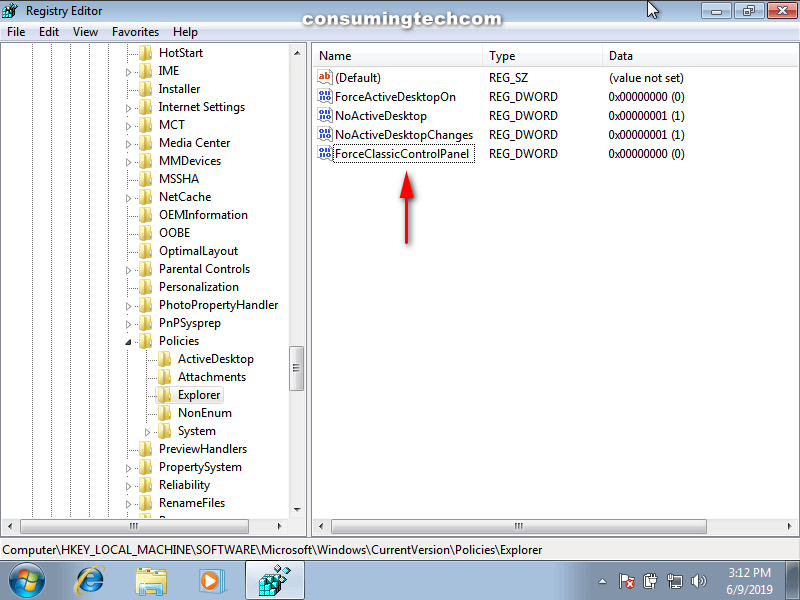
a. From the right pane of the same window with Explorer selected, right-click a spare space and then select New > DWORD (32-bit) Value.
Note: If you have already created the ForceClassicControlPanel DWORD entry previously, then you don’t hve to created it twice. Instead, skip to the next step.
b. Rename your new entry ForceClassicControlPanel and press Enter.
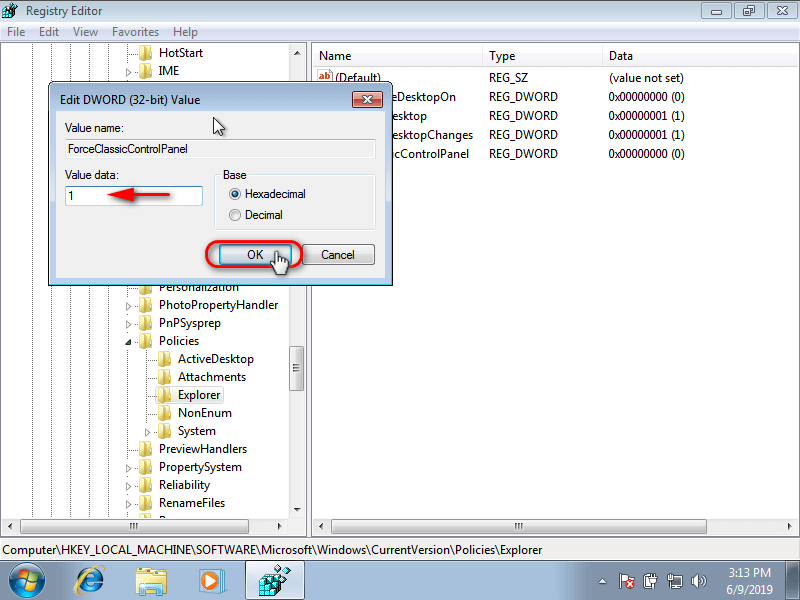
c. Right-click on the ForceClassicControlPanel and click Modify.
d. In the Value data field, type 1 and then click on the OK button.
6. To Force Category as the Default Control Panel View
a. From the right pane of the same window with Explorer selected, right-click a spare space and then select New >DWORD (32-bit) Value.
Note: If you have already created the ForceClassicControlPanel DWORD entry previously, then you don’t hve to created it twice. Instead, skip to the next step.
b. Rename your new entry ForceClassicControlPanel and press Enter.

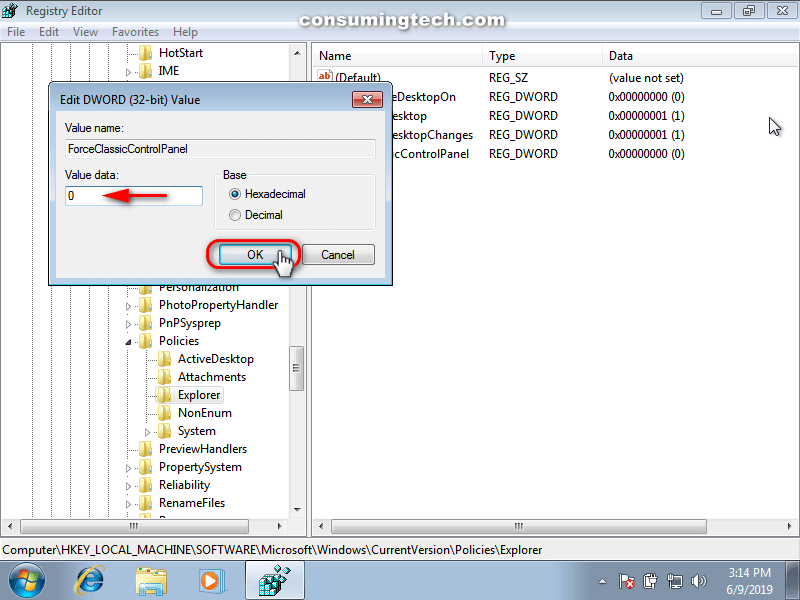
c. Right-click on the ForceClassicControlPanel and click Modify.
d. In the Value data field, type 0 and then click on the OK button.
7. To Unforce All Views as the Default Control Panel View
Note: This is the default settings in all version of the Windows 7 operating system to date.
a. From the right pane of the same window with Explorer selected, right-click on ForceClassicControlPanel and click Delete.
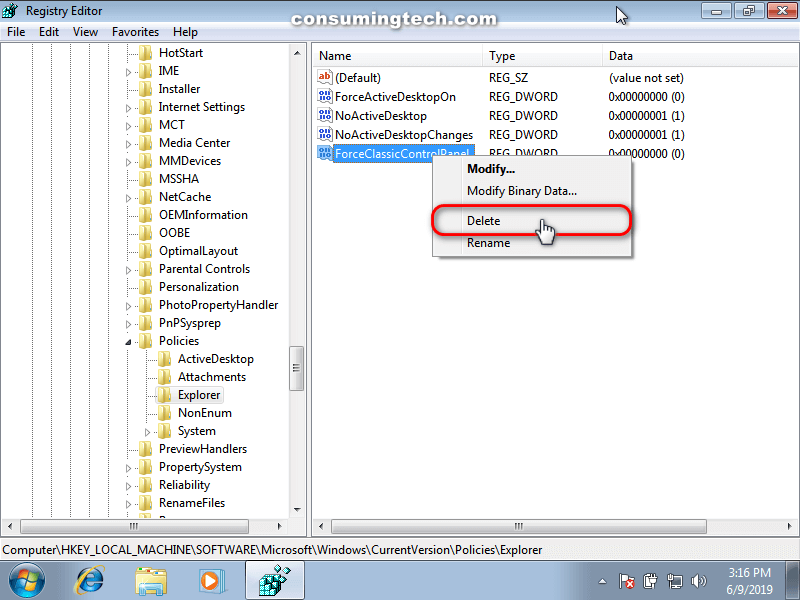
b. If Windows asks you to confirm the deletion of the registry DWORD value, click on the Yes button.
You can now close the Registry Editor and continue using your computer if you like.
Method Three: How to Set Default Control Panel View in Group Policy
Note: You must be logged in as an administrator to set the Control Panel’s default view from the Local Group Policy Editor.
1. Open the Local Group Policy Editor.
2. Using the Local Group Policy Editor’s left pane, navigate through to the following folders:
User Configuration > Administrative Templates > Control Panel
3. In the right pane of the same window when you have Control Panel selected, click on the Always open All Control Panel Items when opening the Control Panel policy to modify it.
![]()
4. From the Always open All Control Panel Items when opening the Control Panel policy window, select either Enabled (to show icons view), Disabled (to show category view) or Not Configured (to show category view), and then click on the OK button at the bottom of the policy window to save the changes.
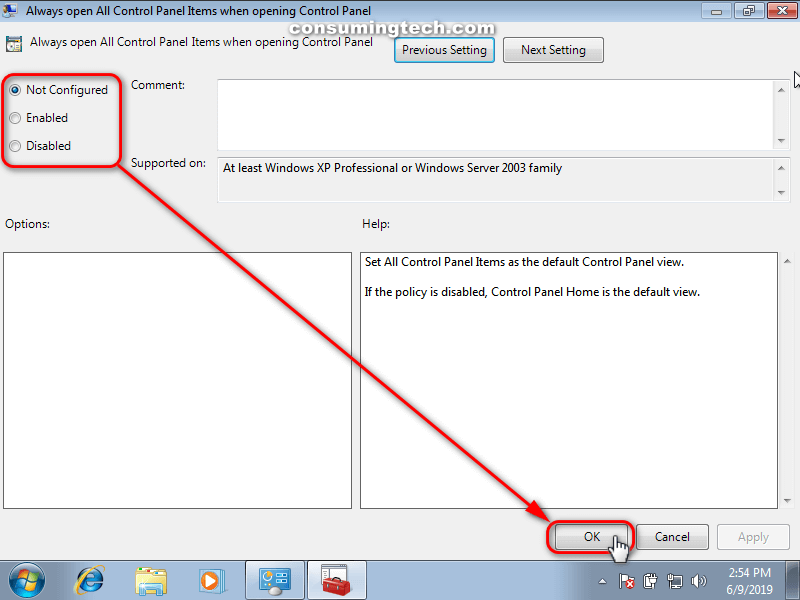
Note: The default settings in Windows 7 is for it to be set on “Not Configured” so that Windows always has control over the setting. This is handy if they change their mind in the future on what the default setting should be for the default Control Panel view. If following our tutorials is your main concern, however, you will want it set on “Small icons” view because it allows for more and simpler navigation.
You can now close the Local Group Policy Editor and continue using your computer if you like.
That’s all.