If you went back five years ago, most Android enthusiasts used their operating systems with root access. There were so many additional things that people could do with root access that it made sense. These days getting root access has become more challenging for developers, and the number of applications that one needs to use with root access is less due to new features being incorporated into the Android operating system when it comes to you as stock.
Still, developers like Chainfire continued knowing hard to deliver the lesser crowd of Android enthusiasts who still wanted root access by updating the SuperSU to continually work on newer versions of Android—even when Android themselves kept changing how Android’s security works.
When we got to Android 5.1 Lollipop, things took a dramatic turn with Android’s security, and it forced Chainfire to create a version of the SuperSU called systemless root. It got this name because the way it needed to work no longer could go through the system partition like it once did in the old days.
Everything was swell with the new version of systemless root that Chainfire had created, but it came with one downside: services like Android Pay and Netflix couldn’t work. Android has developed something called SafetyNet to keep rooted users away from these sensitive services so that bad things couldn’t happen to them. It made sense for Android to do that since there were probably going to be a lot of cases with money disappearing from people’s accounts of they didn’t. Still, it results in people needing to choose between services like Android Pay and root access because both wasn’t possible to achieve at once.
Then came a new tool called Magisk. The Magisk version of SuperSU is fully systemless and doesn’t need to trip SafteyNet which means you can now have root access and still use services like Netflix and Android Pay at the same time.
How to Install Magisk Root Tool on Android 5.0 Lollipop
Download the Magisk installer from the Downloads section of the XDA-Developers thread.
If you already have rooted your device, you’ll need to unroot it now before going ahead with the installation of Magisk. If you have used TWRP and then flashed Chainfire’s SuperSU, you can just remove the SuperSU by opening it up and then choosing to uninstall it from the menu. For everyone else, you might be interested in installing the unSU script instead.
You can only use Magisk if there is a custom recovery image available for you to install. You can look for a custom recovery image made for your device from the TWRP website. Remember that before you can install a custom recovery image, you need to have the bootloader unlocked first. The way you unlock the bootloader changes depending on your smartphone manufacturer. If you find a guide made for your manufacturer, then chances are you can follow it because it’s the same for all devices from the one manufacturer.
Find out the steps required to boot your smartphone into the custom recovery. The way manufacturers choose to enter recovery mode changes depending on who it is, but the good news is that booting into custom recovery is always the same steps as booting into the stock recovery for your phone because it just replaces it. SO, all you really need to do is find out what steps you need to boot your device into the standard recovery mode that all devices come with and then you’ll be able to boot to the custom recovery as well.
Once you are in the custom recovery, tap on the “Install” button and then tap on the Magisk SuperSU zip file. Then to install the zip file you have selected, tap on the “Install Image” button (if you are using TWRP Recovery.) You’ll also need to swipe at the bottom of the phone’s display to confirm the installation of the zip file if it is TWRP Recovery.
After the Magisk SuperSU is installed, you then need to reboot the phone from the TWRP Recovery menu. Once your phone boots back up again, it’s time to install the Magisk Manager application directly on the phone. Before you can install it, though, you first need to enable the Unknown Sources option from the Android Settings. To do that, swipe down from the top of the Android homecreen to pull down the notification shade, and then tap on the “Settings gear icon” at the top.
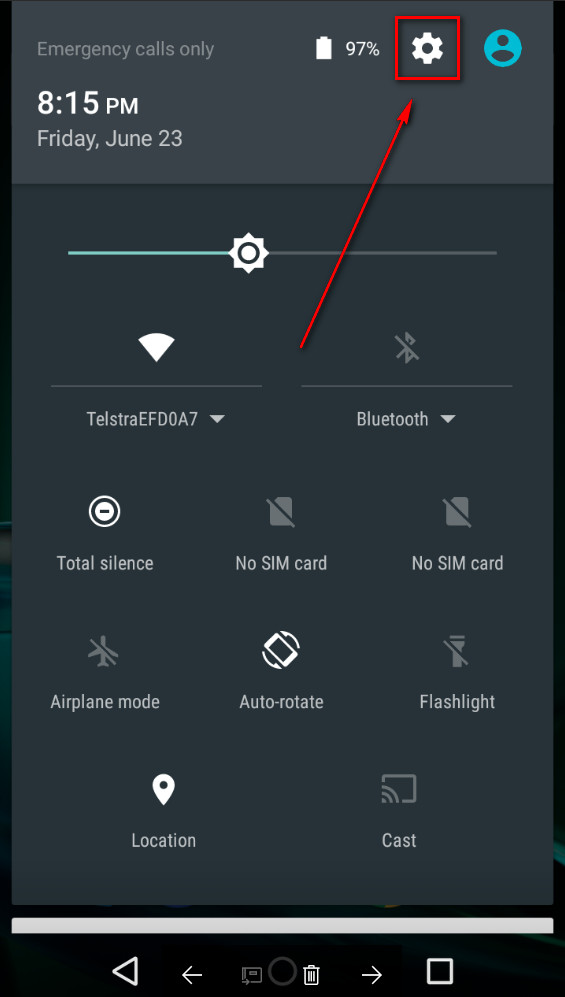
Tap on the “Security” link from the Settings.
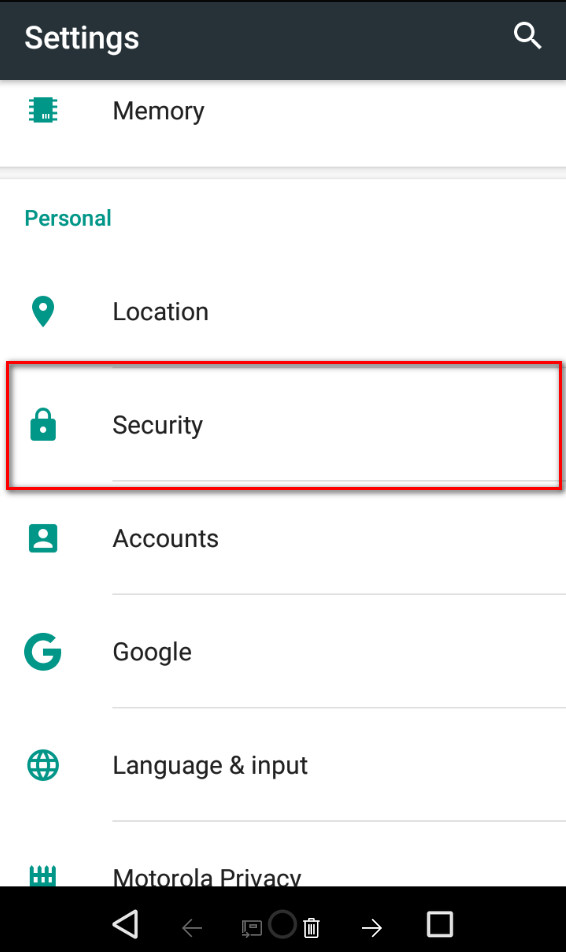
Inside the settings is the “Unknown Sources” option that you now need to tap on.
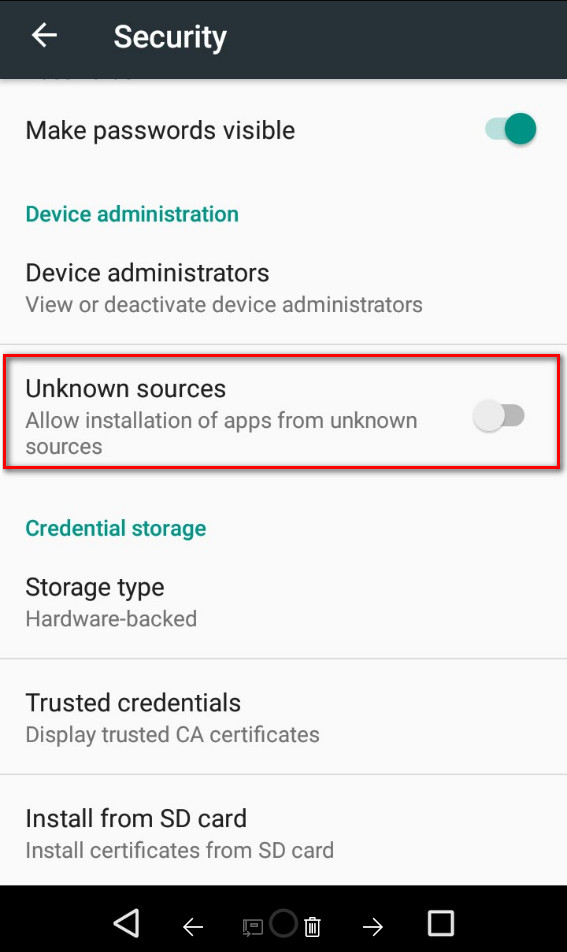
You’ll get a message letting you know about the risks of enabling the Unknown Sources before it turns on for you. Tap on the “OK” button to continue.
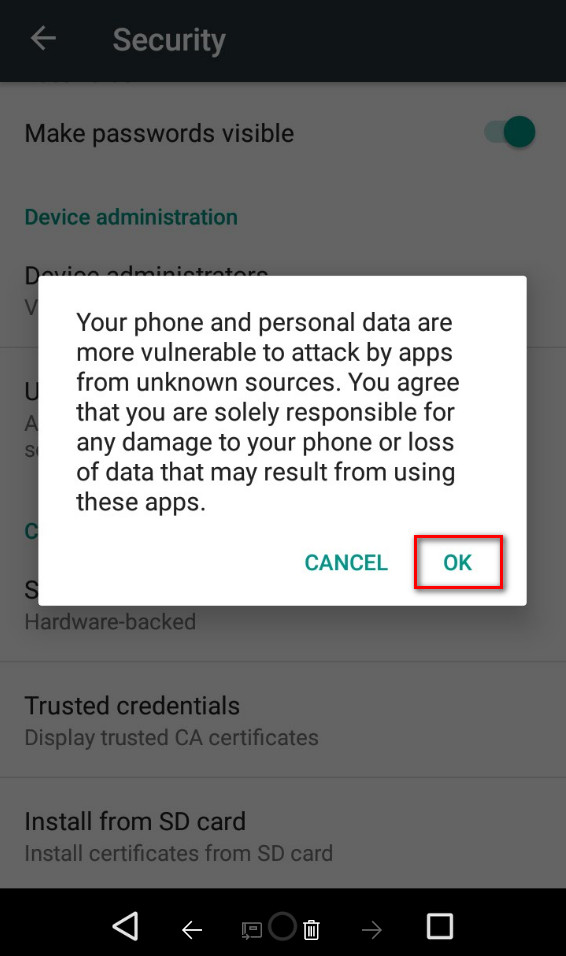
The Unknown Sources toggle is now turned on.

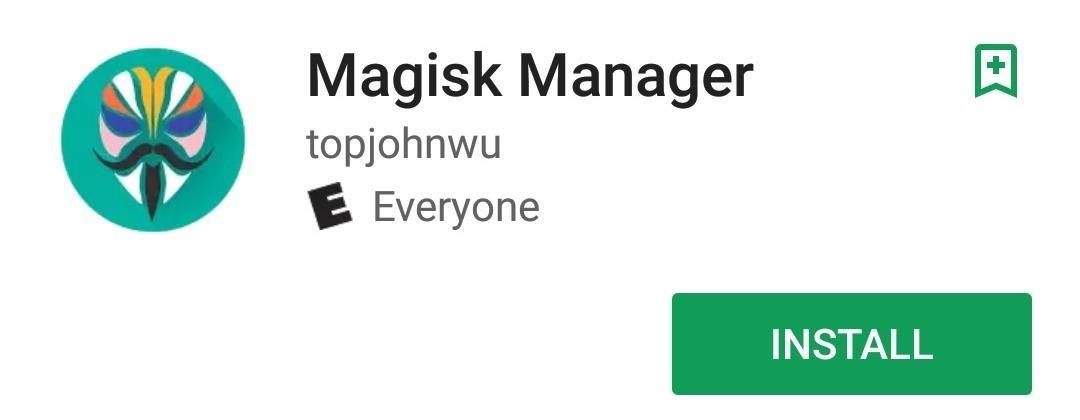
Next, you need to get the Magisk Manager application from the XDA-Developers thread under the same Downloads section that you got the Magisk SuperSU earlier. Download it like you would any other app and then tap on the ‘Install” button to install it on your device.
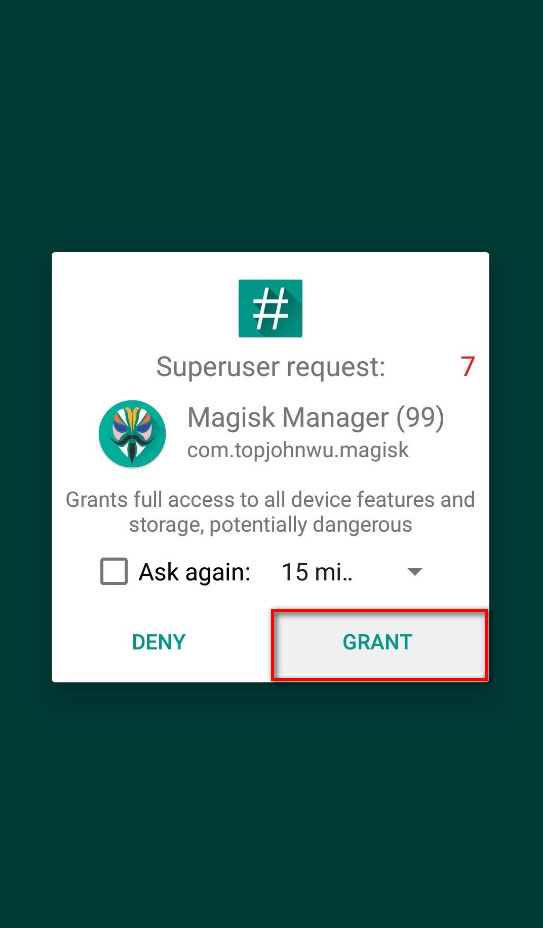
The Magisk Manager sends a superuser request to your device. Tap on the “Grant” button to continue.
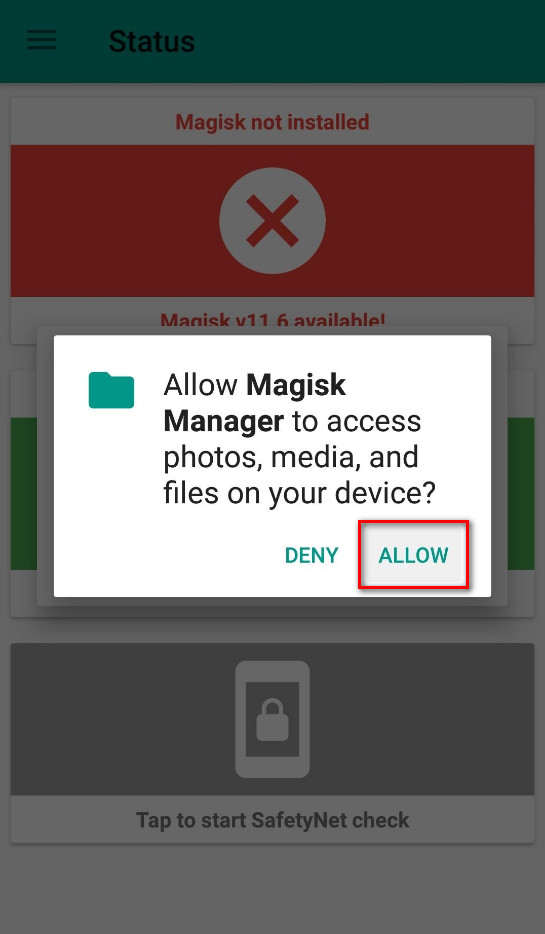
You’ll need to allow Magisk Manager permissions to access your files from the device if you want to get the best experience. Tap on the “Allow” button here.
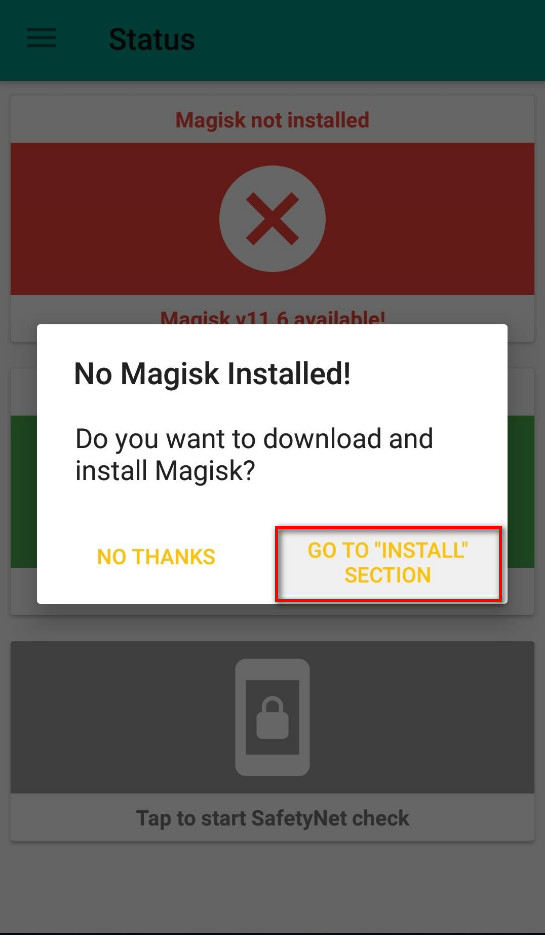
It lets you know that Magisk Manager is not yet installed. Tap on the “Go to Install” section” to continue.
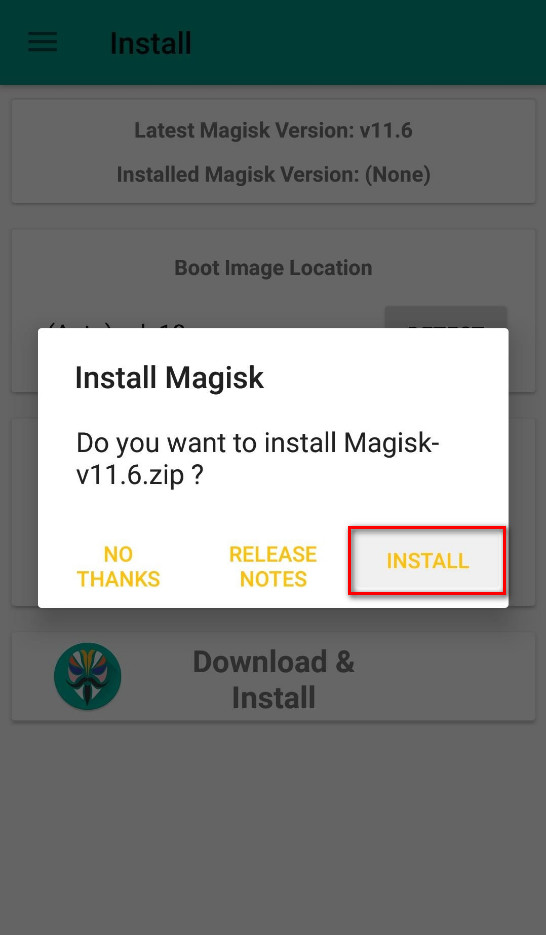
At the bottom of the next screen is the “Download and Install” button that you need to tap on now.

You can choose to view the release notes if you want before installing. When you are done, just tap on the “Install” button, and then the Magisk manager is finally installed.
Wait until you get the “Installation succeeded!” message on the phone’s display and then tap on the “Reboot” button.

Once the reboot is complete and the phone starts up again, you can start using Magik on your device to have root access as well as Android Pay and Netflix working again.