Windows PowerShell is an area available within the Windows 10 operating system for administrators to enter and control the applications that run on the operating system. For example, it is possible for a person in control of the administrator’s account to enter the Windows PowerShell and then uninstall an application that is currently installed if for some reason you are unable to delete and reinstall the application from the Windows Settings app that is also available.
One example of needing to enter the Windows PowerShell is when an admin wants to reinstall the Sticky Notes application in Windows 10. There’s no other way for you to uninstall and then reinstall the Sticky Notes application other than by using the PowerShell. You won’t find it available from the “Apps” section in the Windows Settings app.
Just like with the Command Prompt, it is possible to open the Windows Powershell with the administrator permissions to just open the standard PowerShell window instead. Moreover, the admin version of the PowerShell is also referred to as the “elevated PowerShell window” just like with the command line too.
Note: Windows 10 comes with the standard Windows PowerShell and the elevated Windows PowerShell. The elevated version is the one that executes commands with the administrator’s privileges. If you want to open Windows PowerShell and execute commands with administrative privileges, then you should check out how to Open Elevated Windows PowerShell in Windows 10 instead.
This tutorial demonstrates all the different ways to open the Windows PowerShell when you’re using a version of the Windows 10 operating system.
How to Open Windows PowerShell from All apps in Start Menu
The All Apps menu coming from the Start menu has seen its fair share of changes in Windows 10 updates, but you have always been able to get access to the Windows PowerShell from there, and you can probably expect it to stay that way heading into the future.
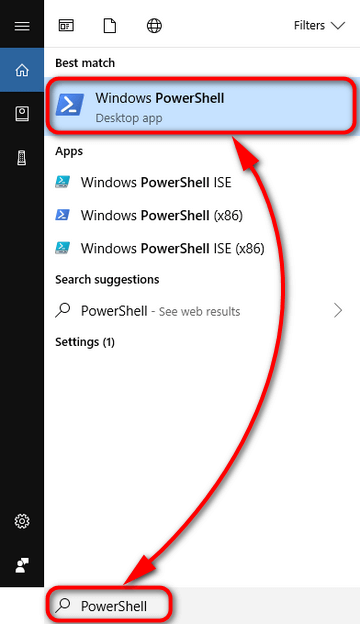
1. To get there, just scroll down the All Apps menu (it’s in alphabetical order) and then stop when you get to the “Windows PowerShell” entry.
2. Click it to expand it, and you’ll see a few options to choose what type of PowerShell you want to open.

The Windows PowerShell then opens.
How to Open Windows PowerShell in Search
1. There are a couple of ways you can open the Search box. Everyone has it nestled into the taskbar by default in Windows 10, but if you don’t have yours there, you can also press on the Windows logo + S keys to bring it up instead.
2. Do that now and then start typing “PowerShell” into the available search field. It brings up the Windows PowerShell app from under the Best match section.
The Windows PowerShell then opens.
How to Open Windows PowerShell from Run
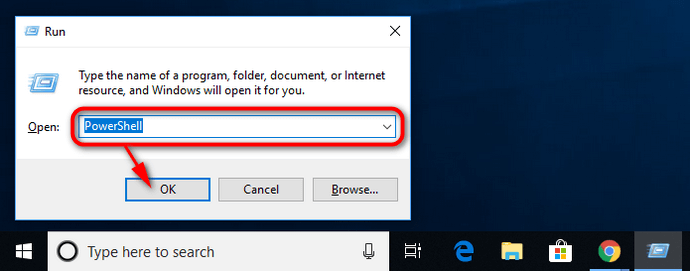
1. Like the search box, the Run dialog box can also be opened by using the hotkey combination. This time it’s the Windows logo + R keys on your keyboard. Do that now and then type “PowerShell” into the available field.
2. Next, click on the “OK” button and the Windows PowerShell will open up on the computer’s display.
The Windows PowerShell then opens.
How to Open Windows PowerShell from Task Manager
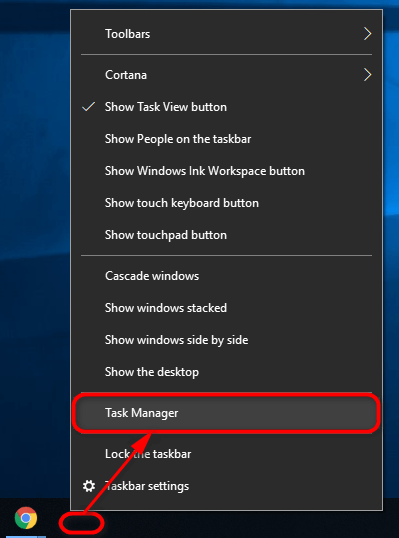
1. Open the Task Manager by right-clicking in the taskbar and then clicking or tapping on the “Task Manager” entry from the menu.
2. Click on “File” from the top menu and then click on “Run new task” to get a new task running from the Task Manager.

3. Type “PowerShell” as the name and then click on the “OK” button.

The Windows PowerShell then opens.
How to Open Windows PowerShell from Win+X Menu
The Win+X menu, otherwise known as the Quick Links menu to some, is another place you can get to the Windows PowerShell.
1. Press the Windows Logo + X keys on your keyboard to open it up and then click on the “Windows PowerShell’ or the “Windows PowerShell admin” entries from the list—depending on what one you want to have open. The admin version is the same thing as an elevated PowerShell window.

The Windows PowerShell then opens.
How to “Open Windows PowerShell Here” in File Explorer
1. Open File Explorer by heading to the Start menu > File Explorer from the left pane and highlight a file or folder by clicking on it once.
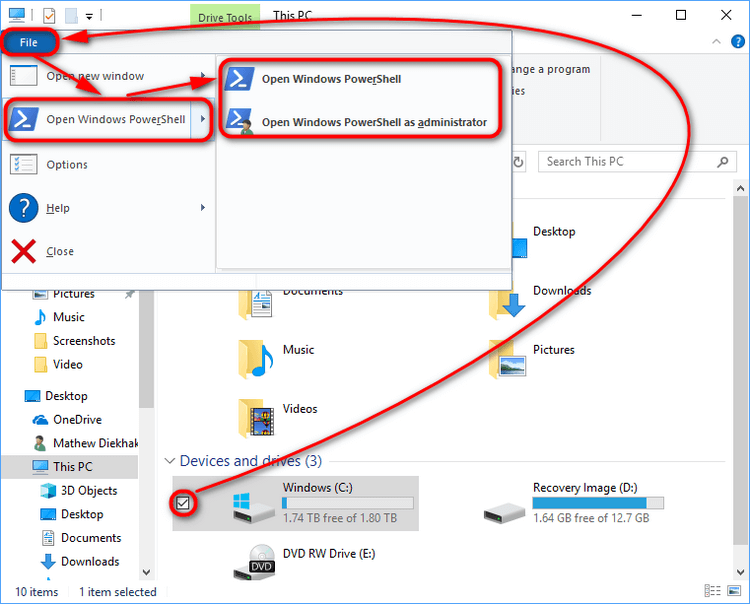
2. Click on the “File” from the top menu.
3. Next, hover the mouse or touchpad on the “Open Windows PowerShell” and then click or tap on the “Open Windows PowerShell” or “Open Windows PowerShell as administrator” options from the secondary menu.
The Windows PowerShell window then opens.
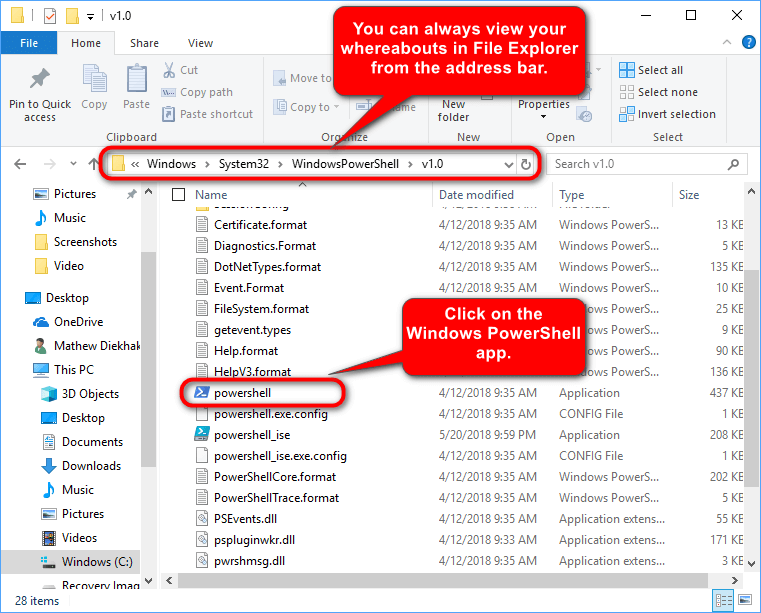
How to Open Windows PowerShell from File Explorer
1. Open the File Explorer by navigating to the Start menu > File Explorer.
2. Enter the Windows C:\Windows\System32\WindowsPowerShell\v1.0 into the folder location address bar at the top. Next, scroll down the list until you can see the “PowerShell” entries. Click on them to open the Windows PowerShell window of your choice.
The Windows PowerShell then opens.
The Windows PowerShell has a lot in common with the Command Prompt, but the two of them do differ. The PowerShell is a more powerful place than the Command Prompt window (if the name didn’t give it away already), and it’s a place where system administrators execute a lot of commands. The Command Prompt, on the other hand, is excellent for running some commands quickly, but it’s not a place of vital importance to the administrators.
You might also be interested in:
- How to Start, Stop, Disable and ReStart Services in Windows 10
- How to Link Microsoft Account to Digital License for Windows 10 Activation
- How to Open Task Manager in Windows 10
- How to Scan with Windows Defender in Windows 10
You can subscribe to our RSS, follow us on Twitter or like our Facebook page to keep on consuming more tech.