If you’ve got multiple computers that you want to install Windows 10 on, you might prefer creating a USB flash drive that has the Windows 10 installation media on it so you can simply insert it into your computer and install the operating system very quickly.
This tutorial demonstrates how to create a bootable USB flash drive that you can use to install Windows 10 with or without UEFI.
How to Use Media Creation Tool to Create Bootable Windows 10 USB for Legacy BIOS and UEFI
The Media Creation tool is an official tool provided by Microsoft that allows you to download an ISO file of Windows 10 and then create a bootable USB flash drive with it. The drive can be either for 32-bit or 64-bit Windows 10 architecture, and with or without UEFI.
To use the Media Creation tool you will need:
- A blank USB flash storage drive with at least 8 GB’s free storage space on it if you plan on downloading the 64-bit version of Windows 10. You can get away with having only 4 GB’s free space on your thumb drive if you want to download the 32-bit version of Windows instead.
- Additional storage on your computer of the same amount so you can temporarily store the ISO file once the download completes.
- A connection to the internet (or else you can’t download the file from Microsoft).
In addition to the spatial requirements, there are some system requirements as well. Just about all modern computers will handle the installation without any worries, but if you’ve got an older computer you might wish to double check yours has what it takes to install the operating system. Read: System requirements for installing Windows 10
1. Download the Media Creation tool from Microsoft’s software download webpage.

2. Open the file location and then run the setup wizard. You’ll then have another file available from the same location that is the beginning of the Media Creation tool setup process.

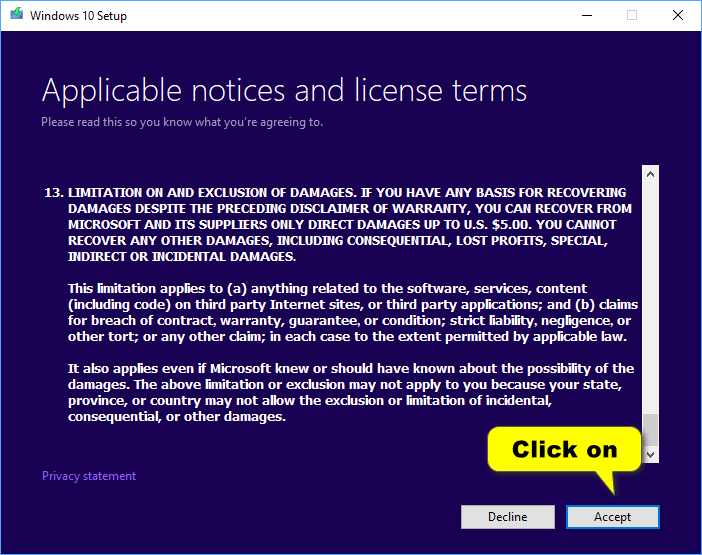
3. Click on the Accept button. (click to enlarge screenshot below)
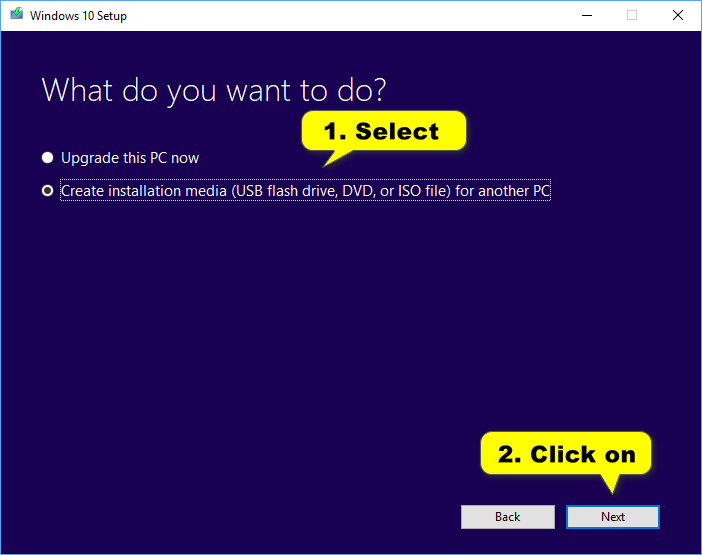
4. Click on the Create installation media (USB flash drive, or ISO file) for another PC and then click on the Next button. (click to enlarge screenshot below)
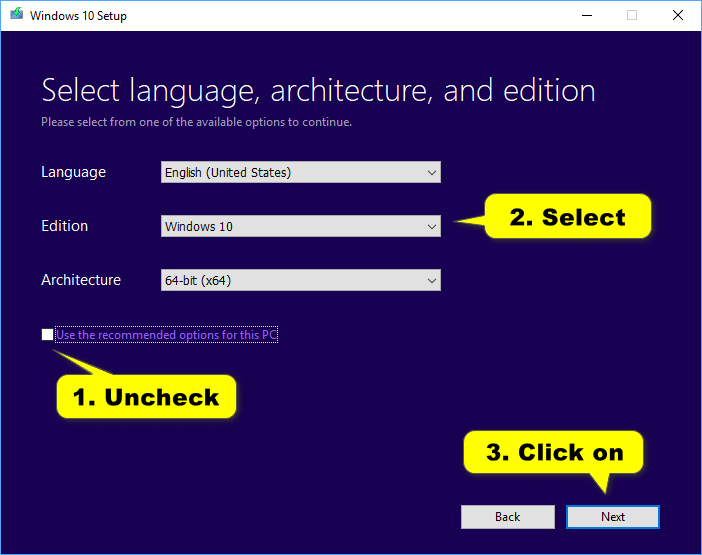
5. By default you’ll see the Use the recommended options for this PC automatically checked which means it automatically detects what language you’re using. Uncheck it if you would like to change the language manually. (click to enlarge screenshot below)
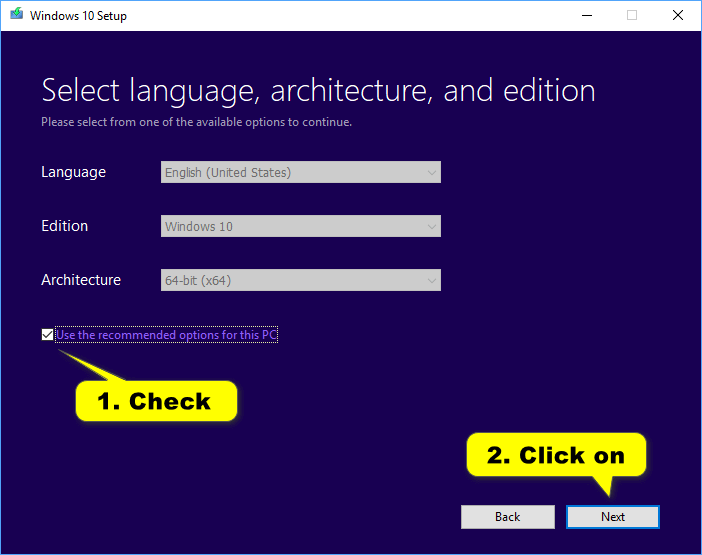
6. Click on the Next button. (click to enlarge screenshot below)
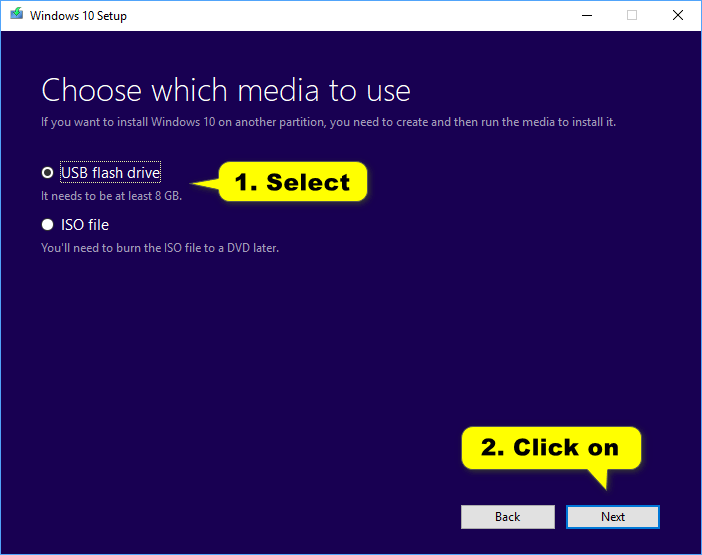
7. Select USB flash drive and then click on the Next button. (click to enlarge screenshot below)
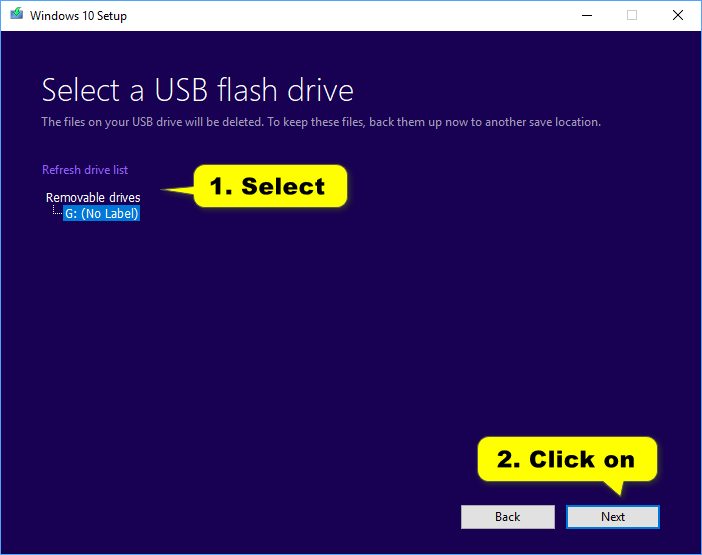
8. Select the right drive from the list if you have more than one USB memory stick connected to the computer and then click on the Next button. (click to enlarge screenshot below)
9. The download can take awhile. You can check its progress from the same window. (click to enlarge screenshot below)

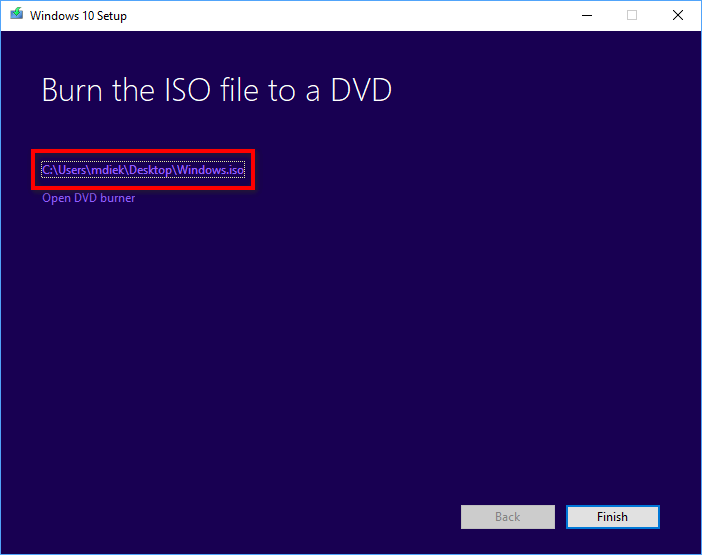
10. Once complete it shows you the location of your Windows 10 file. (click to enlarge screenshot below)
How to Create Bootable Window 10 USB for Legacy BIOS and UEFI with Rufus
To use UEFI you’ll first need to meet the requirements:
- A 64-bit of the Windows 10 ISO file.
- At least GB’s of free storage space on the USB thumb drive that you want to use.
- Temporarily disable Secure Boot and Fast Boot in Windows 10 if you plan on booting from an external UEFI USB flash drive.
1. Download the Windows 10 ISO file from Microsoft’s software download webpage.
2. Download the latest version of Rufus from its official source. (Want more information on Rufus? See the FAQ available on GitHub.)
3. Connect the USB flash drive to the computer.
4. Double-click on the Rufus executable file and you’ll see the Rufus box open similar to the one below.
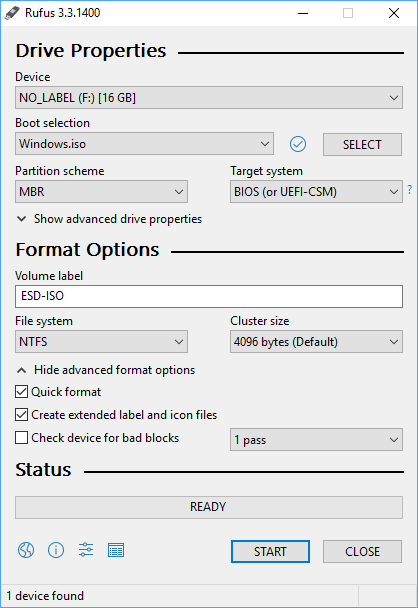
5. Fill in the details as follows:
Device: select the USB flash drive you want to format and use.
Boot selection: tap/click on the SELECT button, and navigate to and select your 64-bit Windows 10 ISO file.
Partition scheme: select GPT.
Target system: select BIOS (or UEFI-CSM).
Volume label: you can enter any name for the USB flash drive, or leave the default name.
File system: select NTFS.
Cluster size: select the one listed as the “Default.”

How to Create Bootable USB Flash Drive for Installing Windows 10 Using Legacy BIOS (without UEFI)
1. Download the Windows 10 ISO file from Microsoft’s software download webpage.
2. Download the latest version of Rufus from its official source. (Want more information on Rufus? See the FAQ available on GitHub.)
3. Connect the USB flash drive to the computer.
4. Double-click on the Rufus executable file and you’ll see the Rufus box open similar to the one below.
5. Fill in the details as follows:
Device: select the USB flash drive you want to format and use.
Boot selection: click on the SELECT button, and navigate to and select your 64-bit Windows 10 ISO file.
Partition scheme: select MBR.
Target system: select BIOS (or UEFI-CSM).
Volume label: you can enter any name for the USB flash drive, or leave the default name.
File system: select NTFS.
Cluster size: select the one listed as the Default.
How to Use “Windows 7 USB/DVD Download Tool” to Create Bootable Window 10 USB for only Legacy BIOS
1. Download the Windows 10 ISO file from Microsoft’s software download webpage.
2. Download the Windows 7 USB/DVD Download tool.
3. If your web browser asks if you would like to Keep or Discard the file because this type of file can harm your device, click on the Keep button.
4. Open the folder location where your Windows 7 USB/DVD Download tool ended up (usually the downloads folder in File Explorer) and double-click on the Windows 7 USB/DVD Download tool to open it up.
Alternatively, you can click on the file directly from the web browser window, depending on your browser, once the download completes.
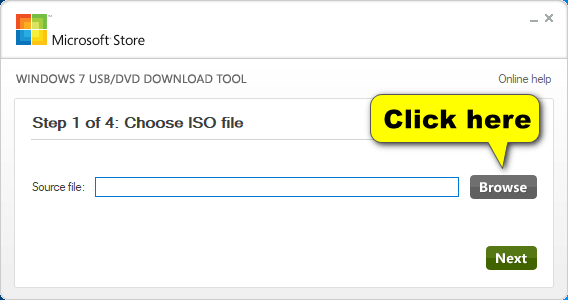
5. Click on the Browse button when it tells you to choose your ISO file.
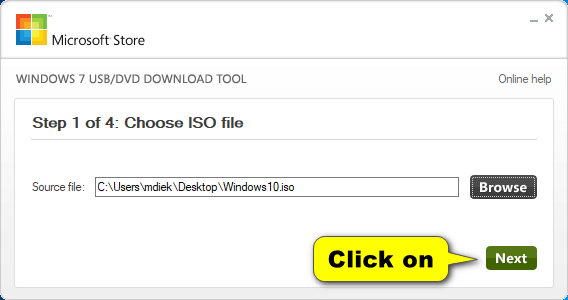
4. Navigate to the location of your Windows 10 ISO file and then click on the Open button. (click to enlarge screenshot below)

5. Once you can see the ISO file’s path is loaded, click on the Next button.
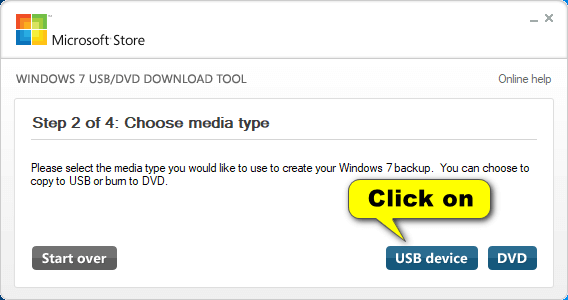
6. Click on the USB device button.
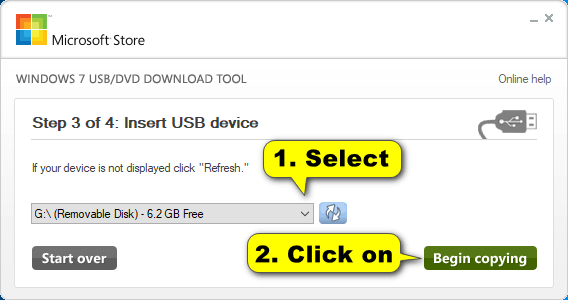
7. Insert the USB stick into the computer and then select it from the drop-down menu and click on the Begin copying button.
That’s all.
Related Tutorials
- How to Create Bootable USB Flash Drive to Install Windows 10
- How to Change Operating System Name at Startup in Windows 10
- How to Change Product Key in Windows 10
- How to Change Account Used to Get Insider Builds in Windows 10
- How to Choose Default Operating System to Run at Startup in Windows 10
- How to Upgrade Windows 10 Pro to Windows 10 Enterprise
- How to Change Time to Display Operating Systems at Startup in Windows 10
- How to Change Windows To Go Startup Options in Windows 10
- How to Reset Windows 10